
Choosing a Brick Chimney Cap That Keeps Water Out
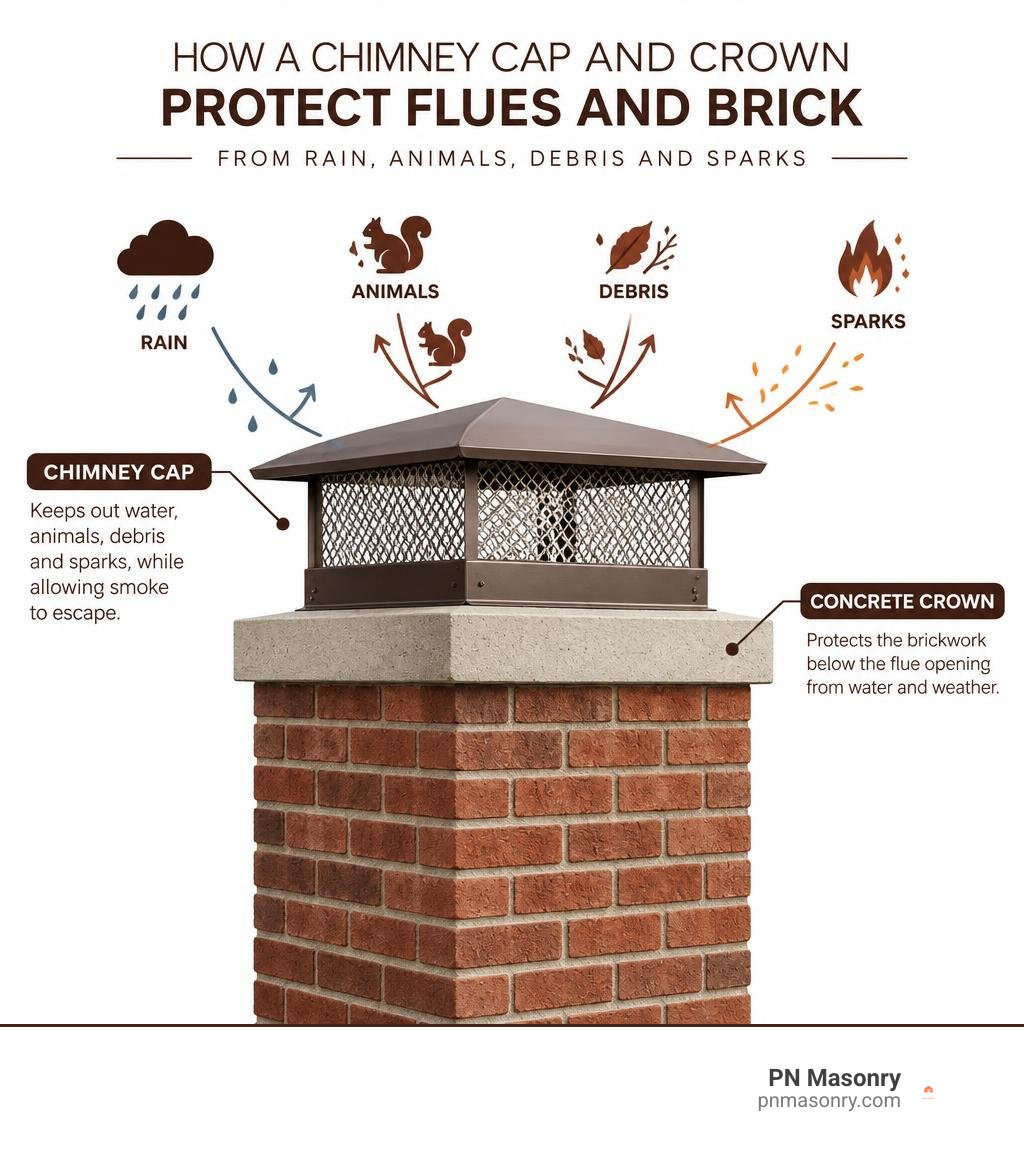
For a brick chimney, choose a cap that fits the outside dimensions of the flue tile, not just the opening inside it. If your chimney has several flues, look for a cap designed to cover them all. Secure mesh helps keep out animals and debris, while the lid sheds rain without blocking smoke.
Check the concrete crown, too. The cap protects the flue opening; the crown protects the brickwork below it. A sound cap cannot stop leaks through a cracked crown. If you see rust, loose parts, damp brick, or water stains indoors, have both inspected before replacing either one.
Brick chimney cap terms you need:
Understanding the Role of a Chimney Cap and Crown in Masonry Protection
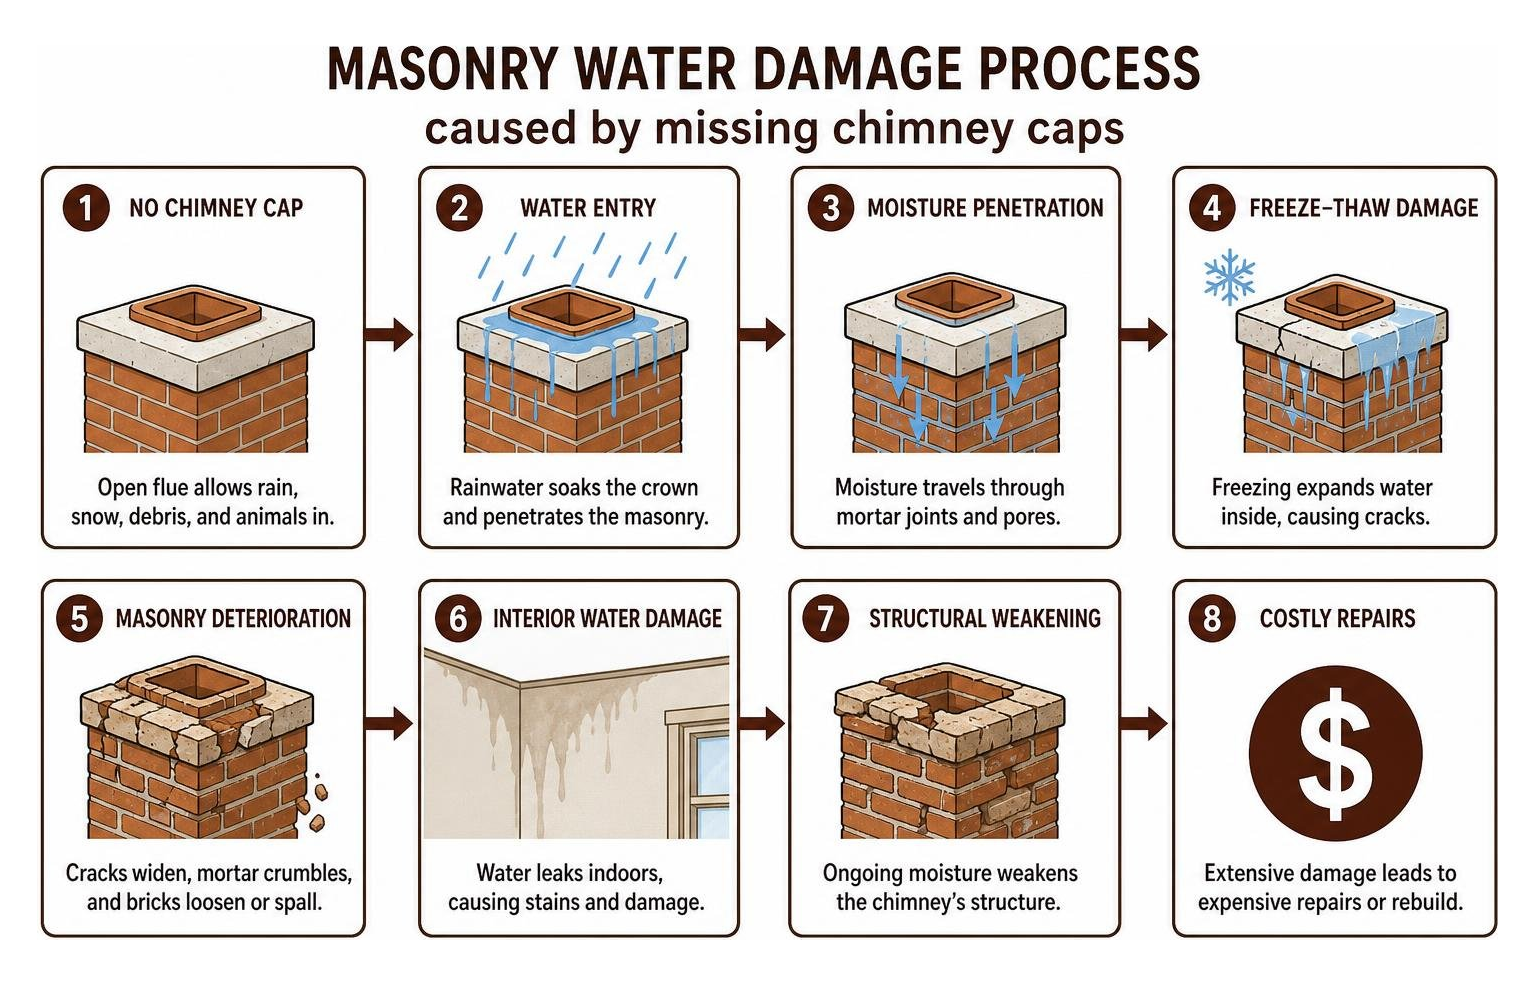
When we inspect residential and commercial chimneys across Cook County, water intrusion is almost always the root cause behind crumbling mortar and cracked brickwork. Masonry is naturally porous. While a sturdy brick structure can easily endure over a century of service, constant moisture penetration dramatically shortens that lifespan.
A metal cap acts as the chimney’s umbrella, deflecting driving rain and heavy snowfall away from open flue passages. Meanwhile, maintaining structural integrity at the top of the stack aligns with established brick and stone preservation standards, which prioritize keeping bulk water out of interior masonry cores. Choosing to replace your damaged concrete chimney cap or crown before freezing weather sets in prevents moisture from expanding inside microscopic voids and splitting your masonry apart.
Crown vs. Cap: Key Differences in Function and Construction
Homeowners often use the words “cap” and “crown” interchangeably, but in the masonry world, they perform two distinct protective duties:
- The Chimney Crown (or Concrete Wash): This is the sloped slab of mortar or poured concrete that covers the entire top footprint of the brick stack, surrounding the flue tile. A well-built crown should project roughly 1.5 inches beyond the brick face with a formed drip groove underneath, casting runoff away from the vertical brick walls. If your crown has deteriorated, targeted chimney crown repair can restore that protective barrier.
- The Chimney Cap: This is the metal or stone hood mounted directly over or around the exposed terra cotta flue tiles. It features a solid lid to block vertical rain and integrated mesh side screens that act as spark arrestors while preventing birds, raccoons, and squirrels from nesting inside your flue.
How Water and Downdrafts Damage Uncapped Chimneys
Leaving a chimney open to the elements invites systemic damage throughout your entire heating system:
- Freeze-Thaw Spalling: Trapped moisture inside bricks expands when temperatures dip below freezing, popping off brick faces (spalling) and breaking mortar bonds.
- Efflorescence and Staining: Water traveling through masonry dissolves internal salts, leaving chalky white efflorescence across exterior walls and dark moisture rings on interior ceilings.
- Metal Corrosion: Rain dripping straight down an uncapped flue rots metal dampers, corrodes firebox grates, and ruins steel appliances or fireplace inserts.
- Downdrafts and Heating Loss: Wind blowing directly across an open flue pushes cold air, soot, and unpleasant odors down into living spaces.
In addition to installing a sturdy metal cover, protecting your flue by sealing brick with penetrating repellent ensures that wind-driven rain beads up on exterior surfaces while still allowing trapped water vapor to escape safely.
Essential Types of Brick Chimney Cap Designs and Materials
Selecting the right cap depends on your chimney’s dimensions, the number of flues venting through the top, and your local climate demands.
| Material | Expected Lifespan | Corrosion Resistance | Aesthetic / Maintenance Profile | Typical Value Tier |
|---|---|---|---|---|
| Galvanized Steel | 5 – 10 Years | Moderate (can rust over time) | Painted black or silver; economical entry point | Budget-Friendly |
| Stainless Steel (304 Alloy) | 25 – 30+ Years | Exceptional (lifetime performance) | Modern silver finish; highly resistant to acid and soot | High Long-Term Value |
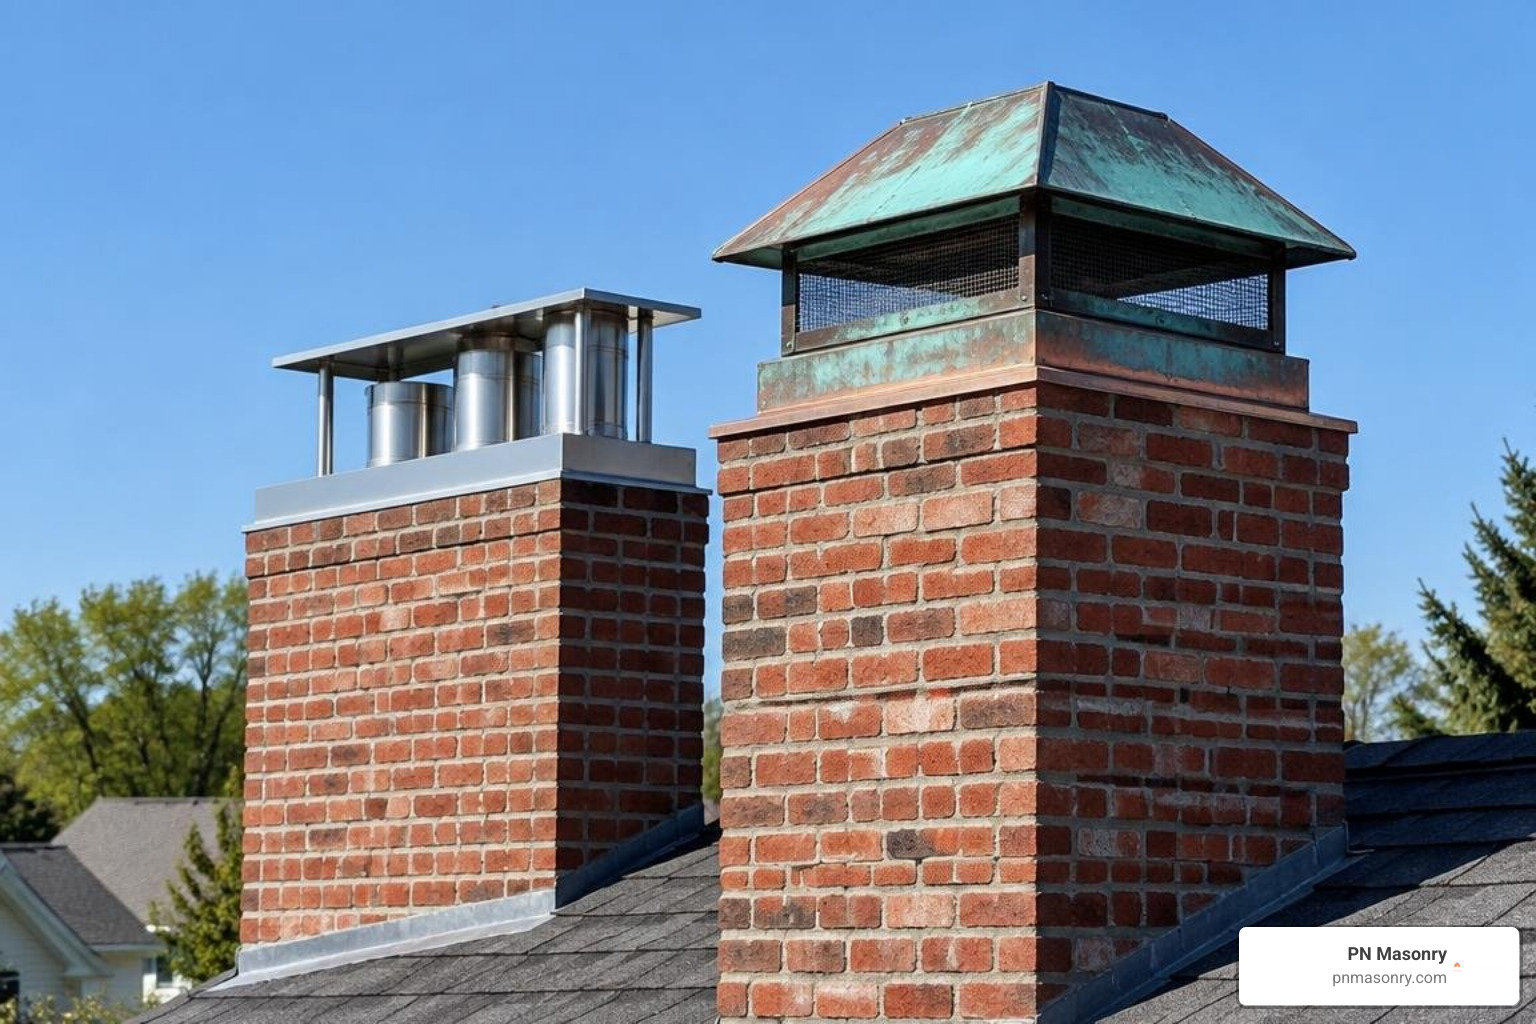
| Solid Copper | 50 – 100+ Years | Maximum (impervious to rust) | Develops an elegant green patina; classic historic look | Premium Architectural |
| Precast Concrete Slab | 50 – 80 Years | High (requires sealant maintenance) | Traditional architectural cap; massive weight and weather shield | Custom Masonry |
For a comprehensive evaluation of styles, review the complete guide to choosing a chimney cap.
Single-Flue vs. Multi-Flue Caps for Masonry Chimneys
- Single-Flue Caps: These units slide directly over a single protruding clay flue tile. They secure in place using side-mounted pressure screws that clamp firmly against the outer tile walls. They are cost-effective, straightforward to replace, and ideal for standard single-appliance chimneys.
- Multi-Flue Caps (Crown-Mount): When a chimney stack houses two or more venting flues (such as a fireplace flue alongside a water heater or furnace flue), a multi-flue cap covers the entire masonry top. These units feature extended mounting flanges that bolt directly into the concrete crown using masonry tapcon screws, shielding both the flue openings and the crown surface beneath.
Evaluating Stainless Steel, Copper, and Galvanized Options
Galvanized steel caps—such as standard 14-gauge base and 24-gauge hood combinations—offer budget-friendly short-term protection, but exposure to acidic wood smoke and road salts can eventually cause them to corrode.
For reliable, long-lasting performance, we recommend heavy-gauge 304-alloy stainless steel equipped with an 18-gauge diamond mesh screen. Stainless steel withstands intense heat, resists creosote corrosion, and carries lifetime manufacturer warranties. For historic brick structures, copper caps provide timeless character while naturally resisting organic growth and harsh freeze-thaw cycles.
Sizing, Sourcing, and Cost Expectations for Chimney Caps
Investing in quality chimney protection prevents major structural repairs down the road. While basic hardware-store caps can run as low as $120 to $290 for DIY units, professional full-coverage installations provide engineered fitment and site safety.
Industry data shows that professional chimney cap and crown restoration projects typically range from $1,750 to $6,000 depending on custom metal fabrication, roof accessibility, and chimney size. Simple rain-cap replacements generally run between $640 and $1,400. To benchmark your budget against industry standards, review what to expect when budgeting for chimney crown replacement.
How to Accurately Measure for a Brick Chimney Cap
Never guess dimensions from the ground with binoculars. Accurate measurements require direct roof access:
- Measure Outside Tile Dimensions: For single-flue caps, record the external length and width of the clay tile. A cap sized for a 13×13 flue must fit external dimensions ranging from approximately 11.5″ x 11.5″ to 13.5″ x 13.5″.
- Measure Flue Protrusion Height: Verify that your tile extends at least 1 to 2 inches above the concrete crown so side-mounting clamp screws can grip the clay securely without slipping.
- Measure Multi-Flue Footprints: For crown-mounted covers, measure the outer perimeter of all flues combined, adding at least 2 to 2.5 inches of clearance on every side to ensure adequate ventilation draft.
- Account for Flue Heights: Identify the tallest flue tile. Your cap’s hood must sit at least 5 inches above the tallest opening so smoke can exit freely without downdraft restrictions.
Budget Breakdown: Installation vs. Custom Fabrication
If your brick stack features unusual architectural brick corbeling or uneven flue heights, off-the-shelf caps may restrict ventilation draft. Custom stainless steel or copper fabrications ensure precise coverage and optimal airflow.
When older chimney stacks have suffered prolonged water entry resulting in leaning walls or loose upper brick courses, cap installation should be paired with structural chimney rebuilding to secure the stack before attaching heavy metal hoods.
Step-by-Step Installation and Maintenance Protocols
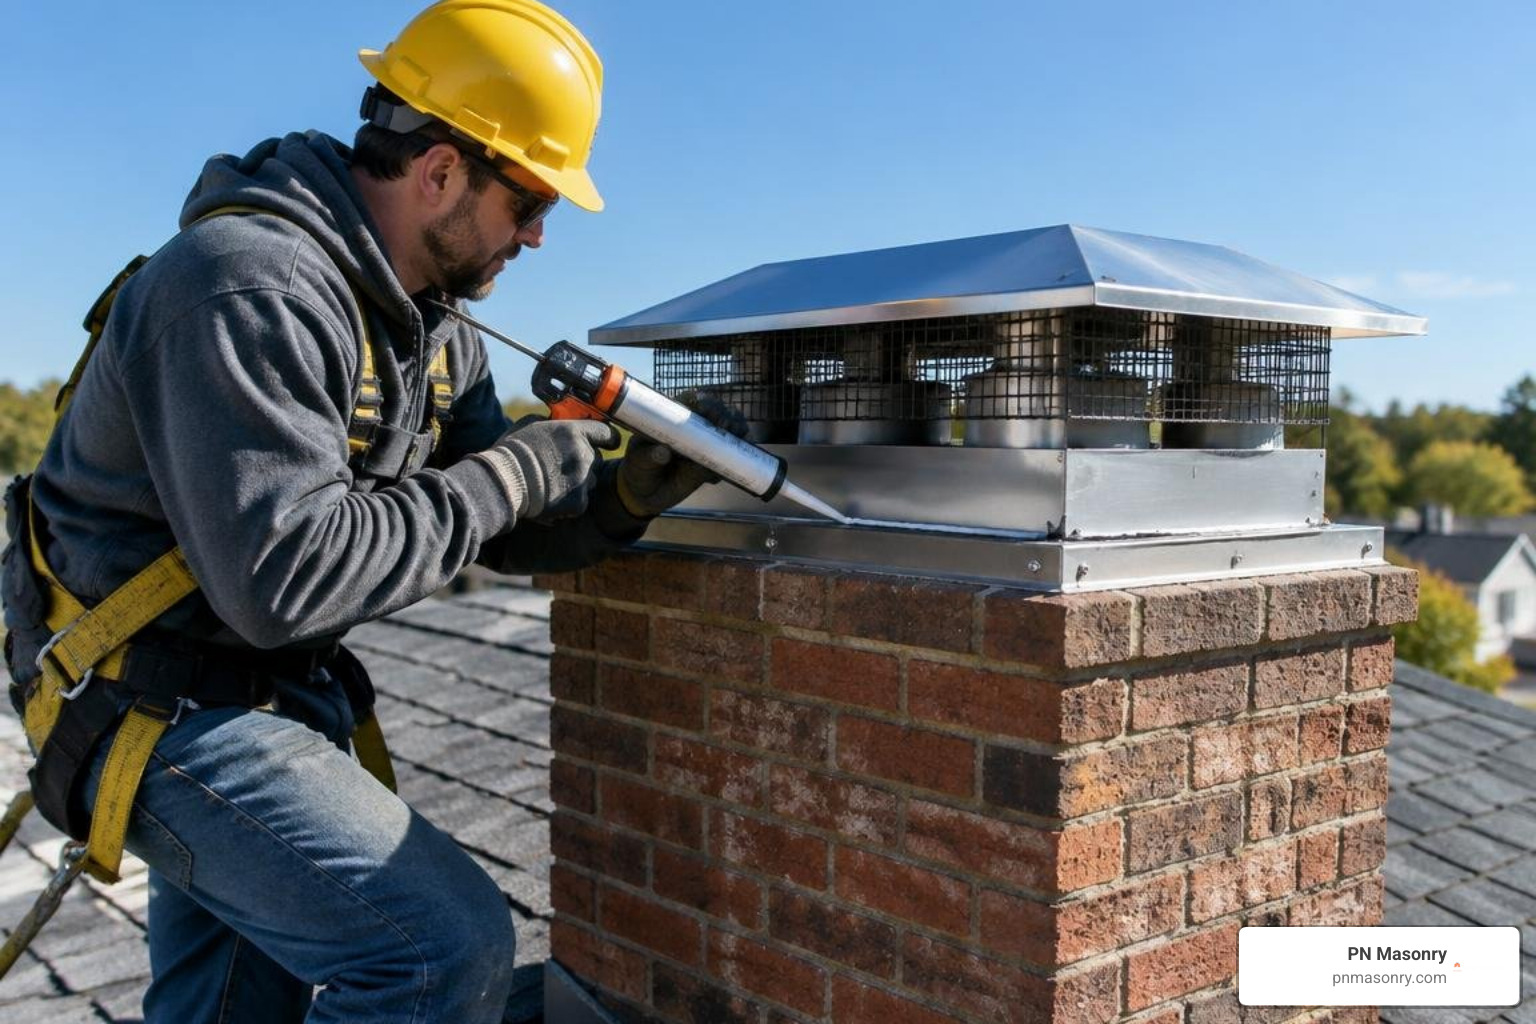
- Safety Setup: Secure ladder brackets and safety harnesses to navigate steep roof pitches safely.
- Surface Preparation: Inspect the crown surface. Clear away loose debris, brush off old soot, and clean clay flue tiles with a wire brush.
- Flashing Inspection: Check base and counter flashings for rust or lifting; perform any needed chimney flashing repairs to seal junction points where brick meets roof decking.
- Positioning and Alignment: Set the cap over the flues, ensuring even clearance on all sides to maintain balanced airflow.
- Mechanical Fastening: For single-flue units, tighten side-clamping bolts evenly against the tile without overtightening (which can crack brittle clay). For multi-flue units, drill pilot holes and secure the perimeter flange with stainless steel tapcon masonry screws.
- Weatherproofing: Apply a continuous bead of high-temperature elastomeric polyurethane sealant beneath the mounting flange to prevent water from seeping under the cap base.
Signs Your Brick Chimney Cap Needs Immediate Replacement
- Visible Rust Streaks: Reddish-brown stains running down your exterior brickwork indicate a corroding galvanized cap that is nearing structural failure.
- Detached or Clogged Mesh: Torn side screening allows bats, birds, and squirrels into your flue, while creosote-clogged mesh restricts furnace venting.
- Moisture in the Firebox: Water pooled on your damper or damp ash in the fireplace firebox points to an ill-fitting or damaged rain hood.
- Hairline Crown Cracking: Fractures radiating outward from the flue tile indicate water intrusion that needs crown repair and cap replacement.
Routine Maintenance and Creosote Clearing
Chimney caps should be inspected at least once a year during your scheduled heating maintenance. Professional chimney cleaning and flue maintenance keeps mesh spark arrestors clear of creosote buildup, ensuring smoke exits smoothly while preserving your appliance’s draft efficiency.
Frequently Asked Questions about Brick Chimney Caps
Can a cracked chimney cap cause leaks in my ceiling or attic?
Yes. A missing, unsealed, or cracked cap allows rainwater to flow directly down the flue opening and soak into surrounding masonry. That water works its way downward through ceiling plaster, attic insulation, and framing timbers, creating expensive structural water damage.
What is the typical lifespan of a stainless steel chimney cap?
High-grade 304-alloy stainless steel chimney caps routinely last 25 to 30 years or more. They resist rust, high flue gas temperatures, and severe freeze-thaw cycles, making them one of the most reliable options available.
Can I install a chimney cap myself or should I hire a professional?
While a simple clamp-on cap can be a weekend DIY job on a low-slope roof, navigating steep pitches, carrying bulky multi-flue caps, and drilling into masonry crowns carry real safety risks. Hiring experienced masons ensures proper safety equipment, leak-free anchor sealing, and correct airflow sizing.
Conclusion
A well-fitted brick chimney cap is the most dependable, cost-effective defense you can install against water damage, animal intrusion, and costly masonry repairs. Whether you need a quick rain-cap replacement, custom multi-flue fabrication, or full crown restoration, our crew at PN Masonry brings the skills, tools, and local experience to get the job done right.
We deliver fast, integrated brick and CMU block solutions across Cook County, Illinois. Schedule an expert assessment with PN Masonry today to protect your chimney before the next heavy storm.