
Replace a Damaged Chimney Crown Before Water Spreads
Chimney crown replacement means removing a failed concrete slab at the top of the chimney and rebuilding it with reinforced, sloped concrete. Replace the crown when it has large cracks, crumbling sections, exposed reinforcement, or water-related damage below the chimney. A sound new crown should extend past the brickwork, slope away from the flue, and include a drip edge to keep rain from running down the masonry.
This is not just a cosmetic repair. The crown is the chimney’s first line of defense against Cook County rain, snow, and freeze-thaw cycles. When water enters through cracks, it can damage the flue liner, loosen brick and mortar, stain ceilings, and lead to more expensive chimney rebuilding.
Small surface cracks may be sealable if the concrete is otherwise solid. But deep cracks, missing pieces, poor slope, or a flat mortar top usually call for full replacement. Most crown replacements take one working day, though the new concrete needs 3 to 7 days to cure before using the fireplace.
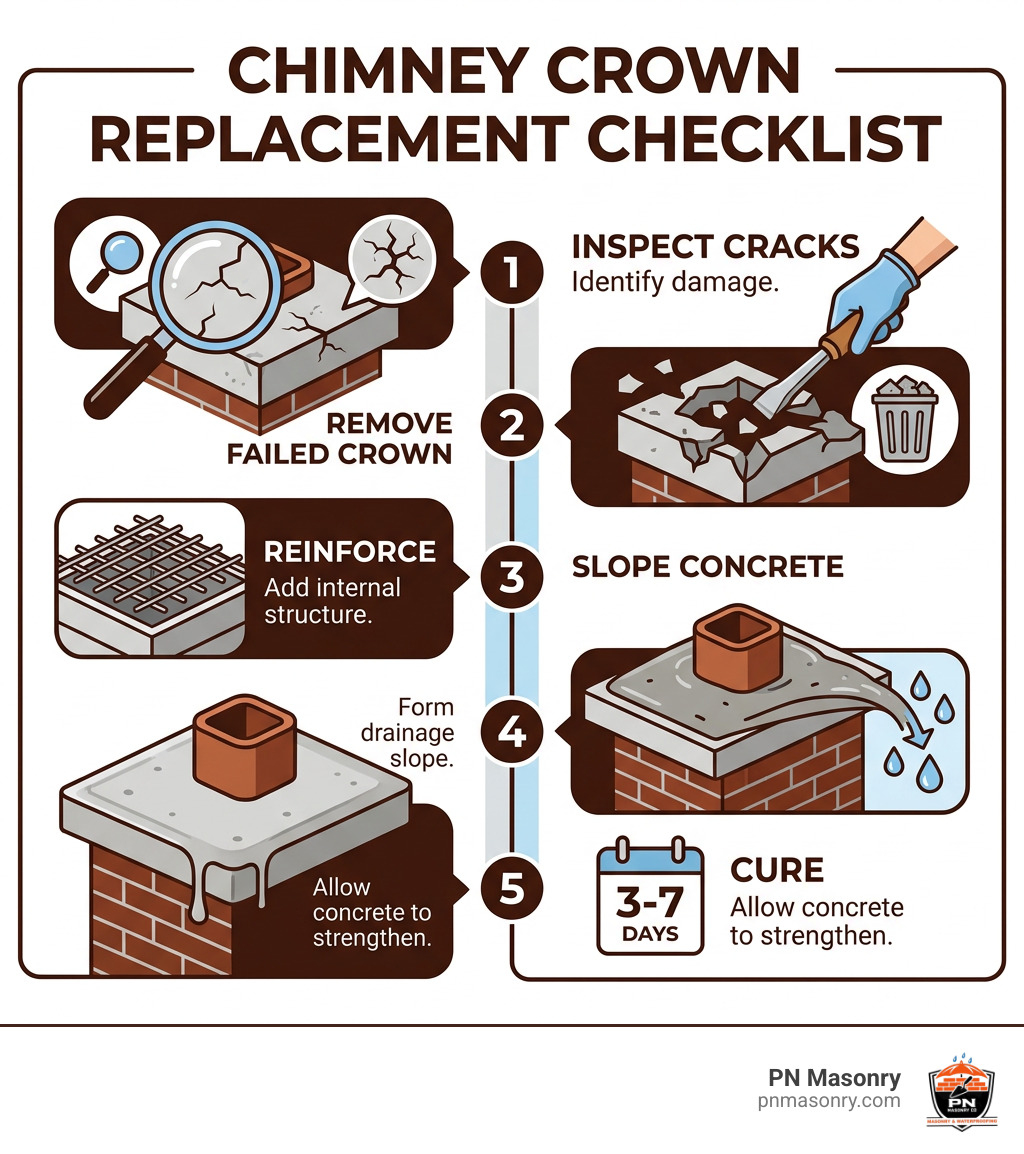
Chimney crown replacement terms to know:
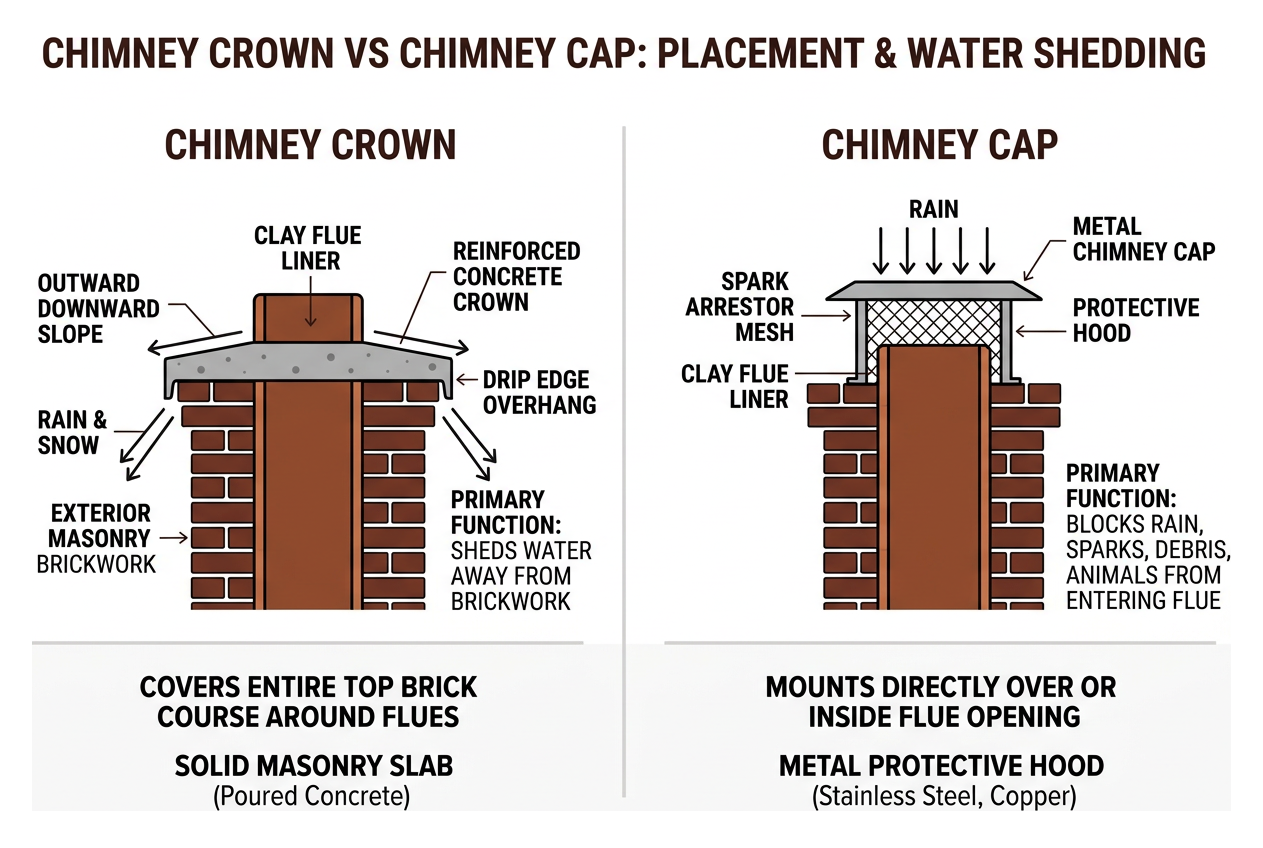
Chimney Crown vs. Chimney Cap: Key Differences
Homeowners often mix up chimney crowns and chimney caps, but they serve distinct protective roles at the top of your venting system.
The chimney crown is a solid masonry slab—ideally poured from steel-reinforced concrete—that covers the entire top opening of the brick stack, surrounding the clay flue liner. Its primary job is shedding rain and snow away from the chimney’s exterior brickwork.
A chimney cap, by contrast, is a metal protective hood (usually stainless steel, copper, or galvanized steel) mounted directly over the flue termination. The cap prevents rain from dropping straight down into the flue, stops downdrafts, catches sparks, and keeps critters like birds, squirrels, and raccoons from turning your chimney into a nursery.
When we deliver our chimney services, we make sure both components work together seamlessly.
| Feature | Chimney Crown | Chimney Cap |
|---|---|---|
| Primary Material | Portland concrete, steel rebar, wire mesh | Stainless steel, copper, galvanized steel |
| Location | Covers the top brick course around flues | Mounts directly over or inside the flue opening |
| Main Function | Sheds water away from exterior masonry | Blocks rain, sparks, debris, and animals from entering flue |
| Design Requirement | Must have outward downward slope & drip overhang | Must feature spark arrestor mesh & hood |
| Lifespan | 30 to 75 years (when reinforced properly) | 10 to 25+ years (depends on metal gauge) |
Signs of Deterioration and Cost Considerations
Because the top of your chimney sits high above eye level, damage can go unnoticed until leaks appear inside your living room or attic. Understanding the early indicators of failure can help you budget effectively for repairs.
Determining When Chimney Crown Replacement Is Necessary
Not every chimney top requires full demolition. However, structural degradation leaves no other safe option. Look for these warning signs:
- Structural fissures and wide cracks: Hairline cracks can occasionally be sealed, but cracks exceeding 1/4 inch indicate that the concrete slab has fractured completely through.
- Spalling and crumbling chunks: If chunks of concrete or mortar are falling onto your roof shingles, water has penetrated the slab and completed multiple freeze-thaw cycles.
- Efflorescence and white staining: Powdery white salt deposits on upper brickwork mean water is soaking straight through the crown slab and leaching through the masonry below.
- Water stains around your firebox or ceiling: Damp drywall, peeling ceiling paint, or rusted damper assemblies point directly to water traveling down the flue gaps from a compromised top slab.
- Flat or inverted mortar washes: Builders sometimes smear leftover brick mortar flat across the top rather than pouring a proper overhanging concrete crown. Mortar lacks tensile strength and rapidly breaks down.
For moderate degradation caught early, exploring chimney crown repair in Franklin Park, IL can stabilize minor surface issues before total structural failure sets in.
Estimated Chimney Crown Replacement Cost and Factors
Chimney crown pricing varies based on chimney dimensions, height, roof pitch, and whether the underlying masonry requires tuckpointing or flue liner extensions.
- Standard Crown Replacement: $800 to $2,000 for standard-sized residential single-flue or double-flue chimneys with standard roof accessibility.
- Complex Custom Crowns: $2,000 to $4,000 for oversized, multi-flue stacks, historic architectural profiles, or steep roofs requiring specialized scaffolding.
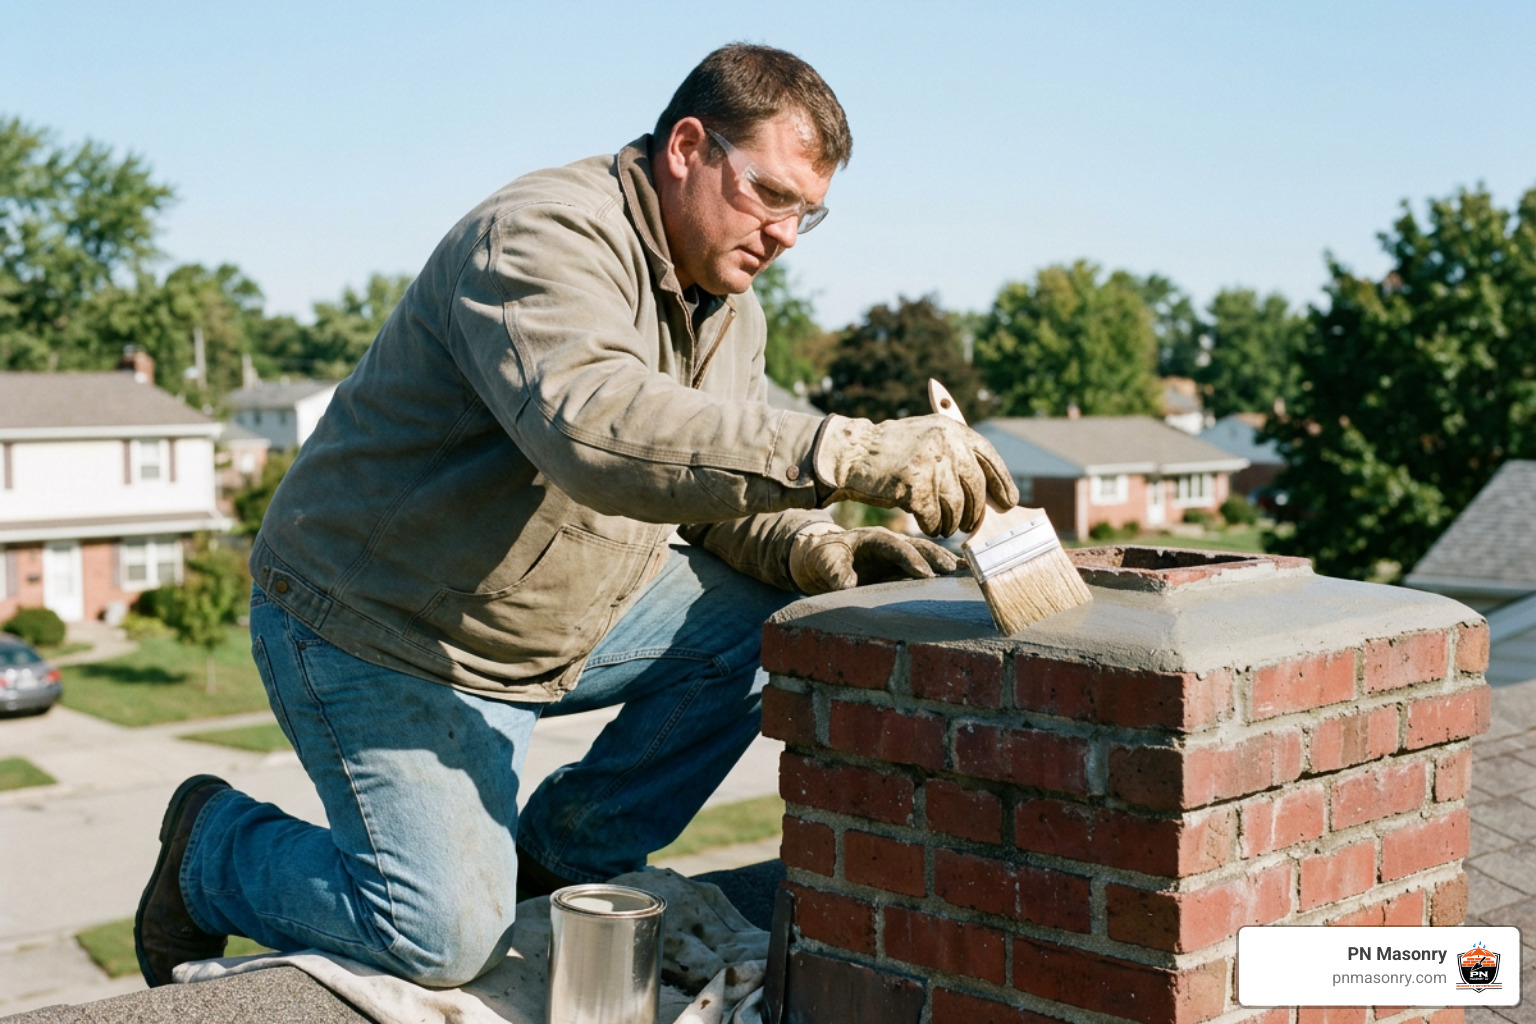
- Minor Crack Sealing: $400 to $800 for applying specialized elastomeric brush-on membranes to minor surface crazing on a sound slab.
- Emergency Temporary Weatherproofing: Around $300 to temporarily seal an active winter leak until full warm-weather replacement is possible.
If water infiltration has destroyed the upper courses of brickwork beneath the slab, you may need comprehensive chimney rebuilding in Franklin Park, IL to restore complete structural integrity before pouring a new concrete crown.
Step-by-Step Chimney Crown Replacement Guide
Replacing a crown requires solid masonry know-how, precise form building, and strict safety practices. Working at roof height demands fall-arrest harnesses, sturdy ladders, and eye protection.
Tools and Materials Required
Gather all necessary tools and materials before climbing onto the roof:
- High-strength 4000+ PSI Portland concrete mix
- Type N or Type S mortar mix
- Steel rebar (1/2-inch or 3/8-inch) and wire spinner with tie wire
- Heavy-duty metal lath and #9 wire mesh
- 3/4-inch exterior-grade plywood or dimensional lumber for edge forms
- Masonry chisel, rotary hammer, and small sledgehammer
- Margin trowel, wood float, and steel finishing trowel
- Clay flue liner extensions (if existing flues sit flush)
- Personal protective equipment (safety glasses, dust mask, heavy gloves, roof harness)
Demolition, Flue Extension, and Form Setup
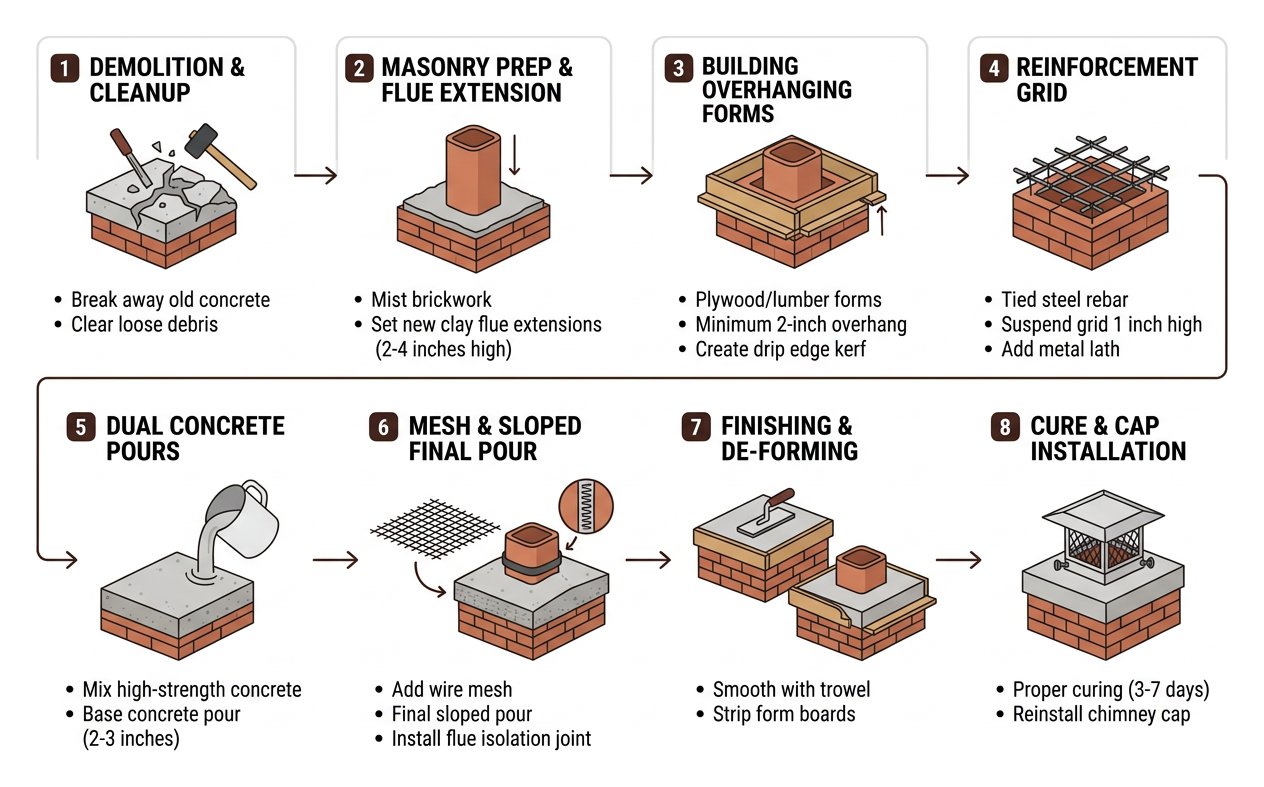
- Safety and Demolition: Secure your ladder and safety harness. Protect the roof surface below the chimney with heavy drop cloths. Using a rotary hammer or chisel and sledge, break away the old cracked concrete down to the top solid brick course. Remove all loose debris and dust.
- Masonry Prep and Flue Extension: Lightly mist the top course of brickwork with clean water. Dry brick will pull water out of fresh concrete too quickly, weakening the cure. The clay flue liners must stick up at least 2 to 4 inches above the finished crown surface. If yours sit flush, lay a bed of mortar and set new clay flue extensions in place. Detailed guidance on flue prep can be found in How To Replace a Chimney Crown by This Old House.
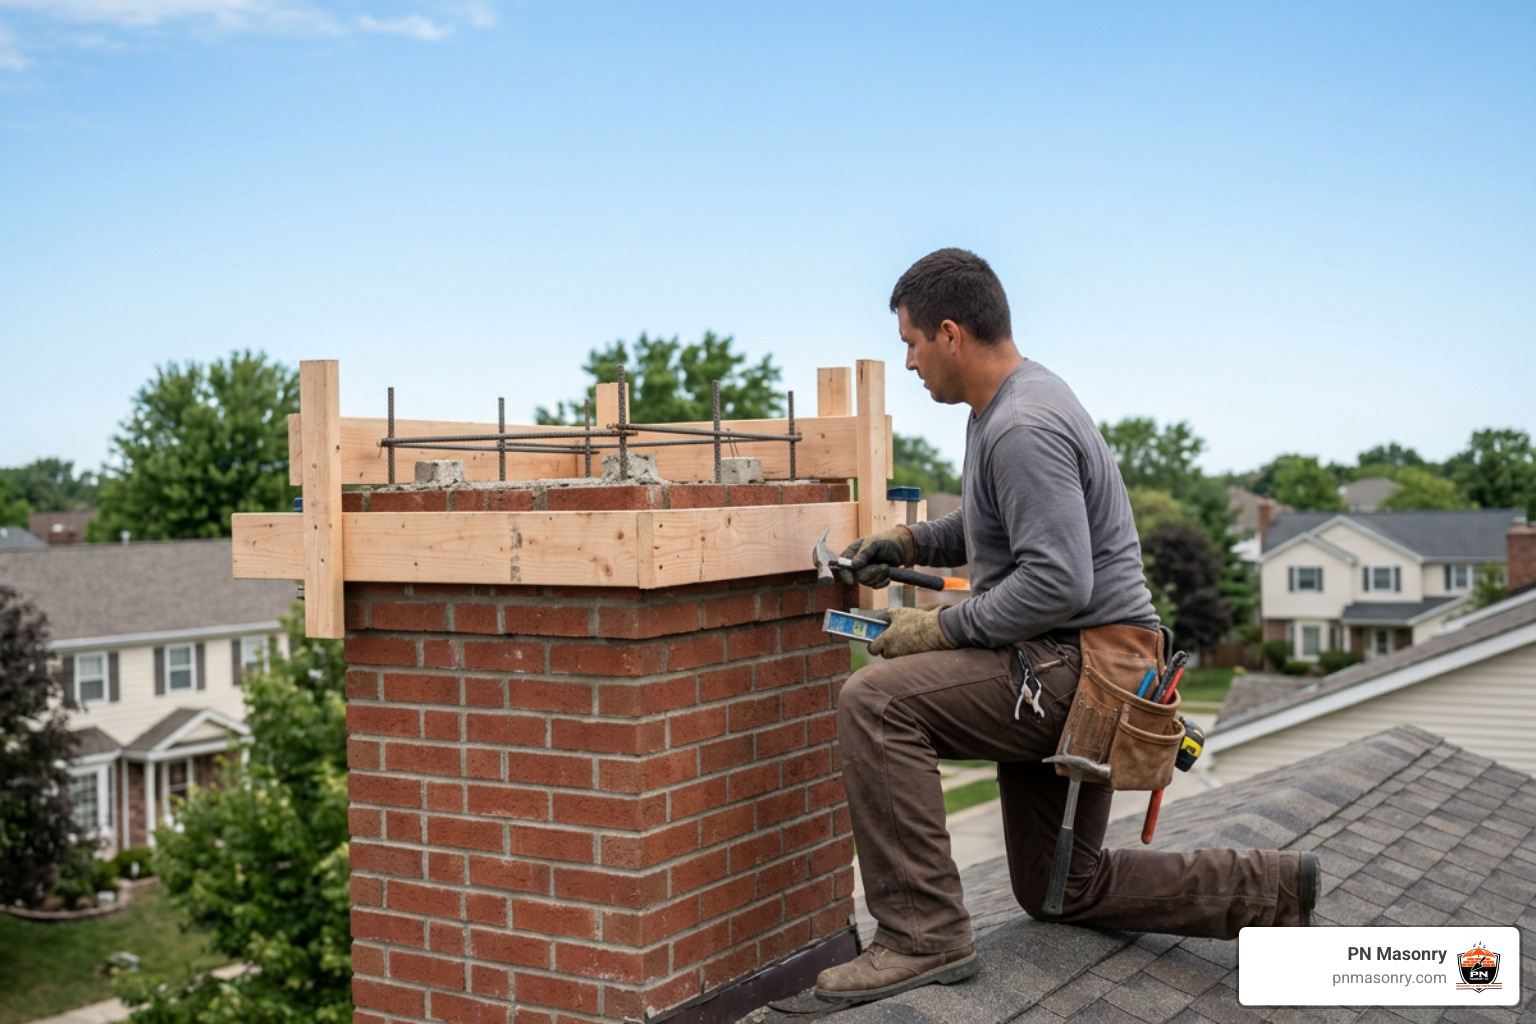
- Building the Formwork: Build an overhanging wood form around the perimeter of the chimney top. A proper crown must extend a minimum of 2 inches past the exterior brick on all four sides. Fasten a small wooden drip strip or kerf bead along the inside lower edge of the form boards to create a continuous drip edge on the underside of the cured concrete.
Reinforcement, Concrete Pouring, and Drip Edge Finishing
- Reinforcement Grid: Lay a grid of steel rebar tied together with a wire spinner, suspended roughly 1 inch above the brick line. Place metal lath over the rebar to support the fresh concrete.
- First Concrete Pour: Mix your high-strength concrete to a workable, stiff consistency. Pour a base layer 2 to 3 inches thick across the lath and rebar grid, packing it firmly into all corners.
- Mesh Layer and Final Sloped Pour: Place your #9 wire mesh into the wet base concrete. Pour the top concrete layer, shaping a continuous slope from the flue liners downward to the edge forms. The center at the flue should be at least 3 inches thick, tapering down to no less than 2 inches at the outer perimeter.
- Flue Isolation Joint: Wrap a 1/4-inch flexible expansion strip around the exterior of the clay flue liners before pouring. Clay flues expand when heated; without this buffer, the expanding flue will crack the concrete crown.
- Finishing and Cap Reinstallation: Smooth the surface with a float and steel trowel. Once the concrete has set, strip the form boards to reveal the bottom drip edge kerf. Secure the spark-arrestor chimney cap onto the flue liner using thumb screws.
Post-Installation Curing and Waterproofing Maintenance
Proper curing guarantees the long-term durability of your new concrete crown:
- Curing Timeframe: Fresh concrete requires 3 to 7 days to cure properly before you light a fire in your fireplace. Firing the hearth too early heats the flue, drying out the concrete prematurely and causing hairline fractures.
- Breathable Water Repellents: Once fully cured (typically 28 days for maximum strength), treat the crown and upper brick with a 100% breathable polysiloxane or silane-siloxane sealer. For instance, ChimneySaver Water Repellent reduces water penetration into masonry by 99.9% while letting interior moisture escape.
- Ongoing Inspections: Inspect your crown annually every fall. Clear off autumn leaves, check that the cap screws remain tight, and verify that the perimeter joint between the flue liner and concrete remains sealed with flexible sealant.
If you notice damp spots along attic rafters near the chimney base, check the roof transitions; you may need professional chimney flashing repair in Franklin Park, IL to complement your new crown.
Frequently Asked Questions About Chimney Crowns
Can I repair small cracks instead of doing a full replacement?
Yes, provided the crown is structurally sound, properly sloped, and made of concrete rather than mortar. Hairline cracks smaller than 1/8 inch can be sealed with high-grade elastomeric brushable sealants like CrownCoat or CrownSeal. These flexible coatings span minor gaps and accommodate seasonal thermal expansion. However, if cracks exceed 1/4 inch, if chunks of concrete are loose, or if the crown lacks a 2-inch overhang, replacement is the only lasting solution.
How long does a reinforced concrete chimney crown last?
A properly built reinforced concrete crown lasts 30 to 75 years, even in harsh freeze-thaw climates like the Midwest. In contrast, basic mortar crowns slapped together without rebar or slope tend to fail in just 10 to 20 years. Concrete’s higher compressive strength, combined with steel rebar and wire mesh reinforcement, resists shifting and cracking over decades.
What happens if I ignore a cracked chimney crown?
Ignoring a damaged crown lets water seep directly into the interior of your chimney. During winter, trapped water freezes, expands, and splits both the crown and underlying bricks. Over time, moisture rots attic rafters, ruins interior drywall, cultivates toxic mold, rusts fireplace dampers, and causes clay flue tiles to crack. Left untreated, water damage can cause the chimney stack to lean or collapse, turning an affordable crown repair into a massive structural rebuild.
Conclusion
Your chimney crown is your home’s roof-level shield against water damage. Investing in a properly reinforced, sloped concrete crown with an overhang and drip edge protects your brickwork, flue liners, and finished interior spaces for decades to come.
Whether you need a quick inspection, minor crack repair, or a complete masonry restoration, taking action before seasonal rains arrive will save you thousands of dollars in structural repairs. Contact our team at PN Masonry to ensure your chimney stands strong through every season.