
Cultured Marble Chip Repair: A Simple Way to Restore a Damaged Fixture
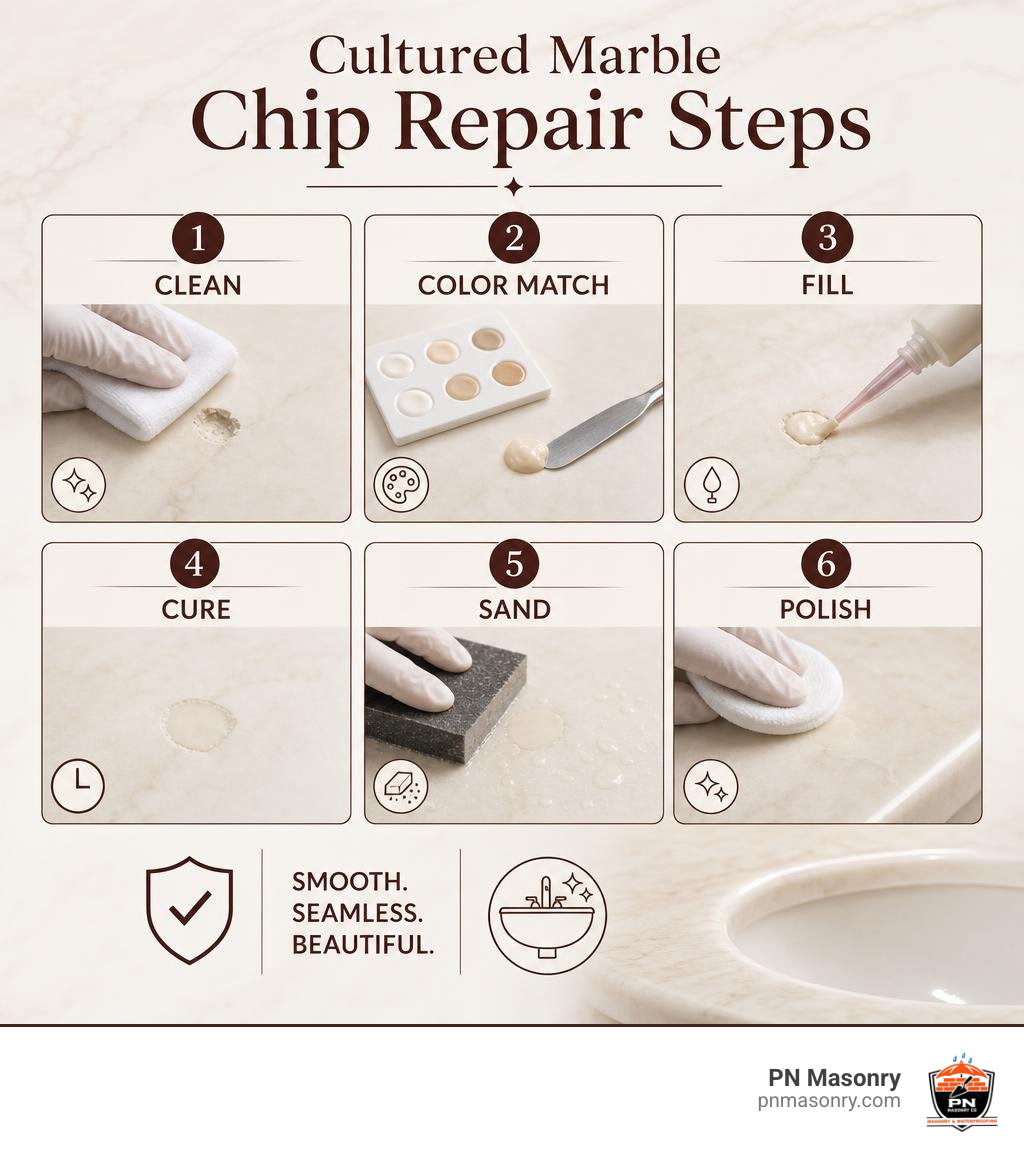
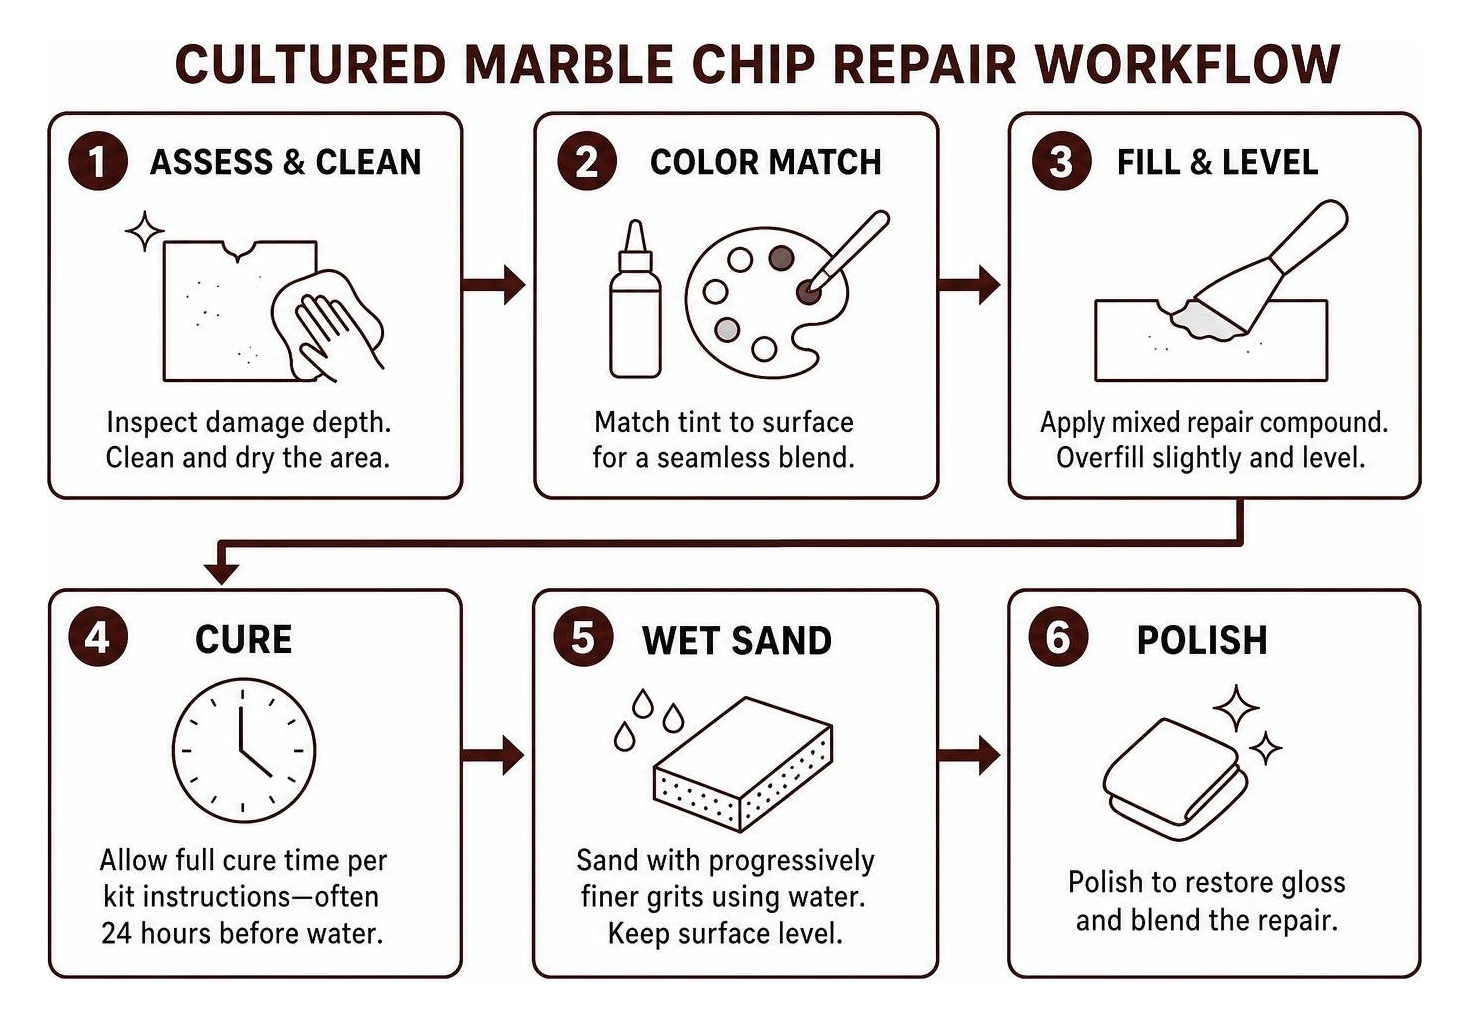
For a small chip, crack, or gouge, cultured marble chip repair is usually straightforward: clean and dry the damaged spot, fill it with a color-matched repair resin, let it fully cure, then wet-sand and polish it to match the surrounding shine. Slightly overfill the damaged area because repair material can shrink as it cures.
Most DIY kits can handle small chips, holes, scratches, and hairline cracks. A small kit may cover up to 10 square inches, but a crack that goes through the fixture, leaks, or keeps spreading needs structural reinforcement or professional assessment before cosmetic filling.
Cultured marble is not natural stone. It is a manufactured blend of marble dust, resin, and pigment protected by a glossy gelcoat. That non-porous surface makes it popular for sinks, vanity tops, shower walls, and tubs – and makes many small repairs possible without replacing the whole fixture.
The key is patience. Give the patch the full cure time specified by the kit, often 24 hours before water exposure, and use progressive wet sanding to avoid a dull spot around the repair.
Understanding Cultured Marble and Surface Damage
Cultured marble is one of the most common materials found in residential bathrooms across the country. It accounts for roughly 30% of residential bathroom vanity and countertop installations. However, many homeowners mistakenly treat it like quarried stone.
Natural marble is cut directly from the earth, consisting of porous calcium carbonate that requires continuous sealing to prevent staining and etching. Solid surface materials like Corian consist of solid acrylic or polyester blends without a top protective shell. In contrast, cultured marble is a composite material engineered by blending crushed marble dust and stone filler with a polyester resin base, cast in specialized molds, and finished with a clear or colored protective gelcoat barrier.
This gelcoat layer is typically 30 to 50 mils thick (about the thickness of a fingernail to a standard credit card) and provides a non-porous, waterproof, high-gloss surface. When an impact happens, it is usually this outer gelcoat layer that suffers the damage. A complete cultured marble repair kit with tints restores both the aesthetic depth and the waterproof seal of that original factory layer.
Types of Damage You Can Fix
Before purchasing repair compounds, it is helpful to diagnose the depth and nature of the surface defect:
- Impact Chips: Caused by dropped perfume bottles, hair tools, or heavy items. These form shallow craters that expose the dull composite stone core beneath the gelcoat.
- Hairline Cracks: Narrow surface fissures that develop from local stresses, minor physical shocks, or improper substrate shimming.
- Thermal Cracking (Crazing): Fine spiderweb-like cracks that frequently appear around sink drains. These occur when rapid shifts between scalding hot water and cold water cause the resin matrix to expand and contract unevenly.
- Superficial Burns: Light scorch marks from curling irons or hot pans that singe the upper clear coat.
- Surface Gouges: Deep scratches caused by dragging abrasive metal or ceramic items across the vanity top.
To determine whether a DIY fix will work, perform the fingernail test: run your nail across the damage. If your nail catches slightly on a defined crater or shallow scratch, it can be patched with standard repair compounds. If the crack shifts under pressure or runs completely through the substrate, it requires structural reinforcement before you apply a cosmetic patch.
Coverage Limits and Kit Sizing
A typical small repair kit (costing between $13.74 and $16.99) provides enough resin, hardener, and pigment to cover up to 10 square inches of surface area at standard gelcoat depth. This makes a single small kit ideal for fixing several impact nicks, a deep 1-inch vanity chip, or multiple small gouges across a bathroom suite.
When should you upgrade to a larger multi-ounce kit or consider professional replacement?
- Multiple Fixture Renovations: Property managers handling turnover in multi-unit buildings with dozens of chipped vanities benefit from bulk multi-use kits.
- Extensive Crazing: When thermal cracking webs across more than a quarter of the entire sink basin, surface patching becomes impractical.
- Wide Structural Breaks: Fractures exceeding 10 to 12 inches in length or sections with missing substrate chunks often compromise the structural load-bearing capacity of the countertop.
Essential Tools and Methods for Cultured Marble Chip Repair
Choosing the correct repair chemistry determines whether your patch lasts for years or turns yellow within months. The two dominant DIY repair chemistries are two-part polyester gelcoat kits and light-cure acrylic (LCA) kits.
While general 5-minute hardware store epoxy might seem convenient, standard epoxy lacks the chemical affinity to bond permanently with polyester-based cultured marble, does not offer UV stability, and cannot be buffed to a high-gloss factory shine.
| Feature | Polyester Gelcoat Kits | Light-Cure Acrylic (LCA) Kits | Two-Part Standard Epoxy |
|---|---|---|---|
| Typical Cost | $13.74 – $18.50 | $32.95 – $35.95 | $9.99 – $15.99 |
| Cure Mechanism | Chemical catalyst (MEKP) | Blue light / UV LED curing | Chemical hardener mix |
| Cure Time | 24 hours full cure | 5 – 20 minutes with light | 20 – 60 minutes |
| Yellowing Resistance | High (UV-stable formulas) | Excellent | Poor (tends to amber) |
| High-Gloss Buffing | Excellent factory mirror shine | Good gloss | Moderate / Dull sheen |
| Best Used For | Deep chips, sinks, shower pans | Quick cosmetic repairs | Rough bonding/structural |
Choosing and Mixing the Right Color Match
Cultured marble fixtures rarely feature a pure hospital-white finish. Most vanities display subtle undertones ranging from bone, almond, and biscuit to grey, brown, or faux-veined marbling.
- Start with the Base Resin: Dispense your base white or clear resin into a small mixing cup.
- Add Tints in Micro-Drops: Use the tip of a toothpick or craft stick to add minute amounts of liquid pigment. Add warm amber or brown for aged, off-white sinks, or slate grey for modern cool-toned tops.
- Mimic Swirls Separately: If your vanity features prominent veining, mix your background color first. Then mix a tiny secondary batch of darker veining paste. Once the main patch is placed, lightly drag a toothpick dipped in the darker tint across the wet surface to mimic the natural swirl.
- Perform a Test Patch: Smear a tiny dab of the tinted (uncatalyzed) resin onto a clean section of the vanity next to the chip. Evaluate the color match under both natural daylight and warm bathroom vanity lighting. Wipe it clean with an acetone cloth before proceeding.
- Monitor Ambient Temperature: Maintain a work area temperature near 70°F to 72°F. Temperatures below 65°F will stall the curing reaction, while temperatures above 85°F cut your working pot life down to less than 8 minutes.
Cross-Surface Compatibility
Most quality surface repair kits work across a variety of solid bathroom and kitchen fixtures. Because polyester and acrylic repair resins bond securely to non-porous polymer matrices, a single color-match kit can repair fiberglass shower pans, acrylic bathtubs, porcelain washbasins, ceramic wall tiles, solid surface countertops (such as Corian), and even natural granite or engineered quartz countertop edges.
Step-by-Step Guide to Cultured Marble Chip Repair
Proper chemical and mechanical surface preparation ensures the repair patch bonds securely to the surrounding fixture.
1. Surface Decontamination
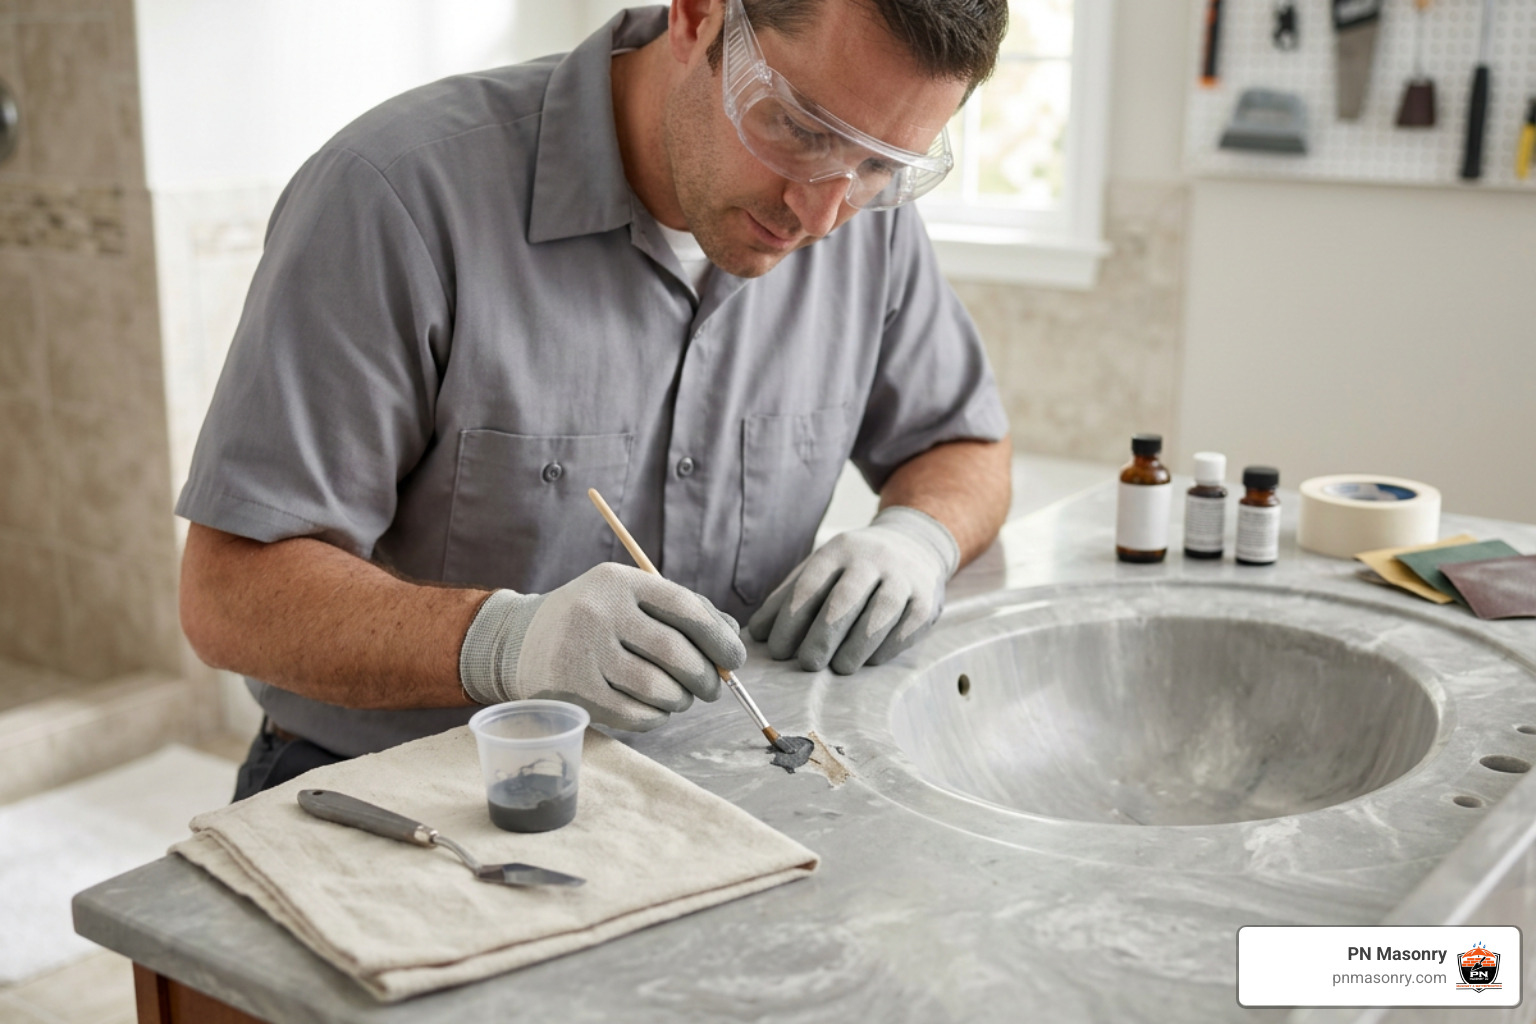
Thoroughly clean the chip and surrounding area using a stiff nylon brush and 100% pure acetone or denatured alcohol. Household bathroom cleaners often contain silicone, wax, or soap oils that prevent resin adhesion. A single microscopic drop of bath soap left inside the chip crater can lead to delamination later.
2. Mechanical Etching
To create a mechanical tooth for the resin, lightly abrade the bottom and jagged edges of the chip using 220-grit wet/dry sandpaper. For deep gouges, a rotary tool with a small, rounded grinding stone helps remove loose topcoat edges without creating sharp corners. Follow the established cultured marble repair procedures by keeping all sanding and etching within 1/2 inch of the damage zone.
3. Perimeter Masking
Surround the repair area with blue automotive or painter’s tape, leaving roughly 1/16th of an inch of exposed original gelcoat around the rim of the chip. This prevents stray resin from sticking to unaffected areas.
Mixing, Filling, and Shrinkage Management
When you are ready to patch the fixture, manage your resin chemistry carefully:
- Catalyst Integration: Add your methyl ethyl ketone peroxide (MEKP) catalyst or hardener to the pre-tinted resin according to the manufacturer’s drop ratio (typically 4 to 6 drops per tablespoon of resin, or 1.5% to 3% by volume). Stir gently with a flat wooden stick for 60 seconds to avoid whipping air bubbles into the paste.
- Working Time: You have a working pot life of roughly 12 to 15 minutes at 72°F before the mixture begins to gel.
- Compensating for Shrinkage: Polyester gelcoats experience roughly 5% to 8% volumetric shrinkage as the polymer cross-links. Overfill the chip by approximately 15% to 20% (about 1/16th inch above the surrounding surface). This extra dome ensures the repair won’t cure into a sunken hollow.
- Deep Void Layering: For gouges deeper than 1/4 inch, apply the compound in two stages. Fill the bottom layer to within 1/16th inch of the surface, let it reach a firm gel state (about 30 minutes), and then apply the top color-matched layer.
- The Mylar Sheet Leveling Trick: Place a small square of clear Mylar plastic or cellophane directly over the wet, mounded resin patch. Lightly smooth it flat with a plastic spreader to level the dome. The plastic acts as an oxygen barrier, preventing the air-inhibited “tackiness” typical of curing polyester resins while leaving a smooth, flat surface.
Curing Times and Waterproofing Properties
Allow the repair to cure undisturbed for a full 24 hours. While the patch may feel solid to the touch after 2 to 4 hours, complete molecular cross-linking requires a full day at room temperature.
Once fully cross-linked, the repair compound cures into a solid, non-porous polymer barrier. It provides complete water immersion resistance, handles direct hot water contact up to standard domestic plumbing temperatures (120°F to 140°F), and restores the watertight integrity of sinks, tubs, and shower enclosures.
Sanding, Polishing, and Sheen Matching
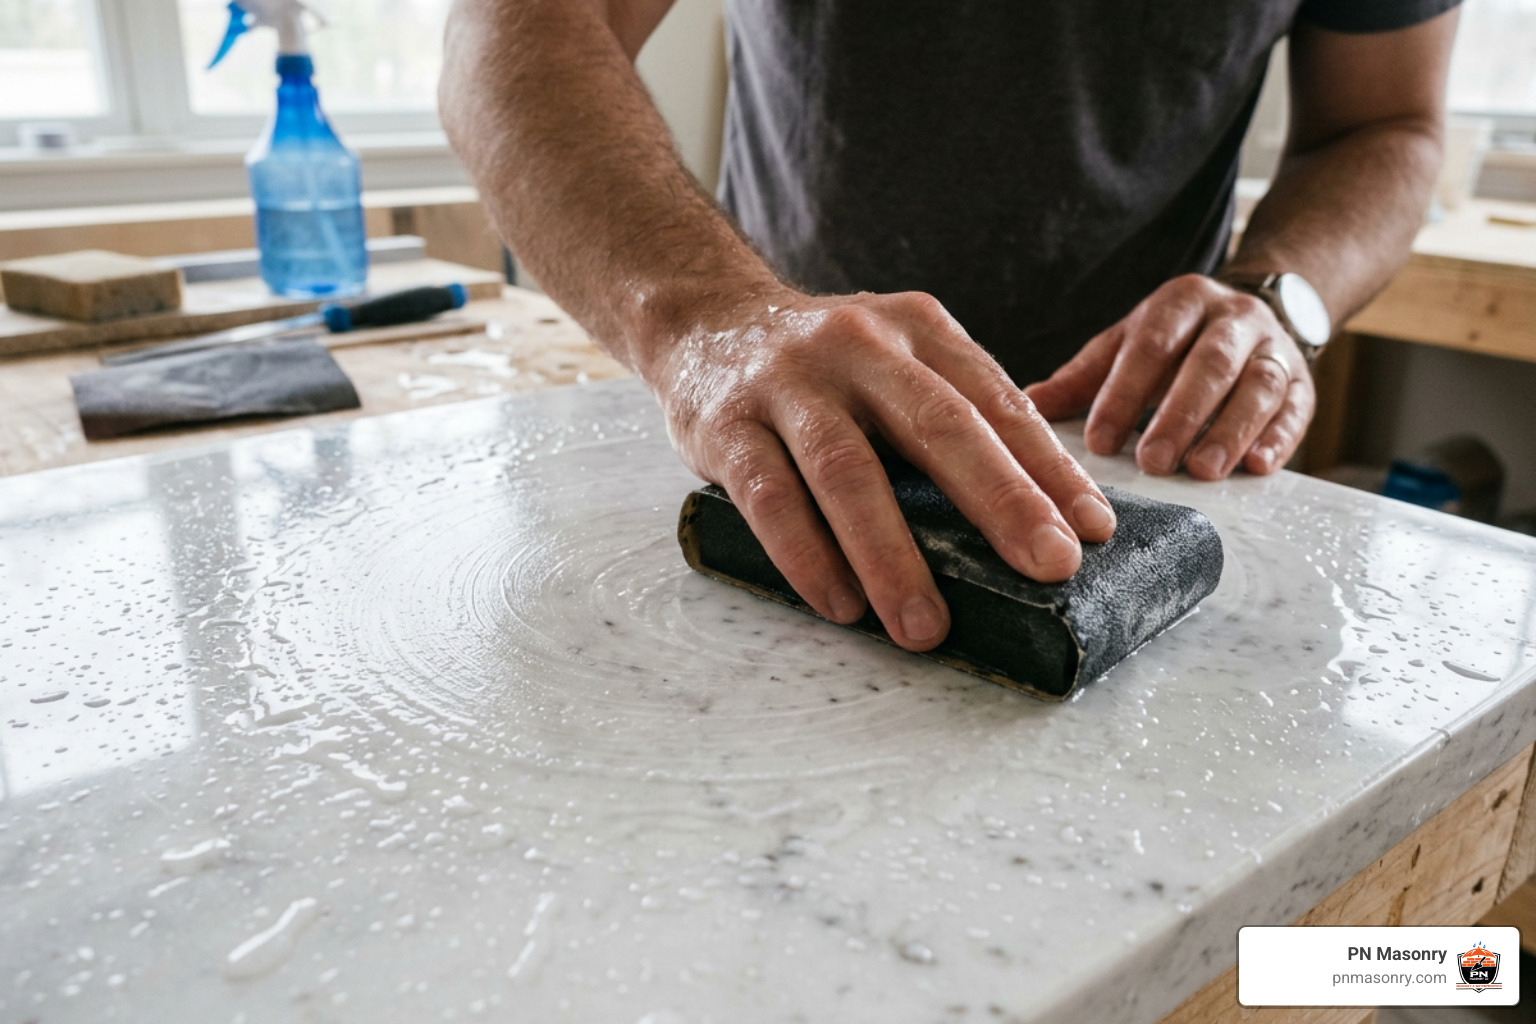
The sanding stage determines whether your patch remains noticeable or blends into an invisible repair. The secret to blending the repair is following a strict wet-sanding progression using automotive-grade silicon carbide wet/dry sandpaper.
The Wet-Sanding Sequence
Never sand cultured marble dry. Dry sanding creates friction heat that can soften the resin and leave swirl marks in the surrounding gelcoat. Keep a spray bottle of clean water mixed with two drops of dish soap nearby to lubricate your sanding block at every stage.
- Level the Dome (400-Grit): Wrap 400-grit wet/dry paper around a small, flat sanding block. Lightly sand the cured patch using circular motions until the raised dome is nearly flush with the surrounding surface.
- Refine the Edges (600-Grit): Switch to 600-grit paper. Sand the patch and feather outward roughly 1/4 inch into the adjacent gelcoat, removing scratches left by the 400-grit paper.
- Smooth the Transition (1000-Grit to 1500-Grit): Continue wet sanding with 1000-grit, followed by 1500-grit paper. The surface will transition from a rough matte texture to a smooth satin finish.
- Pre-Polish Prep (2000-Grit): Finish with 2000-grit paper. Keep the area wet until the repaired spot matches the smoothness of the original fixture.
Achieving a Factory Mirror Finish
To bring the satin patch back to a high-gloss shine, finish with mechanical buffing:
- Buffing Compound: Apply a dab of fine, white automotive polishing compound (or specialized gelcoat cutting cream) over the repair site.
- Mechanical Buffing: While hand-rubbing with a microfiber cloth works for small nicks, using a variable-speed rotary tool or power drill with a soft 3-inch foam or wool buffing wheel produces a smoother finish. Run the buffer at a low-to-medium speed (1200 to 1800 RPM), keeping the pad moving across the repair zone to prevent heat buildup.
- Protective Wax: Once you achieve a high gloss, wipe away compound residue with a clean microfiber towel. Seal and protect the entire vanity top using a non-abrasive, carnauba-based paste wax or specialized gelcoat sealant.
Frequently Asked Questions About Cultured Marble Repair
Why is my repair patch still tacky after 24 hours?
A repair patch that remains sticky or soft after 24 hours is usually caused by an incorrect catalyst ratio (too little MEKP hardener), working in cold temperatures (below 65°F), or surface oxygen inhibition. Polyester resins exposed to open air can cure with a thin, tacky surface layer. You can wipe this uncured film away using a paper towel dampened with 100% acetone, exposing the hardened compound underneath, or prevent it entirely by taping a Mylar sheet over the wet patch during curing.
Can I use standard clear epoxy for cultured marble chip repair?
Standard hardware store 5-minute clear epoxy is not recommended for cultured marble repairs. Clear epoxy lacks the opacity to conceal damaged composite fillers, breaks down under UV light, and tends to turn amber over time. It also lacks the polyester chemistry needed for a long-term chemical bond and cannot easily be wet-sanded and machine-buffed to a high-gloss finish.
How do I repair structural cracks that leak through the fixture?
If a crack extends completely through a sink basin or shower pan and leaks water, surface filling alone will not hold up to everyday stress. You must first reinforce the underside of the fixture:
- Access the underside and sand the area around the crack with 80-grit sandpaper.
- Apply two layers of woven fiberglass cloth saturated with polyester laminating resin across the crack to stabilize it.
- Once the structural underside reinforcement cures, prepare and fill the top-side cosmetic crack using the standard gelcoat method.
Conclusion
Fixing chips, gouges, and nicks in cultured marble does not require expensive vanity replacement or specialized contractors. With a dedicated repair kit, careful color blending, and progressive wet sanding, you can restore damaged bathroom sinks, bathtubs, and shower surrounds to their original look. Regular care with non-abrasive cleaners and a coat of paste wax will keep the repaired gelcoat looking fresh for years to come.
While minor surface chip repairs make great weekend DIY projects, extensive structural cracking, custom stone fabrication, architectural fireplace restorations, and exterior masonry repairs call for professional expertise. At PN Masonry, we provide full-service masonry and stone restoration throughout Cook County, Illinois. Whether you need residential stone repair, commercial CMU block construction, tuckpointing, or complete masonry preservation, our team delivers high-quality craftsmanship to keep your property durable, safe, and looking its best.