
Structural Risks and Code Standards for Core Hole Remediation
To fill core holes in concrete securely, mechanically abrade the smooth interior walls, pre-saturate the substrate to a saturated surface dry (SSD) condition, secure bottom containment formwork or expandable plugs, place high-strength non-shrink grout in consolidated lifts, and moist-cure the repair for 3 to 7 days. This remediation protocol restores load-bearing capacity, prevents stress cracking, and re-establishes assembly fire ratings.
Every core-drilled cylindrical opening interrupts the continuous concrete matrix. In structural slabs, shear walls, and load-bearing columns, an unfilled or inadequately patched void acts as a stress concentrator. Under dynamic or heavy static loads, stresses pool around the smooth boundaries of the opening, encouraging micro-cracking, punching shear failures, and long-term delamination. In multi-story buildings, core penetrations also breach fire separations, compromising the assembly’s original fire rating by creating a direct pathway for smoke, heat, and toxic gases.
Industry standards establish explicit baselines for structural concrete repairs:
- ACI 301 (Specifications for Concrete Construction): Requires core holes left after concrete sampling or mechanical penetrations to be filled with low-slump concrete or mortar possessing compressive strength equal to or greater than the original parent concrete.
- ACI 563 (Specifications for Repair of Concrete in Buildings): Dictates strict surface preparation, minimum interface bonding profiles, and dimensional stability standards to prevent repair shrinkage.
- ASTM C476 (Standard Specification for Grout for Masonry): Details slump, proportioning, and strength requirements for high-flow grouts used in reinforced masonry cells and block infills.
The broader market reflects this emphasis on durable remediation. The global concrete restoration market stood at USD 17.33 billion in 2023, while the concrete repair mortars market is projected to expand from $2.7 billion in 2020 to $5.3 billion by 2032. Furthermore, hand-applied repairs captured 53.2% of the market revenue share in 2024. When dealing with complex structural penetrations across Cook County, collaborating with a professional concrete contractor in Franklin Park, IL ensures every repair adheres strictly to local municipal building codes and ACI performance guidelines.
Material Selection: Choosing the Right Mortar or Grout
Selecting an effective filler material requires matching the product chemistry to the application’s structural, environmental, and thermal demands:
- Non-Shrink Cementitious Grout: The industry standard for interior and exterior structural floor slabs. Unlike standard bag-mix concrete that contracts during hydration, non-shrink grout contains controlled expansion agents to offset plastic and drying shrinkage, ensuring a tight mechanical interlock. High-performance non-shrink grouts routinely achieve compressive strengths exceeding 3,000 PSI (20.7 MPa) within 24 hours and over 7,000 PSI (48.3 MPa) at 28 days.
- Masonry Core-Fill Grout: Formulated to flow freely into masonry block cells. According to QUIKRETE core-fill grout technical specifications, each 80-pound bag yields approximately 0.68 cubic feet (19 liters), filling the cores of roughly three standard 8 in x 8 in x 16 in masonry blocks while achieving a 28-day compressive strength greater than 2,000 PSI (13.7 MPa).
- Epoxy Mortars and Polymers: Ideal for chemical-resistant environments, thin overlays, or horizontal wall anchors requiring ultra-high tensile bond strength. Epoxies cure quickly (typically 24 hours) but behave poorly under high-heat or fire scenarios due to polymer breakdown.
- Geopolymer Mortars: An advancing category in sustainable construction, aligned with the global green concrete market valued at USD 36.5 billion in 2024. Scientific research on geopolymer repair mortar shows that an optimized geopolymer mortar with 15% silica fume and 10 M NaOH achieves a 28-day compressive strength of 36.5 MPa (competitive with commercial repair mortar at 39.4 MPa). Crucially, geopolymer mortar displays superior residual fire retention, losing only 19.2% and 54.0% of its strength after exposure to 400°C and 800°C, compared to losses of 43.6% and 60.8% in standard concrete and 49.2% and 75.7% in traditional commercial mortars.
- Crystalline Waterproofing Grouts: Designed for below-grade foundations and retaining walls subject to hydrostatic pressure. Crystalline admixtures react with moisture and unhydrated cement particles to grow microscopic crystals within the pores, permanently blocking water paths.
| Repair Material Class | 28-Day Compressive Strength | Tensile / Shear Bond Adhesion | Fire & Heat Resistance | Standard Cure Time Before Traffic |
|---|---|---|---|---|
| Non-Shrink Structural Grout | 5,000 – 9,000 PSI (34.5 – 62 MPa) | High (Mechanical interlock + SSD) | Excellent (Matches parent concrete) | 24 Hours (Light foot traffic in 4–6 hrs) |
| Structural Epoxy Mortar | 8,000 – 12,000 PSI (55 – 83 MPa) | Very High (Chemical adhesion) | Poor (Degrades above 140°F / 60°C) | 12 – 24 Hours |
| Optimized Geopolymer Mortar | ~5,300 PSI (36.5 MPa) | High (Chemical & micro-matrix) | Superior (High residual retention) | 24 – 48 Hours |
| Masonry Fine Core Grout | >2,000 PSI (13.7 MPa) | Moderate (Standard masonry bond) | High (Standard cementitious fire rating) | 7 Days |
| Crystalline Repair Grout | 4,000 – 6,000 PSI (27.6 – 41.4 MPa) | High (Autogenous healing bond) | Excellent (Inorganic crystal matrix) | 48 Hours |
Step-by-Step Guide to Filling Core Holes in Concrete
Achieving a durable structural repair requires following a structured progression from substrate cleaning to final curing.
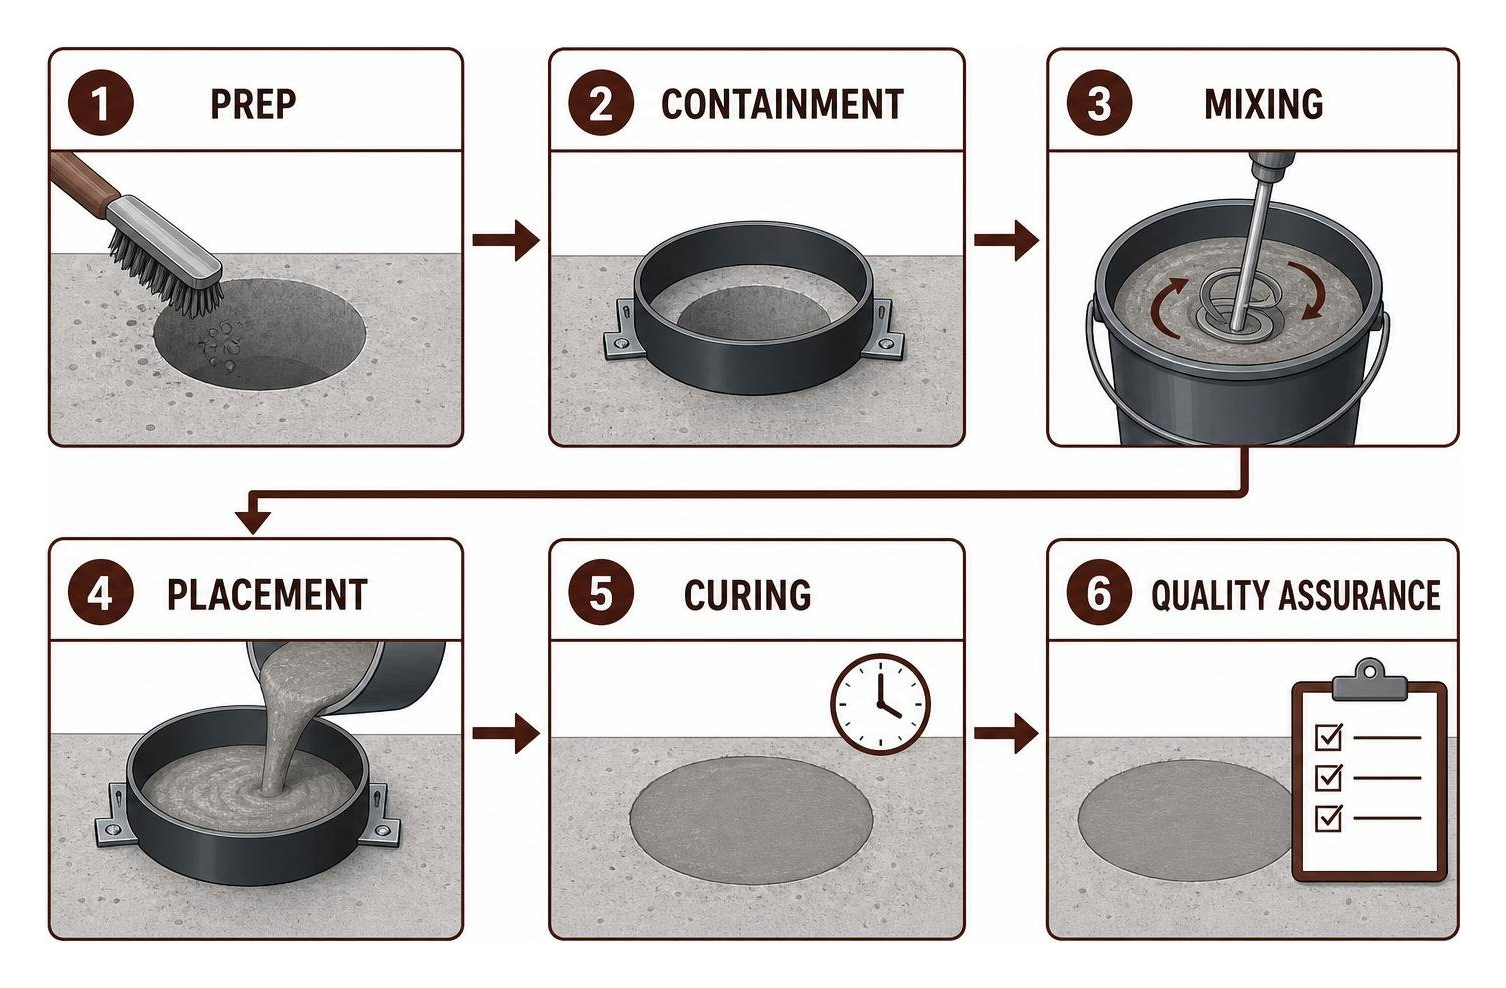
Essential Preparation Before Filling Core Holes in Concrete
Diamond core drills leave polished, mirror-smooth inner walls covered in microscopic slurry residue. If you pour repair material into an untreated diamond-drilled void, it will act like a cork in a smooth bottle—dislodging easily under impact or thermal cycling.
- Mechanical Abrasion & Roughening: Use a stiff wire brush, needle scaler, or light mechanical chipping tool to abrade the smooth perimeter. Where possible, undercut the bottom or intermediate perimeter slightly to establish a mechanical dovetail key.
- Dust Extraction: Remove all loose aggregate, fractured matrix, and drilling slurry using an industrial HEPA-filtered vacuum.
- Achieving Saturated Surface Dry (SSD): For all cementitious grouts, pre-soak the inner walls with clean potable water for 2 to 4 hours before placement. Immediately prior to grouting, vacuum out all standing pooled water. The concrete should appear dark, damp, and saturated, but free of standing surface water. This prevents dry parent concrete from prematurely pulling mixing water out of your repair mortar.
For compromised CMU foundation cells or block masonry assemblies surrounding core areas, consider scheduling expert concrete block repair in Franklin Park, IL to stabilize adjacent structural walls prior to grouting.
Forming Bottom Penetrations and Underdeck Containment
Full-depth slab cores require a stable bottom form to prevent wet grout from falling through. In commercial renovations or occupied multi-story buildings, access to the underside of the ceiling slab may be blocked by drywall ceilings, electrical conduits, or tenant spaces.
- Blind-Side Mechanical Plugs: Single-sided installation systems allow crews to seal the bottom opening directly from above. Mechanical containment assemblies use an expandable plate or disc lowered on a threaded rod through the hole. Once cleared below the slab, the plate expands and is pulled upward against the bottom lip using a top-mounted bracket and speed nut.
- Traditional Plywood Deck Shoring: When lower-level access is unobstructed, securely fasten 3/4-inch exterior-grade plywood tight against the ceiling slab using post shores or concrete masonry screw anchors, sealing perimeter edges with silicone to prevent slurry loss.
- Hydrostatic Waterproofing Containment: For deep core penetrations subject to active groundwater ingress, refer to the Krystol crystalline penetration sealing guide. Chipping a clean 25 mm x 40 mm rectangular chase around the base and packing fast-setting crystalline water-stop plugs holds back pressurized water while supporting subsequent structural grouting.
Mixing and Placement Techniques for Filling Core Holes in Concrete
Consistency and consolidation dictate the final density of the repair. Standard bag-mix concrete should never be used, as its high water content causes shrinkage cracks.
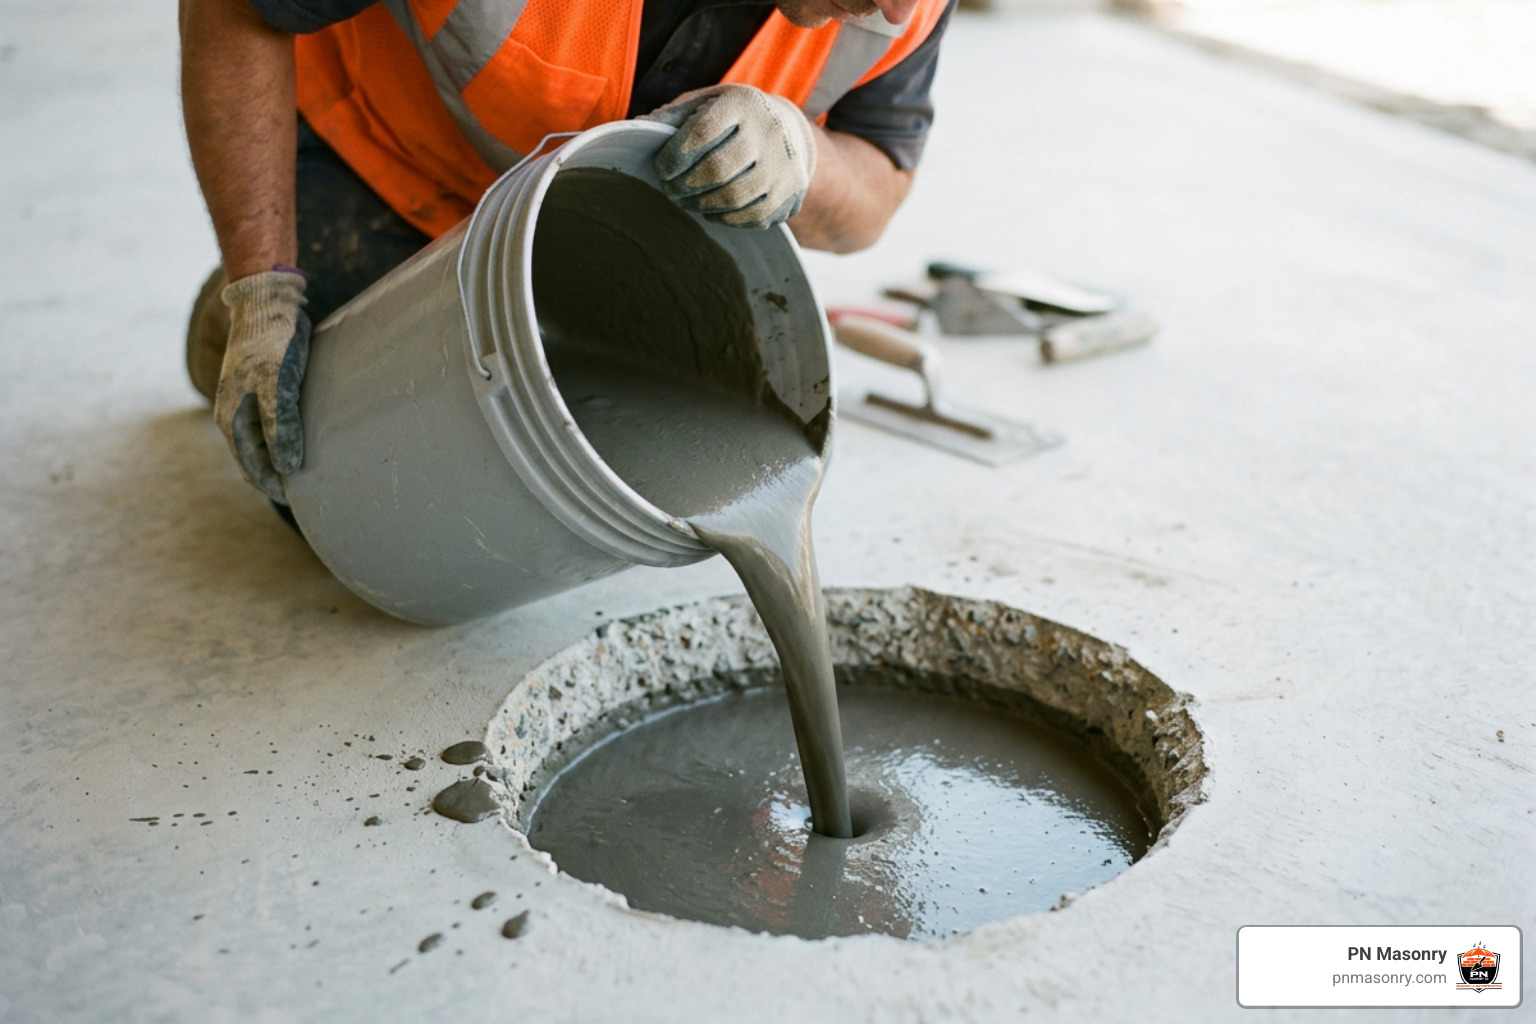
- Mechanical Paddle Mixing: Mix non-shrink grout using a heavy-duty drill and helical mixing paddle for 3 to 5 minutes. Measure water strictly within manufacturer limits (typically 5 to 7 quarts per 80-pound bag, maintaining a workable slump of 8 to 11 inches per ASTM C143).
- Multi-Lift Placement: For core holes deeper than 4 inches, place the mortar in balanced 2- to 3-inch lifts.
- Consolidation: Tamp each lift with a non-absorbent tamping rod, or insert a small pencil vibrator for deep cores to eliminate trapped air pockets and honeycombing along the perimeter interface.
- Slight Overfill and Striking Off: Fill the hole slightly proud of the surrounding surface. Allow the material to reach its initial set (when thumb pressure leaves only a faint indentation), then shave the excess level with the slab using the sharp edge of a steel trowel.
Proper Curing Protocols and Load-Bearing Timelines
Cementitious materials require sustained moisture to complete hydration and attain design compressive strength:
- Moist Curing: Cover the patched area immediately with clean, wet burlap topped with polyethylene plastic sheeting for 3 to 7 days.
- Liquid Membrane-Forming Curing Compounds: In high-traffic corridors where wet burlap cannot remain in place, apply an ASTM C309-compliant curing compound immediately after surface finishing.
- Temperature Management: Maintain surrounding ambient and concrete temperatures above 50°F (10°C) for a minimum of 7 days per ACI 306R/305R guidelines. If temperatures dip below freezing, protect the patch with thermal insulation blankets.
- Loading Thresholds: Light foot traffic is generally permitted after 4 to 6 hours once the grout reaches 1,000 PSI. Structural load application, heavy machinery, or vehicle traffic must wait a minimum of 24 to 48 hours until compressive strength exceeds 3,000 PSI.
Quality Assurance, Finishing, and Moisture Sealing
Once the repair cures, verify the structural integrity of the interface:
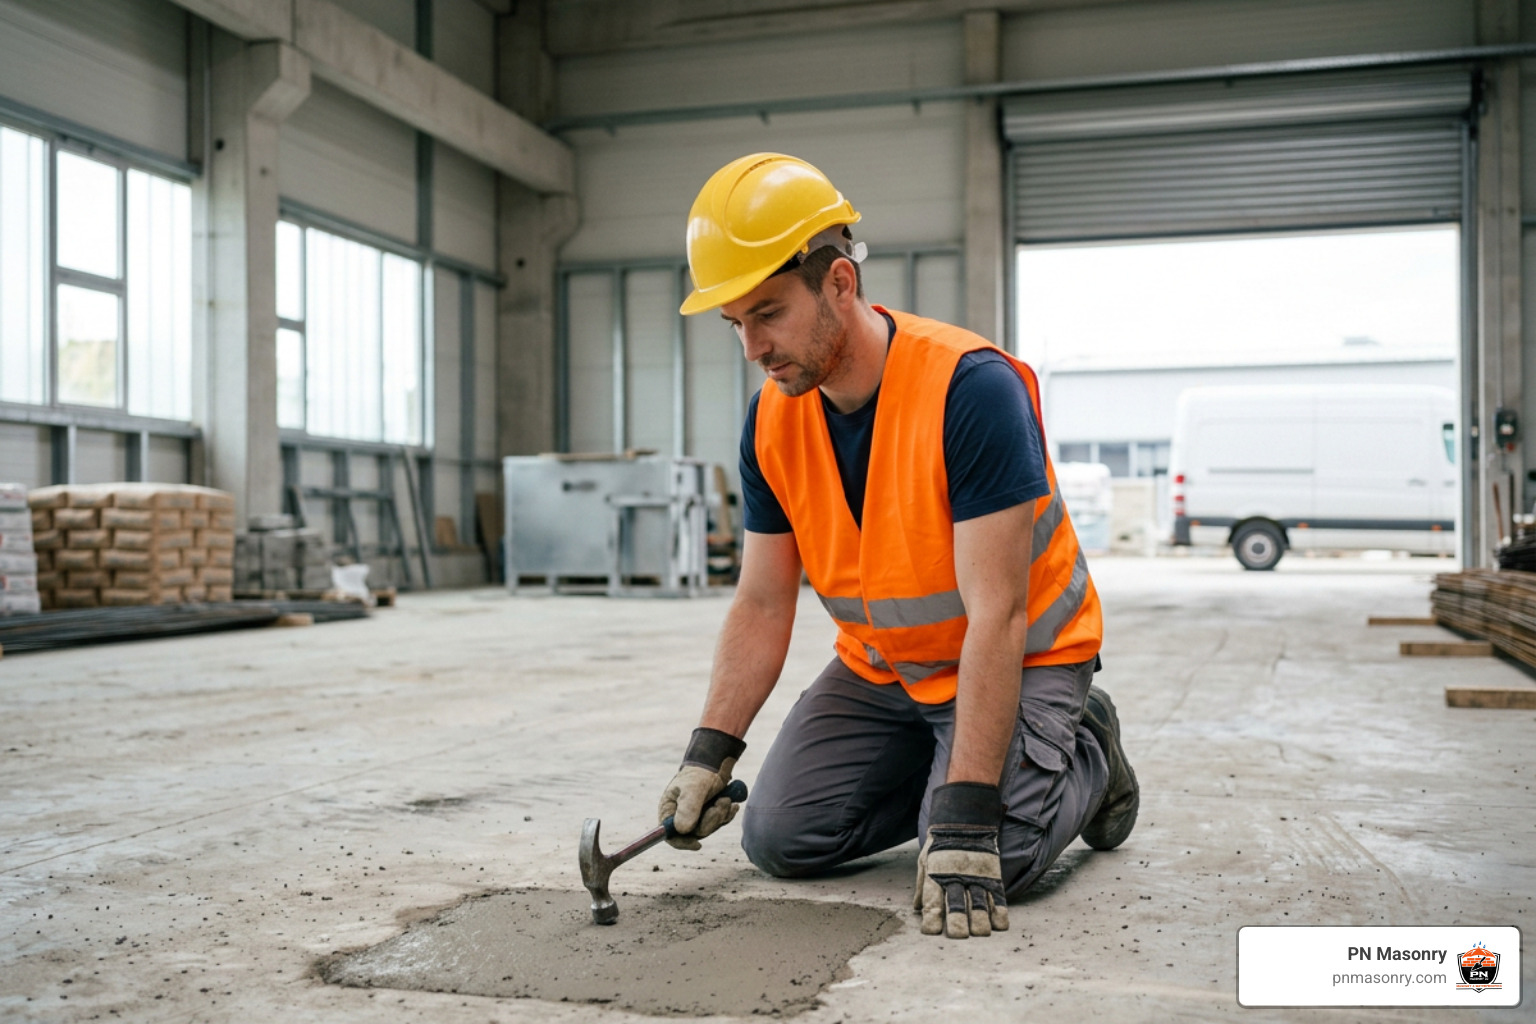
- Acoustic Sounding Inspection: Tap the patched surface and perimeter with a steel inspection hammer or chain drag. A sharp, high-pitched ring indicates a solid, fully consolidated bond. A dull, hollow “thud” reveals internal voids, honeycombing, or perimeter delamination requiring injection or replacement.
- Non-Destructive Testing (NDT): For critical load-bearing columns or post-tensioned slabs, ultrasonic pulse velocity (UPV) testing measures pulse transmission speed through the repair zone, verifying internal density within a 5% to 7% variance of the surrounding parent concrete.
- Surface Levelness & Edge Feathering: Ensure the finished grout sits flush with the adjacent concrete slab to eliminate tripping hazards and prevent impact damage from forklift wheels.
To prevent water ingress, deicing salt degradation, and freeze-thaw spalling across Cook County’s harsh winters, protect the slab with deep-penetrating protective concrete sealing in Franklin Park, IL. When dealing with external concrete, parapets, or CMU backup walls, applying specialized brick and block sealing and waterproofing solutions creates a breathable, hydrophobic barrier that keeps the entire masonry assembly dry.
Frequently Asked Questions About Core Hole Repairs
Can standard bag-mix concrete be used to fill core holes?
No. Standard bag-mix concrete undergoes substantial drying shrinkage during hydration. As the water evaporates, standard concrete contracts away from the smooth walls of the core hole, forming a microscopic gap (cold joint). This unbonded interface permits water leaks, eliminates shear transfer, and loosens under heavy point loads. Structural repairs require dimensionally stable non-shrink grouts or polymer mortars.
Is a separate bonding agent always necessary for structural repairs?
Not always. If you mechanically roughen the core hole’s walls and bring the substrate to a Saturated Surface Dry (SSD) condition, high-performance structural non-shrink grouts bond reliably through physical aggregate interlock and crystalline matrix growth. However, when working with ultra-dense parent concrete or epoxy repair mortars, applying a compatible epoxy bonding primer (applied while tacky) provides additional chemical adhesion across the joint.
How soon after grouting can the slab bear heavy traffic?
Foot traffic is typically safe within 4 to 6 hours after initial set. However, heavy structural loads, dynamic vibration, scissor lifts, and vehicle traffic require at least 24 hours of curing, at which point quality non-shrink grouts achieve 3,000 to 5,000 PSI compressive strength.
Conclusion
Filling concrete core holes correctly protects the building’s load paths, moisture integrity, and fire ratings. By mechanically roughening the interior walls, securing bottom containment, placing high-performance non-shrink or geopolymer mortars in consolidated lifts, and maintaining proper wet-curing schedules, you prevent common issues like cold joints, hollow voids, and slab cracking.
Whether managing a multi-story commercial tenant build-out, an industrial floor remediation, or a residential masonry restoration, our team delivers complete, code-compliant masonry solutions. Contact PN Masonry structural and decorative concrete services today to schedule an expert on-site structural evaluation and comprehensive concrete remediation for your next project.