
Brick Chimney Restoration Protects Historic Homes From Water and Collapse
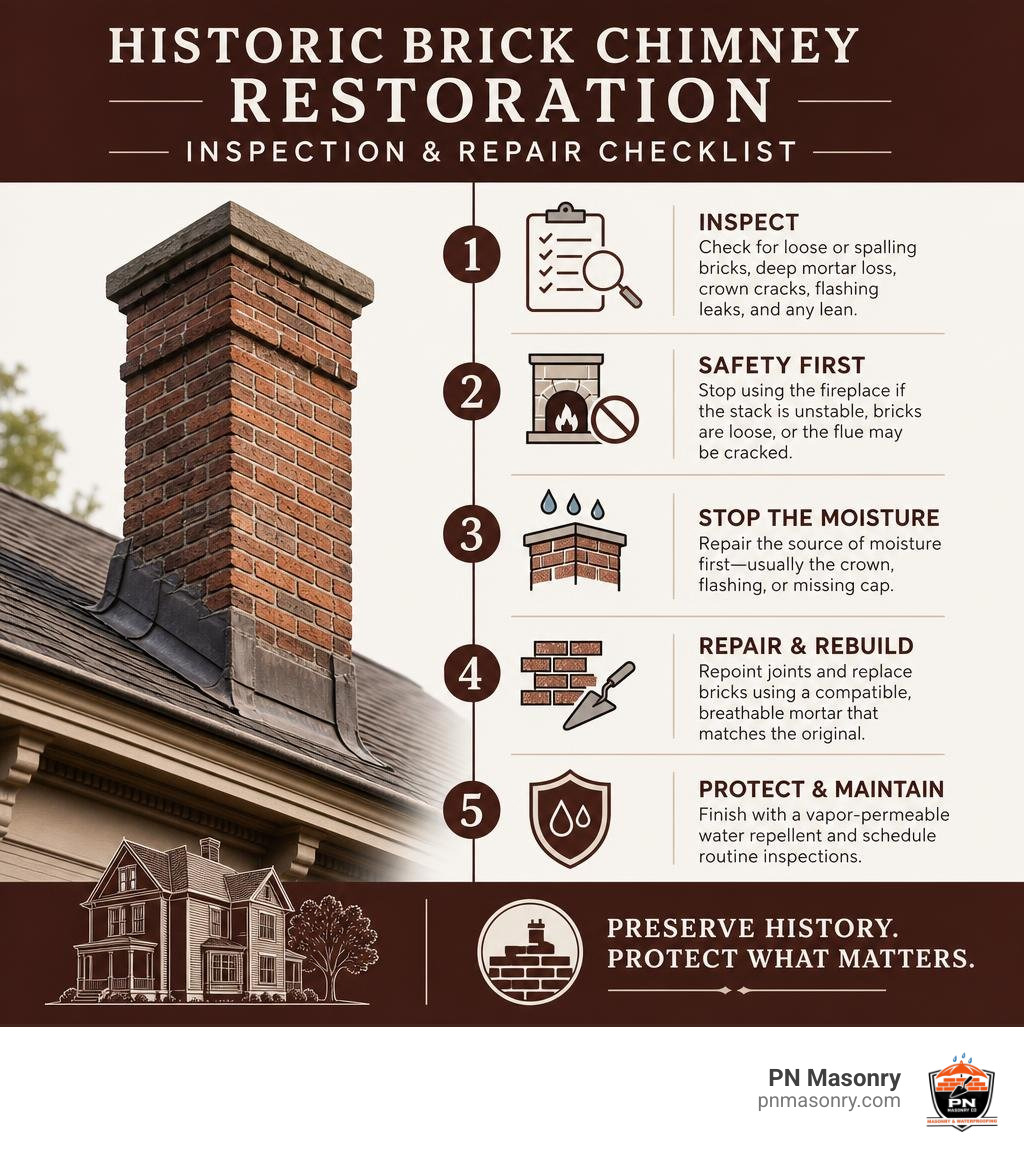
Brick chimney restoration starts by stopping water entry, removing failed mortar, and replacing damaged bricks with materials that fit the original masonry. For a historic chimney, the safest basic plan is:
- Check for loose or spalling bricks, deep mortar loss, crown cracks, flashing leaks, and any lean.
- Stop using the fireplace if the stack is unstable, bricks are loose, or the flue may be cracked.
- Repair the source of moisture first – usually the crown, flashing, or missing cap.
- Repoint joints and replace bricks using a compatible, breathable mortar. Historic soft-fired brick often needs lime-rich mortar, not hard Portland-cement mixes.
- Finish with a vapor-permeable water repellent and routine inspections.
A chimney can look like it only has cosmetic wear while water is quietly damaging its mortar, brick faces, flue, and roof connection. In Cook County, repeated wet weather and freeze-thaw cycles make small cracks especially urgent: trapped water expands when it freezes and can turn sound-looking masonry into spalling, loose brick.
The goal is not simply to make the chimney look new. It is to preserve its original character while restoring a safe path for smoke, heat, and moisture to move where they should.
Assessing Chimney Damage: Structural Instability vs. Cosmetic Wear
Before picking up a trowel or chipping away at old mortar, we must determine whether the chimney is suffering from surface-level weathering or deeper structural movement. Historic chimneys endure relentless thermal expansion from heating cycles alongside external wind loads and driving rain.
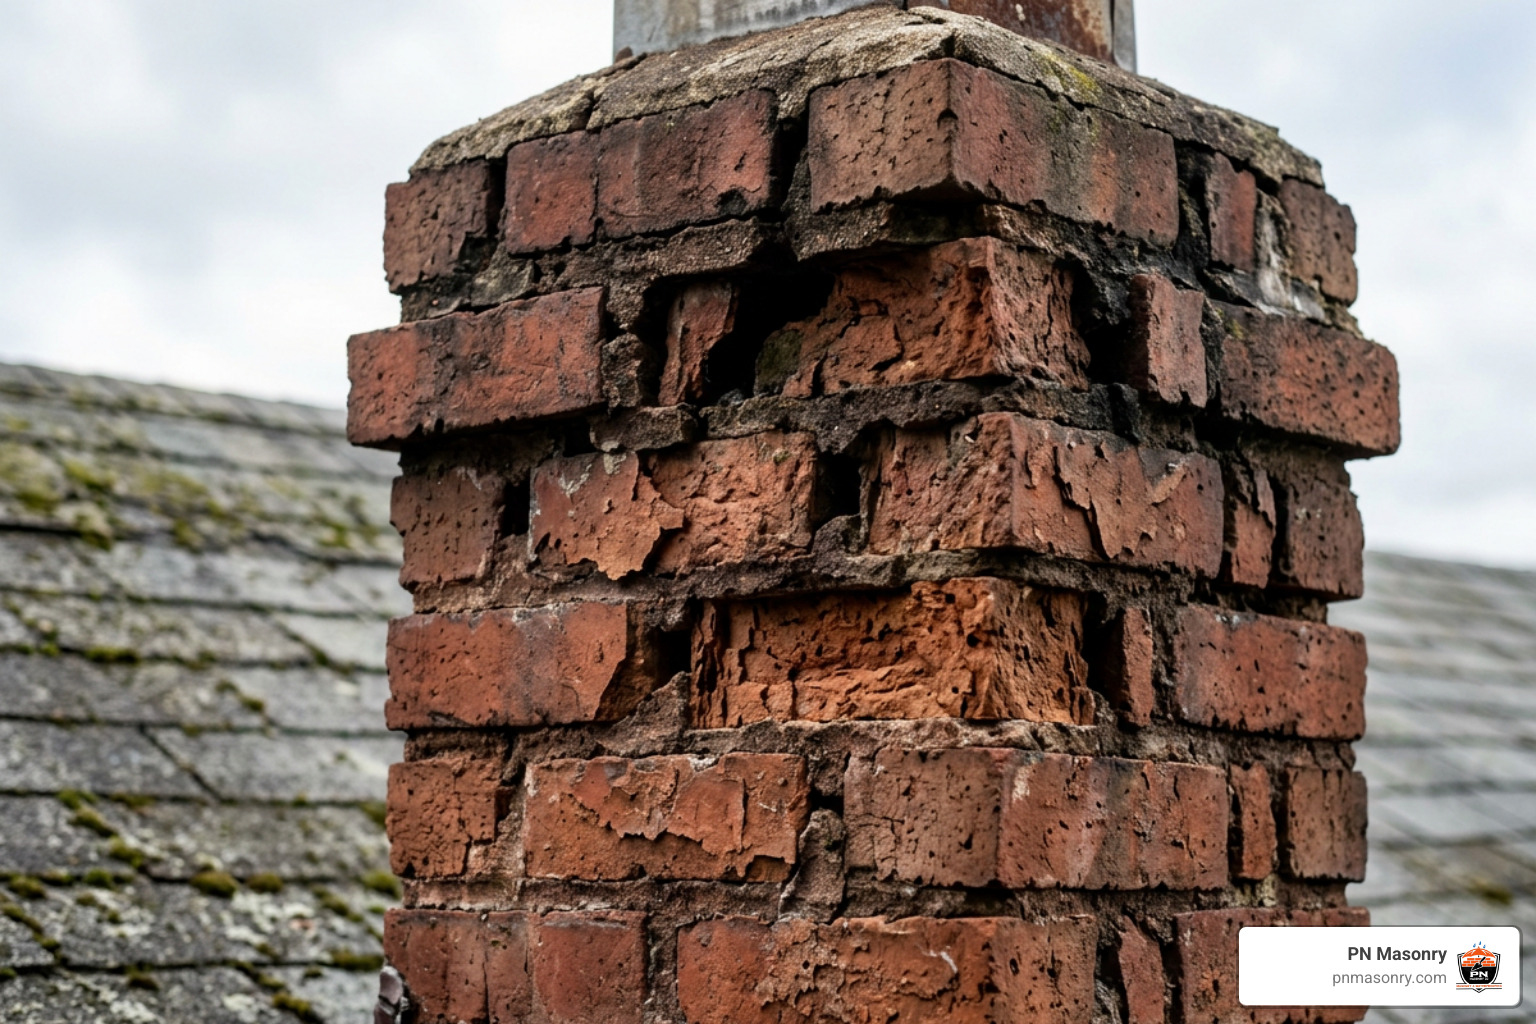
Evaluating a chimney requires careful visual diagnostics. Surface staining or slight joint recession might be straightforward to repair, but structural shifts threaten the entire structure. If you notice severe shifting or stack degradation, reviewing structural chimney repair protocols can help you understand the engineering steps necessary to stabilize historical masonry safely.
A vertical plumb check is an indispensable diagnostic step. If a stack leans more than 1 inch for every 10 feet of height, the underlying issue extends past surface masonry down into foundation settlement, framing rot, or expansive soil shift.
Structural and Cosmetic Signs Requiring Brick Chimney Restoration
Distinguishing between cosmetic wear and hazardous failure ensures repairs address the real root cause:
- Spalling Brick Faces: When water enters porous brick and freezes, the outward pressure pops the hardened outer crust off the unit. This exposes the soft, highly absorbent inner clay, accelerating structural decay.
- Deep Mortar Recession: Mortar joints eroded deeper than 1/2 inch allow rainwater to pool on brick ledges, softening the inner masonry structure.
- Vertical or Stepped Cracks: Cracks extending straight down through multiple brick units and joints signal foundation movement, seismic shift, or expanding clay soils under the footing.
- Efflorescence: A crystalline, white powdery deposit on the exterior brick shows that soluble salts are being carried out by migrating moisture. While the salt itself is harmless, its presence proves water is traveling through the stack.
- Stack Separation: A visible gap developing between the chimney and the home’s exterior wall indicates footing settlement that requires structural stabilization.
Evaluating Flue Liner Integrity and Internal Masonry
The exterior brickwork represents only half of the chimney system. The internal flue must safely contain toxic combustion gases, intense heat, and acidic condensation. In older homes, chimneys were often built with unlined brick flues or early clay tile systems that crack and shift over decades.
A Level 2 chimney camera inspection runs an optical feed from the crown down to the smoke chamber to locate hidden cracks, missing mortar joints, or shifted clay tiles. A compromised flue creates an immediate fire hazard by exposing combustible wall framing to direct heat and gases.

When internal walls show moisture staining or the fireplace throat deteriorates, consulting a masonry extraction and breast brick repair guide ensures that both internal firebox masonry and chimney breast bricks are properly addressed. Modern restoration frequently pairs exterior repointing with the installation of a UL-listed, insulated stainless steel flue liner, optimizing exhaust draft while isolating the historical brick from corrosive gases.
Mortar Selection: Why Historic Masonry Demands Lime-Based Formulas
The single most destructive mistake in historic brick restoration is using modern, hard Portland cement mortar on pre-war brickwork.
Historical brick produced before the mid-20th century was fired at lower temperatures, resulting in a softer unit with high vapor permeability and a compressive strength around 1,500 to 3,500 psi. Modern Portland cement mortars (like Type S or hard Type N) cure with extreme hardness—often between 1,800 and 3,500+ psi—and lack vapor breathability.
According to National Park Service Preservation Brief #2, the mortar in historic masonry must act as a sacrificial element. It needs to be softer and more vapor-permeable than the surrounding brick. When seasonal temperatures fluctuate, the mortar joint must flex slightly to accommodate thermal expansion.
If you lock soft, historic bricks between rock-hard Portland mortar joints, the brick cannot expand. Instead, the edges crush, moisture becomes trapped inside the clay, and the wrong mortar spalls the original brick within 3 to 7 winters.
| Mortar Classification | Average Compressive Strength (psi) | Vapor Permeability | Best Historic Application |
|---|---|---|---|
| Pure Lime Putty (Non-Hydraulic) | 200 – 500 psi | Extremely High | Pre-1900 soft-fired historical brick |
| Type K Mortar | ~75 psi | Very High | Fragile, historic restoration and preservation |
| Type O Mortar | ~350 psi | High | Pre-1930 interior and exterior historic masonry |
| Type N Mortar (Modern) | 750 – 1,800 psi | Moderate | Post-1940 structures with modern hard-fired brick |
| Type S Mortar (Modern) | 1,800 – 3,000+ psi | Low | Below-grade, retaining walls, CMU block only |
To identify your home’s original mortar, an acid test can be performed: submerging a small piece of original cured mortar in white vinegar causes significant bubbling if it has the high calcium carbonate content typical of historic lime mixes.
Sourcing and Matching Salvaged Period Bricks
When structural failure requires replacing broken units, modern off-the-shelf bricks rarely match. Historic bricks vary from modern modular dimensions, displaying subtle surface textures, irregular edges, and colors shaped by local clay pits and wood-fired kilns.
Restoring historic chimneys requires sourcing reclaimed period bricks from salvage specialists or specialized architectural yards. These salvage units generally cost between $4 and $5+ per brick, but they ensure exact dimensional compatibility and textural continuity.
To achieve an invisible repair, custom mortar matching is equally essential. We blend clean, sharp, washed sands of varying grain sizes with iron oxide pigments to match the weathered hue of the surrounding masonry joints.
The Step-by-Step Brick Chimney Restoration Process
Restoring elevated masonry requires strict adherence to safety protocols and precise restoration techniques.
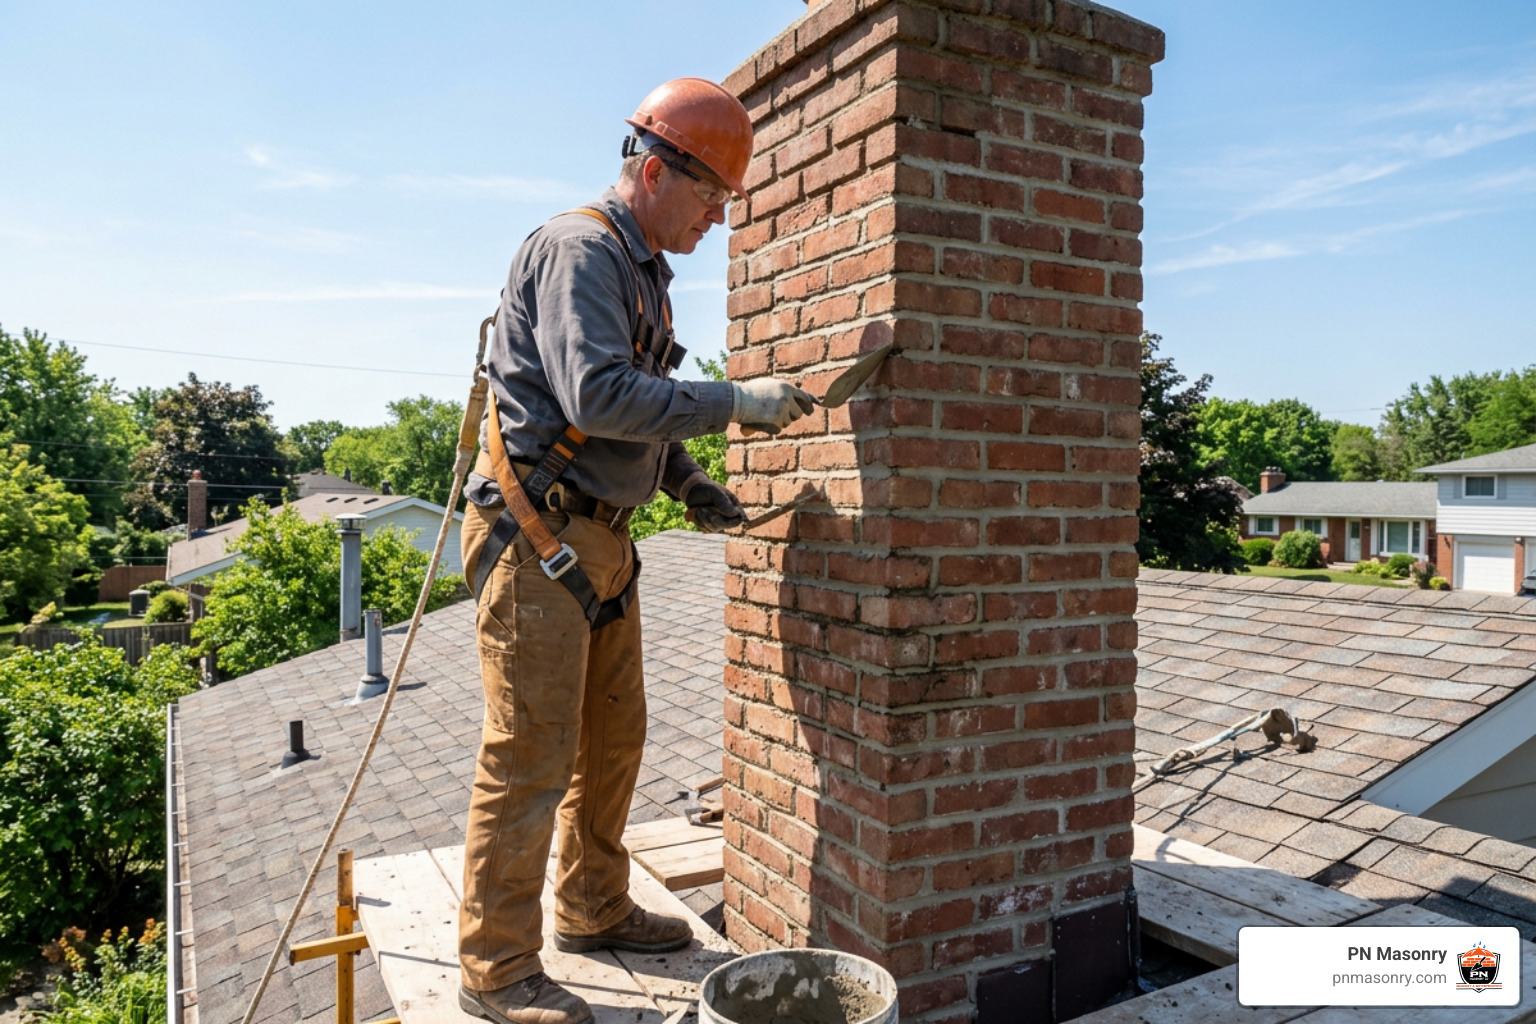
Before beginning roof-level work, safety harnesses, rope-grab systems, and sturdy roof staging must be secured. When removing old joints, certified respiratory protection (such as P100 respirators) and local dust-shroud extraction systems must be used to mitigate hazardous crystalline silica dust.
Tuckpointing and Mortar Application for Brick Chimney Restoration
Effective joint restoration requires a deliberate, step-by-step repointing sequence:
- Raking Out Old Joints: Using diamond-wheel tuckpoint grinders fitted with depth guards and vacuum shrouds, we score and remove decayed mortar to a minimum depth of 2 to 2.5 times the width of the joint (typically 3/4 inch to 1 inch). We finish near delicate brick edges with hand cold chisels to prevent nicking the historical clay.
- Cavity Cleaning and Pre-Wetting: We clear all dust using nylon brushes and clean water. Because dry historic brick rapidly wicks moisture out of fresh mortar—causing it to dry prematurely and crumble—we pre-dampen the open joints thoroughly.
- Mixing the Mortar: We prepare compatible Type O or lime-based mortar to a workable, peanut-butter consistency that holds its shape on a trowel without slumping.
- Layered Joint Packing: Using a mortar hawk and jointing tuck tools, we firmly pack the fresh mix into joints in consecutive layers no thicker than 1/4 inch, allowing each layer to reach thumbprint hardness before applying the next. This prevents shrinkage cracking.
- Tooling and Curing: Once the final layer is firm, we strike the joint with a rounded or concave jointer to compress the mortar and shed water. The new mortar must be misted and shaded over a 24- to 48-hour period to ensure proper curing strength.
For homeowners in need of specialized joint renewal, our dedicated team provides professional tuckpointing that matches historical mortar profiles while reinforcing wall integrity.
Repairing and Rebuilding the Chimney Crown
The chimney crown serves as the roof of the masonry stack, directing water away from the flue and exterior brickwork below.
Many historic chimneys feature thin, flat mortar washes smeared over the top brick course. These quickly shrink, crack, and channel water into the core of the chimney.
A permanent restoration calls for casting a dedicated, reinforced fiber-concrete crown. The crown should be poured with a minimum 15-degree downward slope to shed rain rapidly. It should also extend 2 to 2.5 inches beyond the outer brick perimeter, complete with an underside drip groove to prevent water from running back down the brick face.
If your crown exhibits structural cracking, our team provides comprehensive chimney crown repair to rebuild this vital line of defense.
Replacing Damaged Bricks and Partial Stack Rebuilding
When individual bricks show deep spalling, they must be removed without destabilizing the surrounding courses. Masons utilize a “support-first” extraction method:
- Drill a series of small 1/4-inch relief holes into the mortar perimeter of the damaged unit to release internal compressive tension.
- Chisel the deteriorated brick inward toward its core, taking care not to vibrate or lever against neighboring sound bricks.
- Clear the interior cavity of debris, pre-dampen the opening, apply a full bed of mortar to the bottom and side surfaces, slide in the matched replacement brick, and tool the joints flush.
When freeze-thaw cycles cause extensive multi-course failure above the roofline, dismantling and rebuilding that upper section of the stack is the safest long-term solution. Our specialists deliver dependable chimney rebuilding services to restore stability while honoring the property’s original architectural lines.
Installing Flashing and Step Counter-Flashing
Water leaks around the base of the chimney are frequently misdiagnosed as masonry failure when faulty roof flashing is the true culprit.
Flashing requires a two-part overlapping system:
- Base and Step Flashing: L-shaped metal pieces woven under each roofing shingle course and bent up along the vertical masonry face.
- Counter-Flashing (Cap Flashing): Metal strips with their top edges ground directly into the mortar joints (raglets), extending downward to overlap the step flashing.
Joints should be mechanically ground out, cleared, embedded with hemmed metal edges, and sealed with high-grade elastomeric polyurethane sealant rather than silicone or tar. Tar degrades and cracks under direct UV exposure within a few seasons.
When you notice interior ceiling stains near your stack, our dedicated chimney flashing repair isolates the root cause and restores watertight protection.
Waterproofing, Chimney Caps, and Long-Term Preservation
After completing all masonry and flashing repairs, the chimney requires long-term environmental protection.
First, install a high-grade 100% 304 or 316 stainless steel chimney cap. Unlike galvanized steel caps that rust after a few years, stainless steel withstands acidic flue gases, prevents spark discharge, blocks downdrafts, and keeps nesting animals out.
Second, treat the brick surfaces with a 100% vapor-permeable silane/siloxane-based water repellent. Film-forming acrylics or silicone sealers should never be applied to exterior masonry; they create a non-breathable plastic film that traps interior household vapor inside the brick, causing rapid spalling during winter freezes.
Applying breathable brick and block sealing creates a hydrophobic surface that sheds wind-driven rain while allowing internal moisture vapor to escape naturally.
We stand behind our restoration craft. Selecting a reputable contractor backed by comprehensive masonry warranty protection guarantees that your investment remains sound and defended for decades to come.
Frequently Asked Questions About Chimney Restoration
How much does professional chimney restoration cost compared to DIY repairs?
Basic DIY materials—such as crown sealers, breathable repellents, and an exterior cap—often cost under $300. However, minor unaddressed crown fractures or brick spalling can quickly escalate into extensive repairs exceeding $1,000 to $3,000 if water enters the stack core.
Professional crown rebuilds generally range from $800 to $2,500, while partial or full chimney rebuilds range from $5,000 to $15,000 depending on height, pitch, and materials. Hiring a qualified masonry contractor eliminates the risk of steep roof falls, ensures OSHA/EPA compliance, avoids costly material mismatches, and provides comprehensive structural warranties.
Why does modern Portland cement mortar damage historic brick?
Modern Portland cement mortar cures into a dense, rigid compound with high compressive strengths (1,800 to 3,500+ psi) and minimal vapor permeability. Historic soft-fired bricks (1,500 to 3,500 psi) need mortar that is softer and more permeable than the brick itself.
When modern Portland mortar is applied, it locks the historical bricks into a rigid matrix. Trapped moisture cannot escape through the mortar joint, and natural building movement crushes the brick faces. This mismatch leads to extensive brick spalling within 3 to 7 winter seasons.
When should individual bricks be replaced versus rebuilding the entire chimney?
If damage is isolated to fewer than 15–20% of the bricks, individual unit extraction and selective tuckpointing provide a lasting, cost-effective repair.
However, if the chimney is visibly leaning (greater than 1 inch off plumb per 10 feet), shows vertical stairstep cracking through the core, exhibits loose brick courses below the roofline, or has widespread flue liner collapse, a structural rebuild above the roofline is necessary to guarantee home safety and fire code compliance.
Conclusion: Preserving Architectural Heritage and Structural Safety
Restoring a historic brick chimney requires balancing structural masonry skills, period-accurate materials, and effective moisture protection. Addressing early warning signs—such as cracked crowns, loose mortar joints, and spalling brick—prevents minor weathering from developing into costly structural rebuilds.
Always ensure your restoration team respects historical preservation standards (such as NPS Preservation Brief #2) and strictly complies with the EPA RRP rule for pre-1978 lead-safe renovation practices.
For historic property owners seeking dependable craftsmanship, PN Masonry delivers expert residential and commercial masonry restoration. Whether you need precision tuckpointing, structural brick replacement, custom crown construction, or long-term waterproofing, our experienced team provides the specialized care your home deserves. Reach out today to schedule a comprehensive chimney assessment and protect your architectural heritage for generations to come.