
Choose Mortar That Is Softer Than the Brick
For most modern, above-grade brick walls, Type N mortar is the best mortar for brick repair. It provides a practical balance of strength and movement capacity, with a compressive strength of about 750 psi.
But do not choose mortar by strength alone. For a house built before roughly 1920, soft or handmade brick often needs a more breathable lime mortar instead. Using a hard Type S or Type M mix on old brick can trap moisture and force freeze-thaw damage into the brick faces.
Use this quick starting point:
- Modern exterior brick walls: Type N
- Soft, historic, or pre-1920 brick: True lime mortar, selected to match the original masonry
- Foundations, retaining walls, and high-load areas: Type S or Type M only when the masonry and design call for it
- Small cosmetic cracks: A repair cartridge may work, but it must still be compatible with the existing mortar
The right repair mortar should act as the wall’s sacrificial layer: it should manage moisture, accommodate small movement, and wear out before the brick does. That choice matters even more in Cook County, where wet weather and freeze-thaw cycles can turn a small failed joint into water intrusion, spalling, and loose masonry.
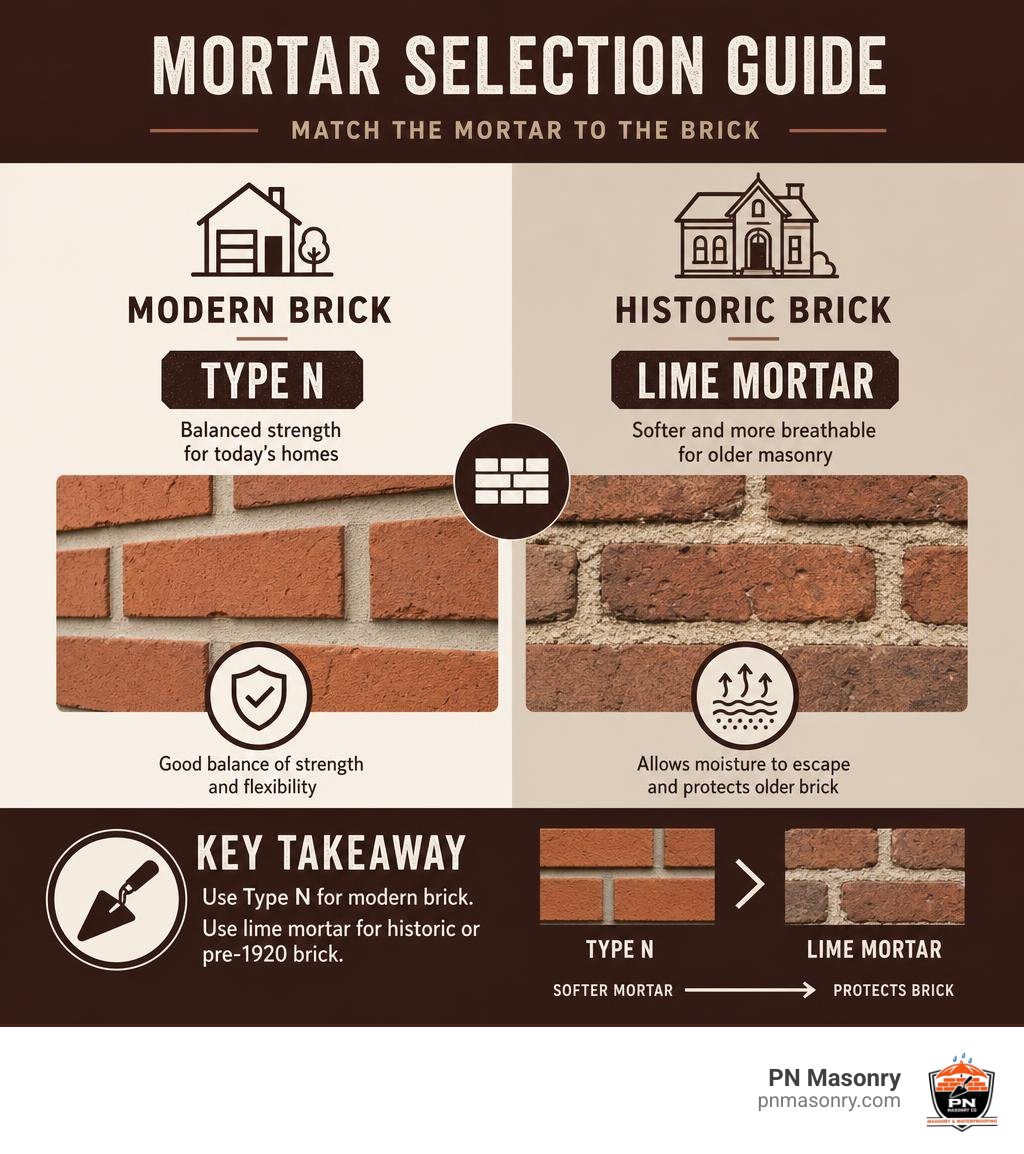
How to Choose the Best Mortar for Brick Repair Based on Strength and Flexibility
When repairing masonry joints, it is easy to assume that higher strength guarantees a longer lifespan. In masonry restoration, the exact opposite is frequently true. Mortar is engineered to serve as a sacrificial element within an assembly. It must remain slightly softer and more vapor-permeable than the surrounding masonry units so that thermal movement, seismic vibration, and moisture expansion relieve stress through the joint rather than fracturing the brick itself.
The American Society for Testing and Materials (ASTM) classifies standard cementitious mortars under ASTM C270. This classification establishes strict requirements for compressive strength, flexural bond, and material proportions.
| Mortar Classification | Average Compressive Strength (28-Day) | Typical Mix Ratio (Cement : Lime : Sand) | Flexibility (Elongation Capacity) | Primary Applications | Typical Cost (per 80-lb bag) |
|---|---|---|---|---|---|
| Type K | ~75 psi | 1 : 3 : 10–12 | 25% | Historic restoration, fragile stone, delicate interior brickwork | Specialty pricing |
| Type O | ~350 psi | 1 : 2 : 9 | 20% | Interior load-bearing partitions, soft early 20th-century brick | $10–$13 |
| Type N | ~750 psi | 1 : 1 : 6 | 15% | Exterior above-grade veneers, standard modern residential repointing | $12–$15 |
| Type S | ~1,800 psi | 2 : 1 : 8–9 | 10% | Below-grade foundations, retaining walls, high-wind seismic zones | $14–$18 |
| Type M | ~2,500 psi | 3 : 1 : 12 | 5% | Heavy structural footings, stone retaining walls, high compressive loads | $13–$16 |
| NHL 3.5 / PHL | Variable (~350–700 psi) | Pre-blended or 1 : 2.5–3 | High | Historic masonry, reclaimed brick facades, breathable restoration | Premium concentrate |
Choosing the appropriate blend requires balancing the compressive load of the wall against the modulus of elasticity of the brick.
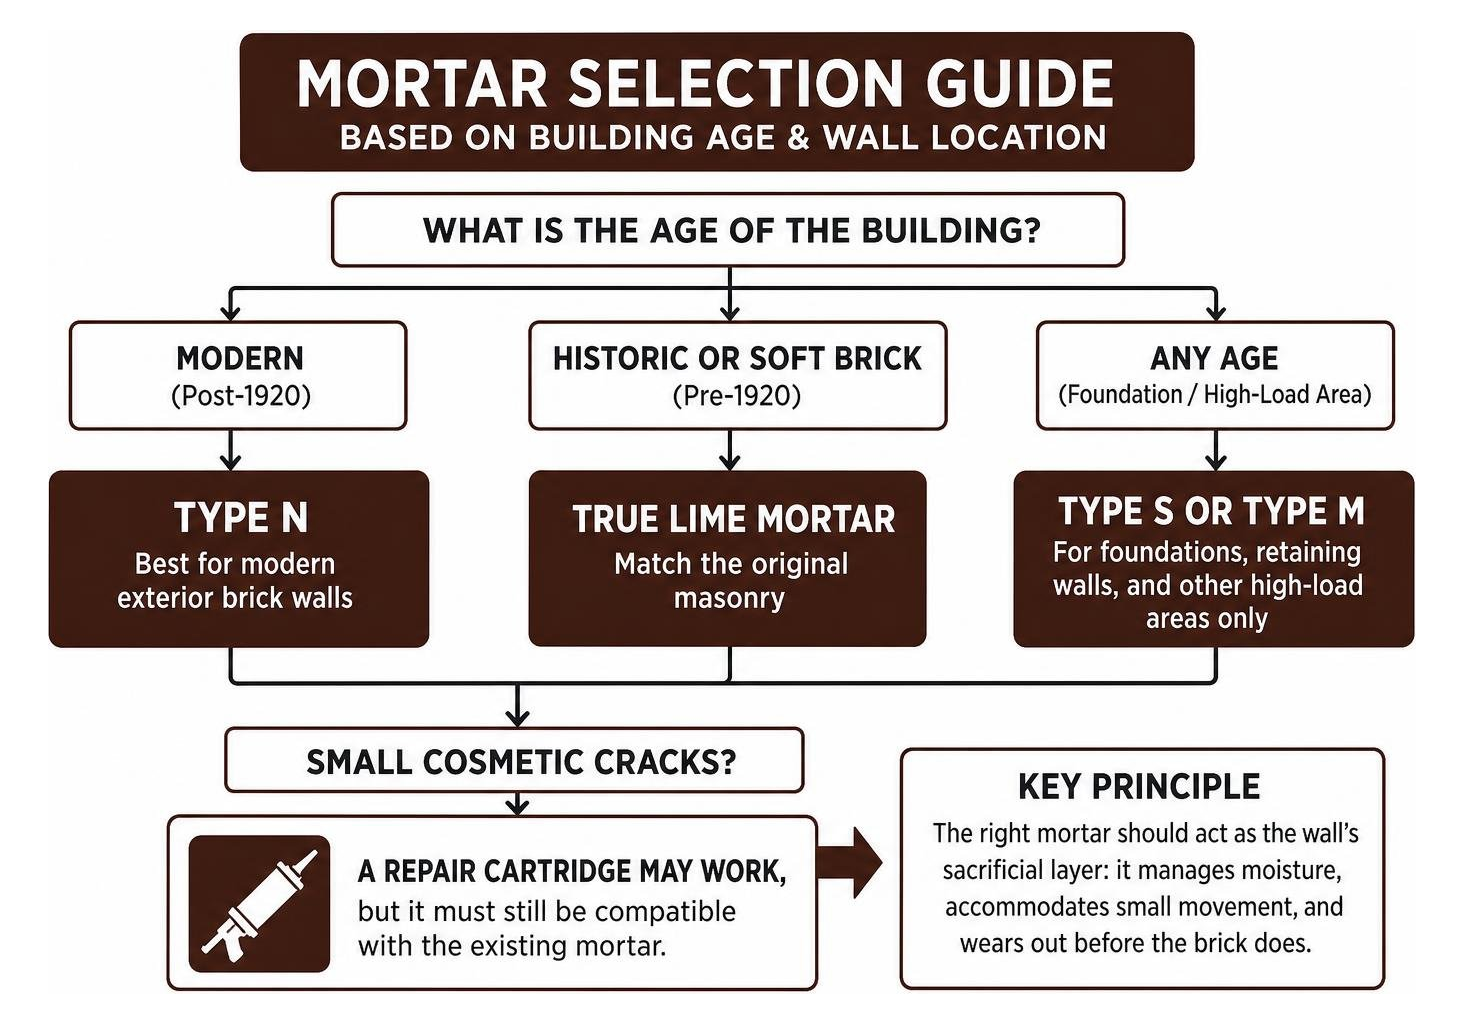
Type N Mortar: The Best Mortar for Brick Repair on Modern Homes
Type N is the standard mix for general residential construction and repair. Formulated with a balanced 1:1:6 volumetric ratio of Portland cement, hydrated lime, and masonry sand, it achieves a compressive strength of roughly 750 psi after a full 28-day cure.
Field data shows that Type N carries a 92% long-term success rate across more than 1,200 standard residential projects, lasting 25+ years in exterior applications. Its 15% flexibility rating allows it to absorb the typical thermal expansion cycles of post-1950 residential brick veneers without shearing.
For consistent quality on residential jobs, we often specify pre-blended Type N mortar formulations, which incorporate precise air-entraining agents that boost freeze-thaw durability. When field-mixing bagged Type N, adding approximately 1.2 gallons (4.5 L) of clean potable water per 30 kg bag and letting the wet mix rest for 1 to 2 minutes prevents dry pockets, ensuring an even, durable bond.
Type O Mortar: Lower Strength Mix for Soft and Early 20th-Century Brick
Type O mortar is a high-lime formulation achieving approximately 350 psi. With a classic 1:2:9 volumetric ratio, it offers 20% flexibility, making it an excellent candidate for low-load walls and transitional housing constructed between 1920 and 1950.
Type O provides sufficient load-bearing capacity for standard multi-wythe interior brick assemblies while maintaining a gentle, flexible grip on soft-fired clays. It has a historic repair success rate of approximately 90%. However, because it contains Portland cement, it lacks the full self-healing capacity of pure lime. In wet exterior environments exposed to harsh Midwest winters, Type O typically tops out at a service life of roughly 50 years. For dedicated exterior repointing, concentrates like ProMason Type N & Type O restoration mixes allow crews to calibrate lime proportions specifically for older exterior facades.
Type S and Type M Mortars: High-Load and Below-Grade Uses
Types S and M represent high-compressive-strength mixes designed for severe structural loads and below-grade moisture conditions:
- Type S (~1,800 psi): Formulated with high Portland cement content (2:1:8–9 mix), Type S provides extreme lateral strength and maximum tensile bond adhesion. It offers only 10% flexibility. It is required for retaining walls, parapet caps, foundation parging, and load-bearing masonry below the damp-proof course.
- Type M (~2,500 psi): Yielding a rigid cure with only 5% flexibility, Type M is reserved for heavy structural masonry, manholes, and foundational footings subject to severe hydrostatic pressures.
Using Type S or Type M on standard above-grade residential brick walls creates rigid, unyielding joints that force thermal stress directly into the bricks, causing face spalling. We restrict these mixes to structural retaining systems and commercial concrete block repair.
Hydraulic Lime Mortar (NHL & PHL): The Best Mortar for Brick Repair on Historic Masonry
True historic masonry constructed before 1920 relies on natural lime chemistry rather than modern Portland cement. Natural Hydraulic Lime (NHL) and Pozzolanic Hydraulic Lime (PHL) cure through a combination of hydraulic setting (reaction with water) and carbonation (absorbing atmospheric carbon dioxide over months).
Unlike modern Portland cement, pure lime mortars provide essential benefits for older structures:
- Autogenous Healing: When micro-cracks form within a lime joint, uncarbonated free lime dissolves in incoming rainwater and re-crystallizes across the crack, effectively healing minor damage naturally.
- Superior Vapor Permeability: Formulations like natural hydraulic lime NHL 3.5 wick trapped moisture up to two times faster than standard Portland-based mortars, keeping soft bricks dry.
- Low Compressive Modulus: Specialized pure pozzolanic PHL 2.0 mixes or ultra-low Type K mortars (~75 psi) yield up to 25% flexibility with a 95% historical preservation success rate.
A single 38.5-lb bag of pre-blended NHL 3.5 lays roughly 30 standard bricks or repoints 40 square feet of joints at 3/8-inch thickness, providing lasting moisture control for vintage facades.
Modern Brick vs. Historic Masonry: Understanding Breathability and Age Factors
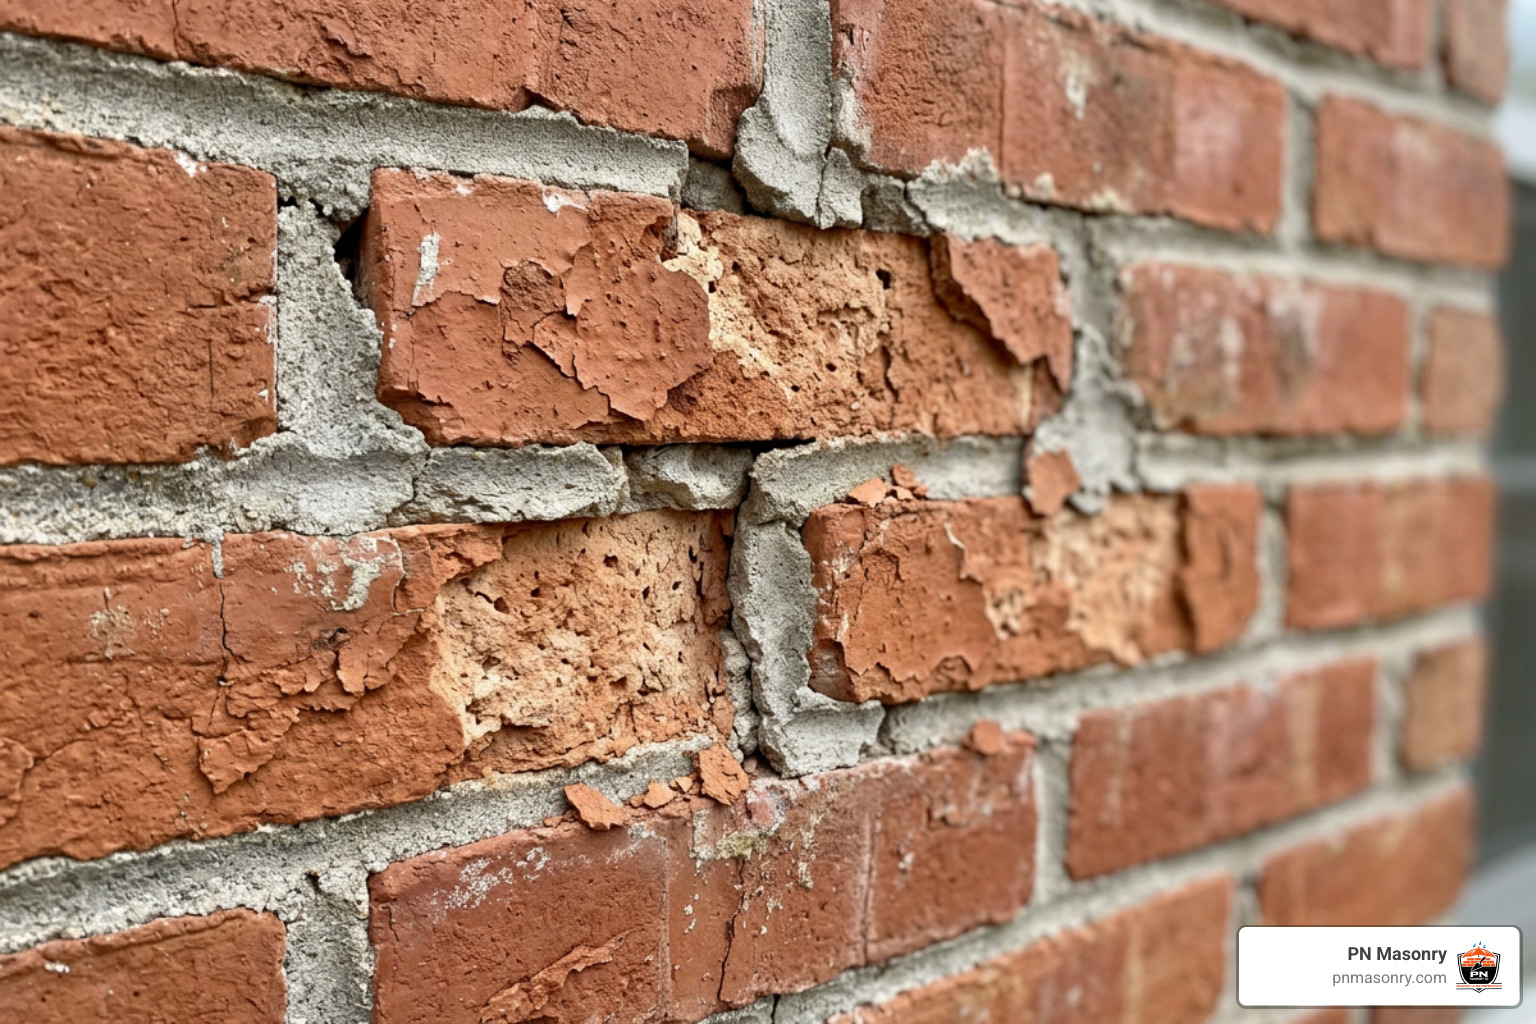
Understanding the construction era of a structure is critical when selecting mortar. Modern extruded brick manufactured after 1950 is fired at high temperatures (often exceeding 2,000°F), producing a vitrified, water-resistant unit that readily pairs with modern Type N mortar.
Historic brick, by contrast, was clamp-fired or low-fired in kilns with uneven heat. This left the brick soft, porous, and prone to rapid water absorption. These older buildings were engineered as “mass wall” breathing systems: moisture enters the wall assembly and evaporates out through vapor-permeable lime joints.
Moisture Vapor Transmission and Freeze-Thaw Resistance
When modern Portland cement is applied over soft historic brick, water enters the brick through exterior micro-fissures. Because the hard Portland mortar forms an impermeable vapor barrier, the water cannot evaporate through the joints.
When winter arrives, that trapped moisture freezes, expands by 9% in volume, and fractures the face of the brick—a destructive failure known as spalling.
To prevent this decay, historical restorations require vapor-permeable lime blends. Where bulk water penetration threatens sound modern masonry, homeowners can pair properly cured Type N joints with breathable brick and block waterproofing treatments to repel liquid water while maintaining vital internal vapor transmission.
Premixed Cartridges vs. Custom Sand-Lime Batches
For hairline cracks or isolated small-scale patches, cement-free polymer repair cartridges offer convenience. A single 310 ml cartridge fills roughly 600 cm³ of wall volume, skinning over in 24 hours and fully curing within 2 to 4 days.
However, standard pre-mixed DIY tubed mortars purchased from big-box retailers are up to 15% less durable over time than field-batched, site-specific sand-and-lime mortars. For broader repointing projects, custom-mixed batches allow precise control over binder ratios, sand grain distribution, and bonding agents. Adding a liquid acrylic admixture to custom site mixes can increase mechanical bond strength by 20%—particularly helpful when working on damp, shaded walls.
Essential Steps and Best Practices for Brick Repointing Projects
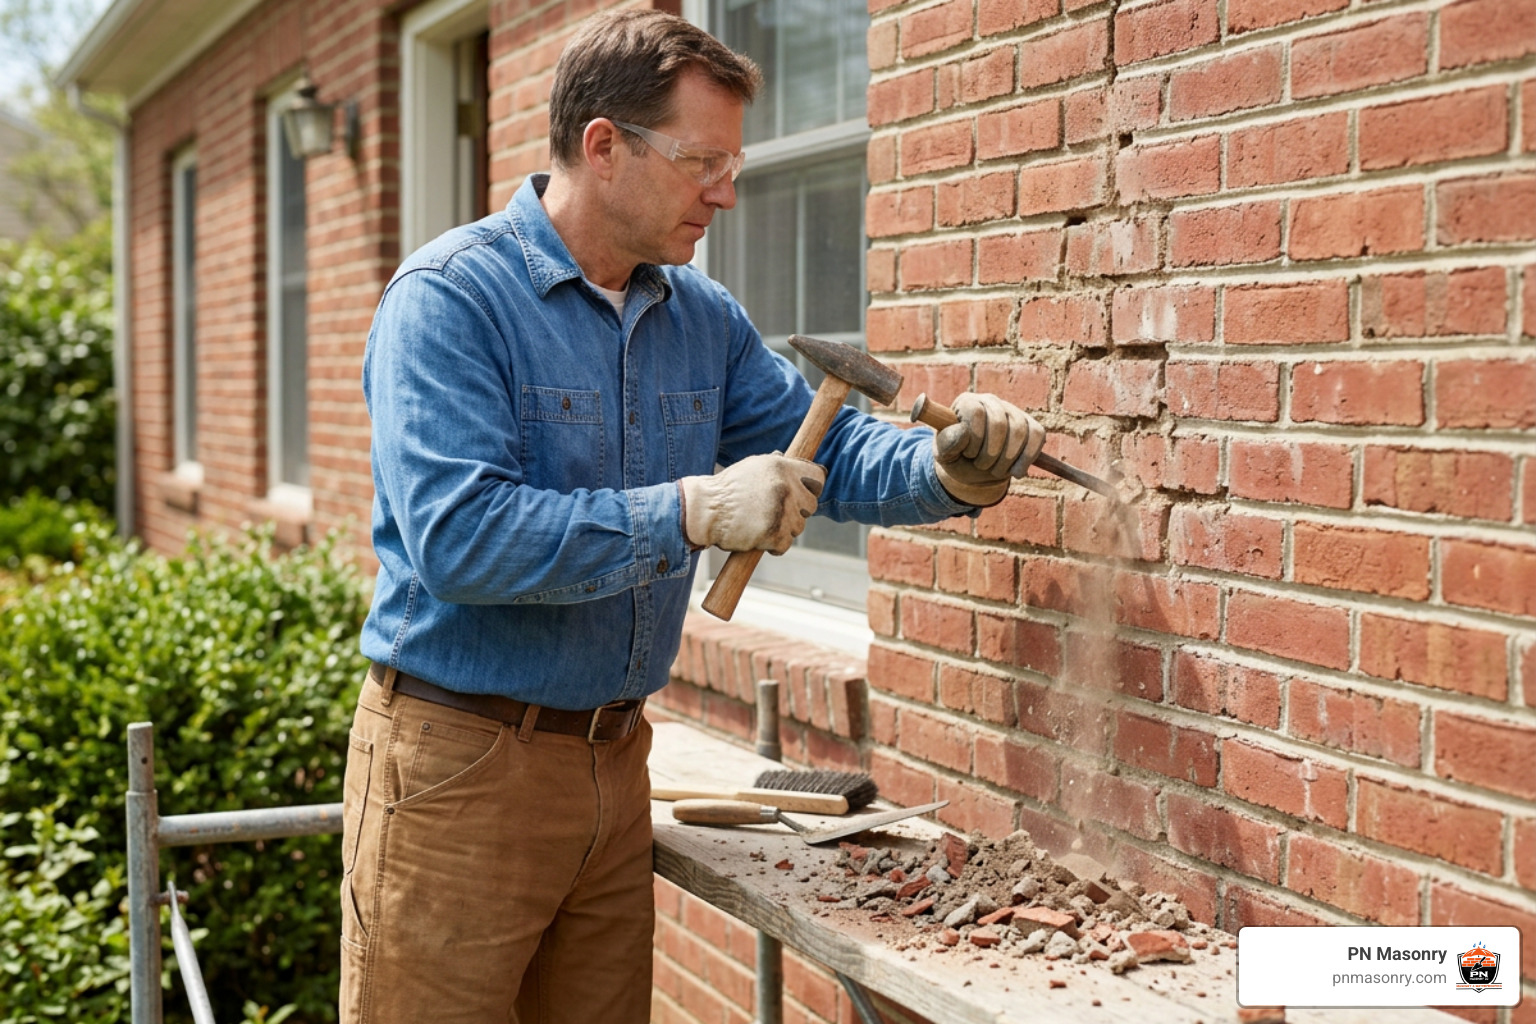
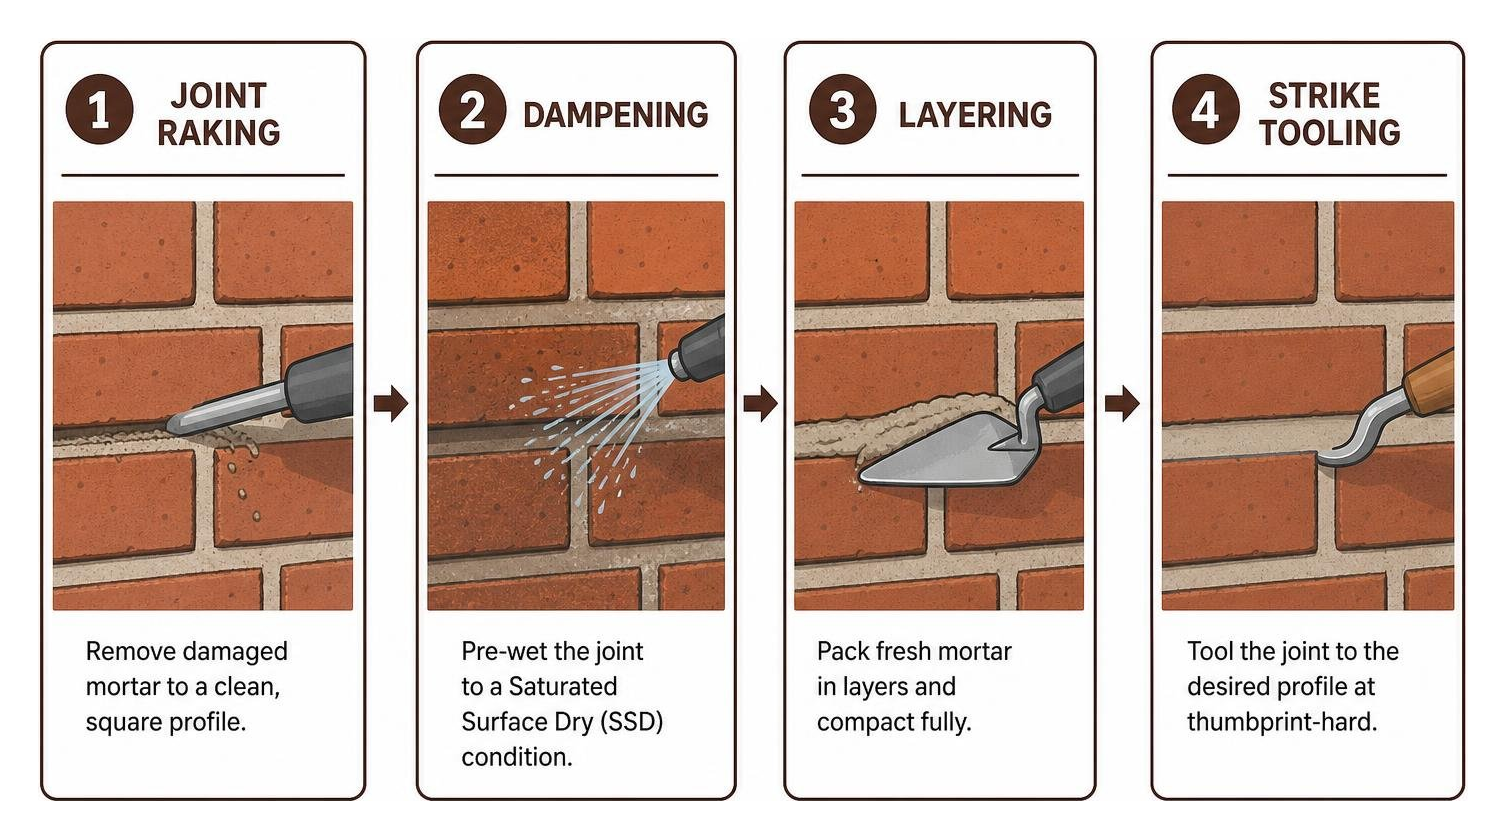
Repointing is a precise surgical process. Simply slapping fresh mortar over deteriorating joints (known in the trade as “buttering” or surface skimming) creates a shallow bond that will pop off after one or two seasonal cycles.
Proper Joint Raking and Depth Preparation
- Clear to Proper Depth: Remove all compromised mortar to a uniform depth equal to 2 to 2.5 times the width of the joint (for a standard 3/8″ joint, rake back 3/4″ to 1″).
- Cut Clean, Square Profiles: Use diamond-wheel tuckpoint grinders equipped with HEPA dust extraction for straight runs, switching to non-impact hand chisels near corners and fragile historic edges. Cut the back of the joint flat and square—never in a “V” profile—to provide a solid mechanical shelf for the new mortar.
- Flush and Pre-Dampen: Clean all dust and loose grit with low-pressure water. Pre-wet the open joint until it reaches a Saturated Surface Dry (SSD) condition. If the substrate is bone dry, it will pull mixing water out of the fresh mortar too quickly, causing weak, powdery joints.
- Structural Inspection: If you see stepped diagonal cracks around doors or windows, inspect the lintels before repointing. Raking alone will not fix structural settling; you may need professional work for replacing steel lintels and openings.
Matching Existing Mortar Color, Aggregate, and Profile
A seamless repair blends into the surrounding masonry without looking like an obvious patch. Achieving this requires matching three core elements:
- Aggregate Matrix: Sand accounts for roughly 70% of a cured mortar’s visual texture. Sift samples of the original mortar through mesh screens to match the local aggregate’s grain size, angularity, and color spread.
- Pigment and Carbonation: Modern Portland cures to a cold, industrial blue-gray, whereas historic lime cures to a warm cream or buff white. Use inorganic iron-oxide mineral pigments, calculating tint percentages based strictly on the dry weight of the binder.
- Tooling the Profile: Strike the joint profile (concave, flush, raked, or beaded) when the wet mortar is thumbprint-hard. Tooling too wet draws excess water and cement paste to the surface, creating a light, shiny glaze. Tooling too dry leaves micro-gaps along the top brick edge. To highlight the original facade character, property owners frequently invest in professional tuckpointing to restore sharp, uniform joint lines.
Common Brick Repair Mistakes to Avoid
Incompatible mortar repairs cause thousands of dollars in hidden damage. Correcting prior, improper mortar work has saved clients $5,000 or more compared to the ongoing costs of continuously patching spalled brick faces.
Watch out for these common repointing missteps:
- Using Cement-Only Mixes: Leaving out hydrated lime produces an unworkable, brittle mortar with zero elasticity. Lime is what gives wet mortar its smooth, spreadable body and allows cured joints to flex.
- Over-Hardening Soft Brick: Applying Type S or Type M mortar to antique, low-fired brick guarantees perimeter spalling and corner fracturing under seasonal freeze-thaw cycles.
- Skipping Joint Preparation: Spreading a 1/8-inch veneer of new mortar over powdery, unraked joints guarantees early delamination.
- Aggressive Acid Washing: Using concentrated muriatic acid on freshly pointed walls etches the mortar surface, bleaches pigments, dissolves lime binders, and can permanently burn brick faces. Use neutral pH specialty restoration washes instead.
- Ignoring Cold-Weather Curing: Placing cementitious mortar when temperatures dip below 40°F (5°C) halts chemical hydration. Water in the mix freezes, expanding and destroying the bond strength before it sets.
When widespread structural movement or broad surface erosion has degraded an entire building elevation, patching individual joints is no longer enough. Long-term stability calls for comprehensive brick facade restoration to restore the whole wall system.
Frequently Asked Questions About Brick Mortar Repair
Can I use Type S mortar on a standard residential exterior wall?
No. Type S mortar delivers approximately 1,800 psi of compressive strength, which is too rigid for typical above-grade residential brick veneers. The Brick Industry Association recommends Type N mortar (~750 psi) for above-grade exterior walls because its balanced flexibility absorbs seasonal building movement without damaging the brick.
How do I know if my brick needs lime mortar instead of cement mortar?
If your home was built before 1920, it almost certainly was laid with a high-calcium or hydraulic lime mortar. You can perform a simple field scratch test: lightly scrape an undisturbed joint with a penny or a key. If the mortar easily powders and crumbles without heavy force, it is a soft lime mortar that should be repaired using pure NHL or PHL lime blends.
What is the correct water-to-mix ratio and curing time for repointing mortar?
Properly mixed repointing mortar should have the workable consistency of thick peanut butter or damp brown sugar—it should hold its shape on an inverted trowel without slumping.
For standard pre-blended 30 kg bags, start with roughly 1.2 US gallons (4.5 L) of clean water. Allow the mixed batch to rest for 1 to 2 minutes so the lime hydrates completely.
Once placed, keep the new joints lightly misted and damp-cured for 48 hours, protecting them from direct sunlight, driving rain, and freezing temperatures for at least 7 days. Full ASTM design strength is reached at 28 days.
Conclusion
Every successful brick repair project comes down to one core rule: the mortar must always work in harmony with the brick, not against it. Modern post-1950 homes perform best with flexible, weather-tested Type N mortar, while vintage pre-1920 architecture requires the breathability and self-healing nature of natural hydraulic lime.
Taking the time to remove old joints to a clean 3/4-inch depth, match original sand aggregates, and properly damp-cure your mix ensures your repairs will protect your building for decades.
Whether you are restoring a vintage residential bungalow or managing structural block across commercial facilities, our team at PN Masonry delivers experienced, high-durability masonry restoration throughout Cook County, Illinois. Protect your property’s value, stop active moisture intrusion, and restore structural integrity by contacting our masonry specialists today.