
Assessing Damage: Surface Fissures vs. Structural Failure
A broken chiminea can often be salvaged without buying a replacement when the damage is limited to non-structural cracks. Hairline and moderate surface fissures can usually be repaired with high-temperature refractory cement and a gradual tempering schedule. However, a chiminea with a detached chimney neck, a crushed base, or multiple intersecting fractures should be retired or repurposed because those failures create a serious fire hazard.
Before diving into repairs, you need to understand the difference between a superficial cosmetic issue and a dangerous structural failure. Clay and terracotta are porous materials that naturally expand and contract as temperatures change. However, when heat builds unevenly or moisture freezes within the clay wall, the material fractures.
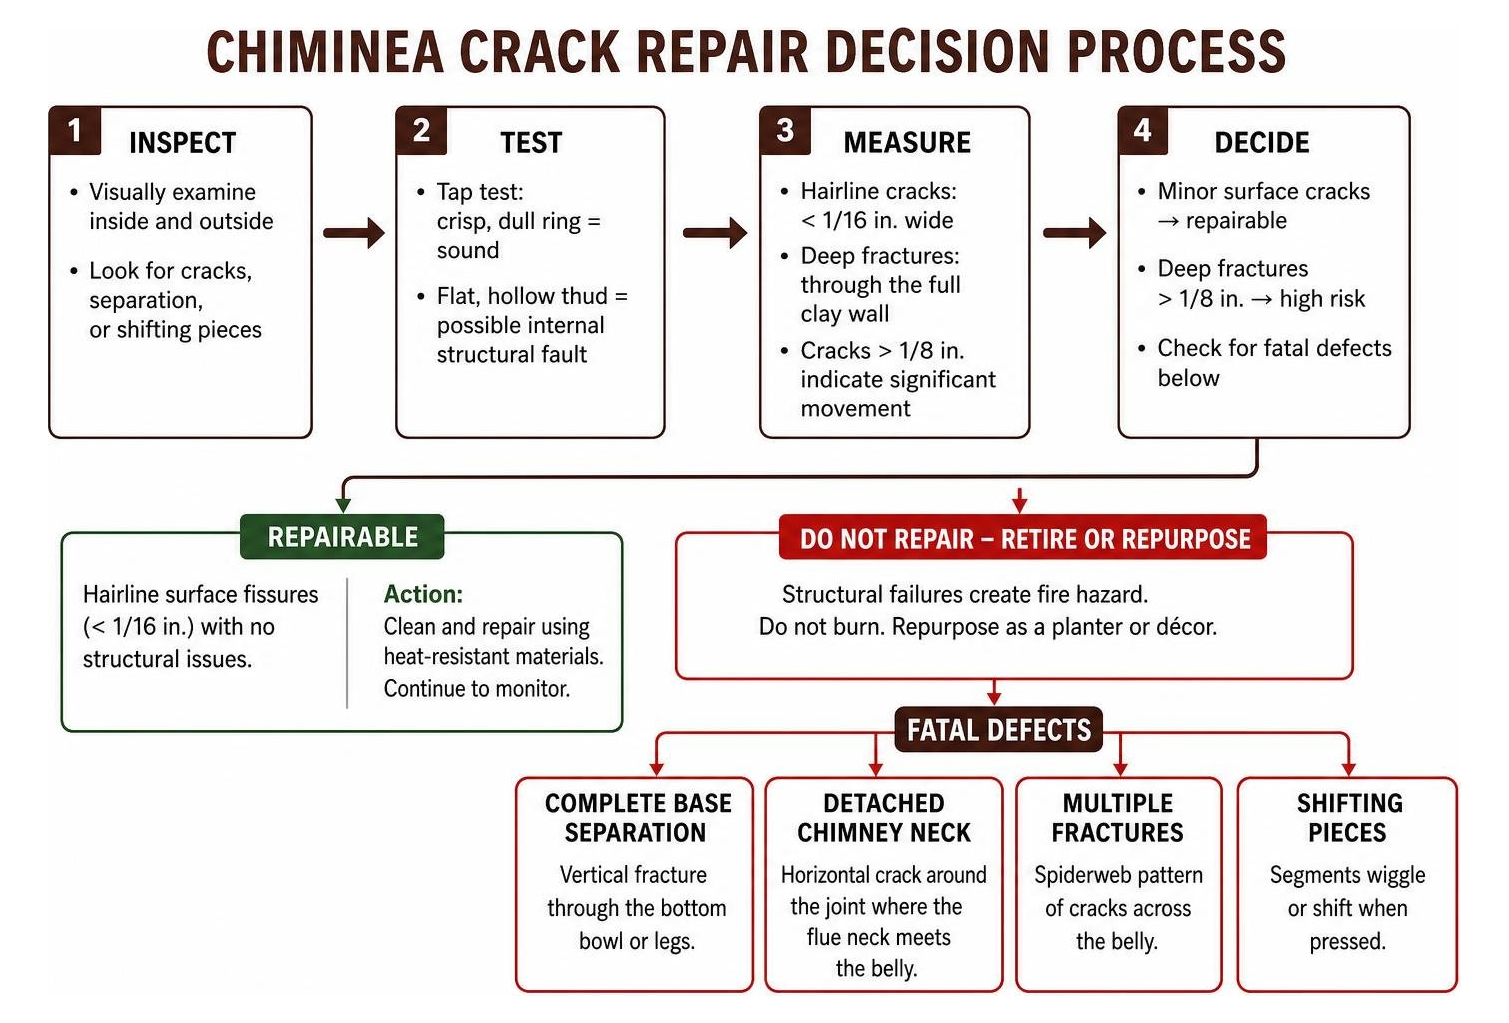
Evaluating your chiminea requires a close visual inspection and a quick physical assessment. We recommend running a simple “tap test”: gently rap the clay body with your knuckles or a small wooden dowel. A sound, uncompromised body produces a crisp, dull ring, whereas a unit harboring hidden internal structural faults yields a flat, hollow thud.
Hairline Cracks vs. Deep Fractures
Hairline cracks are thin, shallow surface fissures less than 1/16 inch wide. These often occur naturally on the outer clay envelope or within the interior kiln wash due to normal heating cycles. In fact, interior kiln cracks are less likely to expand aggressively than exterior cracks because the direct radiant heat tends to keep the internal surface evenly expanded during use.
Deep fractures, however, represent full-thickness breaches where the crack travels entirely through the clay wall. You can detect these by placing a bright flashlight inside the fire bowl at night; if distinct slivers of light penetrate the outer shell, you are dealing with a full fracture.
Cracks wider than 1/8 inch indicate significant movement and structural weakness. When a fracture reaches this size, the interlocking clay particles have separated, meaning the chiminea can no longer distribute heat stress evenly across its body.
When Chiminea Crack Repair Is Not Safe: Structural Failures
Not every chiminea can or should be saved. As masonry professionals who build and restore fireplaces outdoor grills for long-term safety, we always emphasize structural integrity over quick fixes. Attempting to patch a severely compromised unit creates a real fire hazard on your patio.
You should retire or repurpose your chiminea (for example, as a decorative garden planter) if you notice any of the following fatal defects:
- Complete Base Separation: A vertical fracture running straight through the bottom bowl floor or across the supporting legs.
- Detached Chimney Neck: A horizontal crack circling the entire joint where the flue neck meets the belly. If this fails during a burn, the heavy chimney top can tumble backward.
- Multiple Intersecting Fractures: A “spiderweb” network of cracks across the belly indicating the clay has degraded throughout.
- Shifting Pieces: Segments that wiggle or shift when lightly pressed, meaning the chiminea has lost its self-supporting compression.
Choosing the Right Heat-Resistant Repair Materials
Selecting the proper repair compound is the difference between a patch that lasts for years and one that fails during your next gathering. A standard wood-burning chiminea operates at interior temperatures between 600°F and 800°F, with localized hot spots reaching past 1,000°F.
Standard hardware adhesives, household silicone caulks, and standard home-repair epoxies fail at temperatures under 250°F. When exposed to open flames, these materials melt, burn, or off-gas toxic, acrid fumes.
| Repair Material | Continuous Temp Rating | Best Use Case | Cure Mechanism | Durability / Longevity |
|---|---|---|---|---|
| Refractory Cement | 2,000°F – 3,000°F | Direct flame zones, clay fire bowls, internal fissures | Air-dry (24–72 hrs) + heat-set tempering | Excellent (2–5+ years) |
| High-Temp Epoxy (e.g., ExtremeHeat) | 1,000°F – 2,400°F | Outer hairline cracks, reattaching cast iron fragments | Chemical cure (24 hrs) | High (1–3 years) |
| Automotive Heat Putty / Bond | 500°F – 1,000°F | Exterior decorative filling, non-structural gaps | Air-dry & sanding | Moderate (1–2 seasons) |
| Standard Portland Cement | Under 400°F | Not recommended (spalls and degrades under direct flame) | Chemical hydration | Very Poor (fails quickly) |
Clay and Terracotta vs. Cast Iron Materials
Clay and cast iron respond very differently to fire. Clay expands slowly and holds heat through thermal mass, while cast iron expands quickly and conducts heat instantly.
- For Clay & Terracotta: Refractory cement or specialized firebox mortar is the gold standard. These ceramic-based binders closely match the coefficient of thermal expansion of natural earthenware, meaning the patch expands and contracts at roughly the same rate as the surrounding clay.
- For Cast Iron Units: A dedicated high-heat, metal-filled epoxy or furnace paste rated above 1,000°F is necessary to bridge metal gaps.
Tools and Materials for Clay Chiminea Crack Repair
To complete a professional-grade patch on a clay or Mexican earthenware chiminea, assemble these essential tools:
- High-temperature refractory cement (rated for 2,000°F+)
- Wire brush and medium-grit sandpaper (80 to 120-grit)
- Small chisel or abrasive rotary tool (to open tight cracks)
- Putty knife and margin trowel
- Shop vacuum or compressed air
- Spray bottle filled with clean water
- Acetone or denatured alcohol for surface degreasing
- Stainless steel wire mesh or adjustable stainless steel band clamps (for structural stabilization)
- High-temperature silicone or breathable brick block sealing waterproofing sealer for external moisture protection once fully cured
Step-by-Step Chiminea Crack Repair Process
Thorough surface preparation is critical. Industry data shows that 90% of chiminea repair failures are caused by poor cleaning rather than the adhesive itself. Soot, wood ash, and grease form a barrier that prevents refractory cements from bonding to porous terracotta.
Follow this step-by-step method for a durable, long-lasting repair:
Surface Cleaning and Crack Undercutting
- Scrub and De-soot: Use a stiff wire brush to aggressively remove all soot, loose clay flakes, and mineral deposits along both the exterior and interior faces of the fracture.
- Vacuum the Joint: Use a shop vacuum to clear fine dust from deep within the fissure.
- Mechanically Undercut the Crack: If the crack is narrower than 1/16 inch, refractory mortar cannot easily penetrate it. Use a triangular hand file, small cold chisel, or rotary bit to gently widen the crack into a slight V-shaped groove (roughly 1/8 inch wide). Beveling the edges provides a mechanical “tooth” that locks the mortar in place when under heat stress.
- Degrease the Surface: Wipe down the repair path with acetone to dissolve any residual tree sap or fire soot oils, then allow it to flash dry.
- Pre-Dampen the Clay: Clay is thirsty. If you apply wet refractory mortar to bone-dry terracotta, the dry clay will immediately suck the water out of the patch, causing the repair to crumble before it cures. Mist the crack lightly with water from a spray bottle until damp, but not dripping wet.
Applying Refractory Mortar and Reinforcements
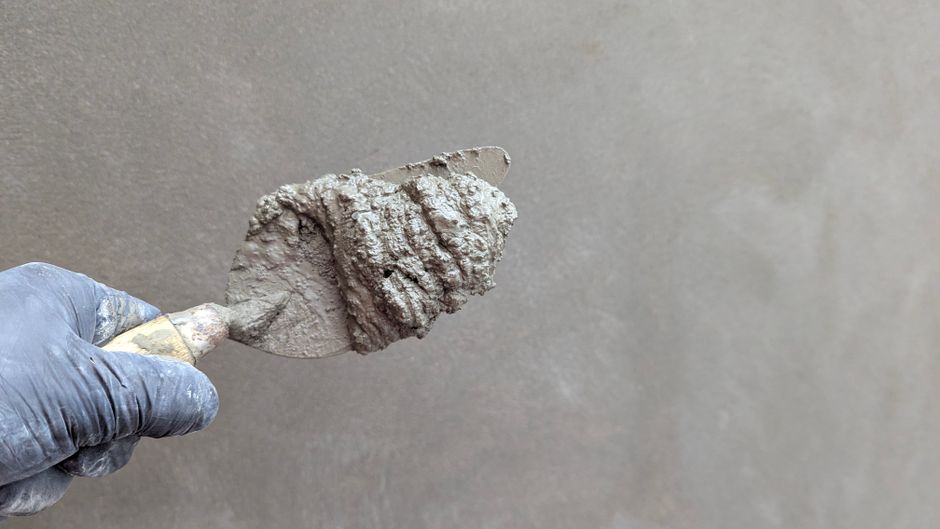
- Mix the Mortar: Mix your refractory cement until it achieves a smooth, workable consistency—much like thick peanut butter.
- Deep Injection / Packing: Using a flexible putty knife, force the mortar deep into the prepared V-groove. Do not simply spread it over the top like frosting; pack it firmly to eliminate internal air pockets.
- Layered Application: For deep fractures, apply the mortar in two stages. Press a base layer into the center of the break, let it tack up for 30 minutes, then apply the finish layer flush with the outer wall.
- Reinforcing Large Fractures: If the crack exceeds 1/8 inch or extends down the main belly, reinforcement is critical to prevent future stress fractures:
- Internal Wire Mesh: Embed small strips of stainless steel hardware cloth directly into the wet mortar along the interior wall.
- External Band Clamping: For horizontal or perimeter fractures, secure an adjustable stainless steel band clamp around the outside circumference of the chiminea belly. Tighten it snugly to hold the pieces in compression while the cement cures.
- Feather and Smooth: Smooth the wet cement using a damp sponge or margin trowel, feathering the edges flush with the surrounding terracotta body.
Curing, Tempering, and Long-Term Maintenance
Applying the patch is only half the battle. Curing the patch requires careful patience. Refractory mortars require both a chemical air-dry phase and a slow thermal cure to achieve their rated strength.
The Critical Multi-Day Tempering Fire Schedule
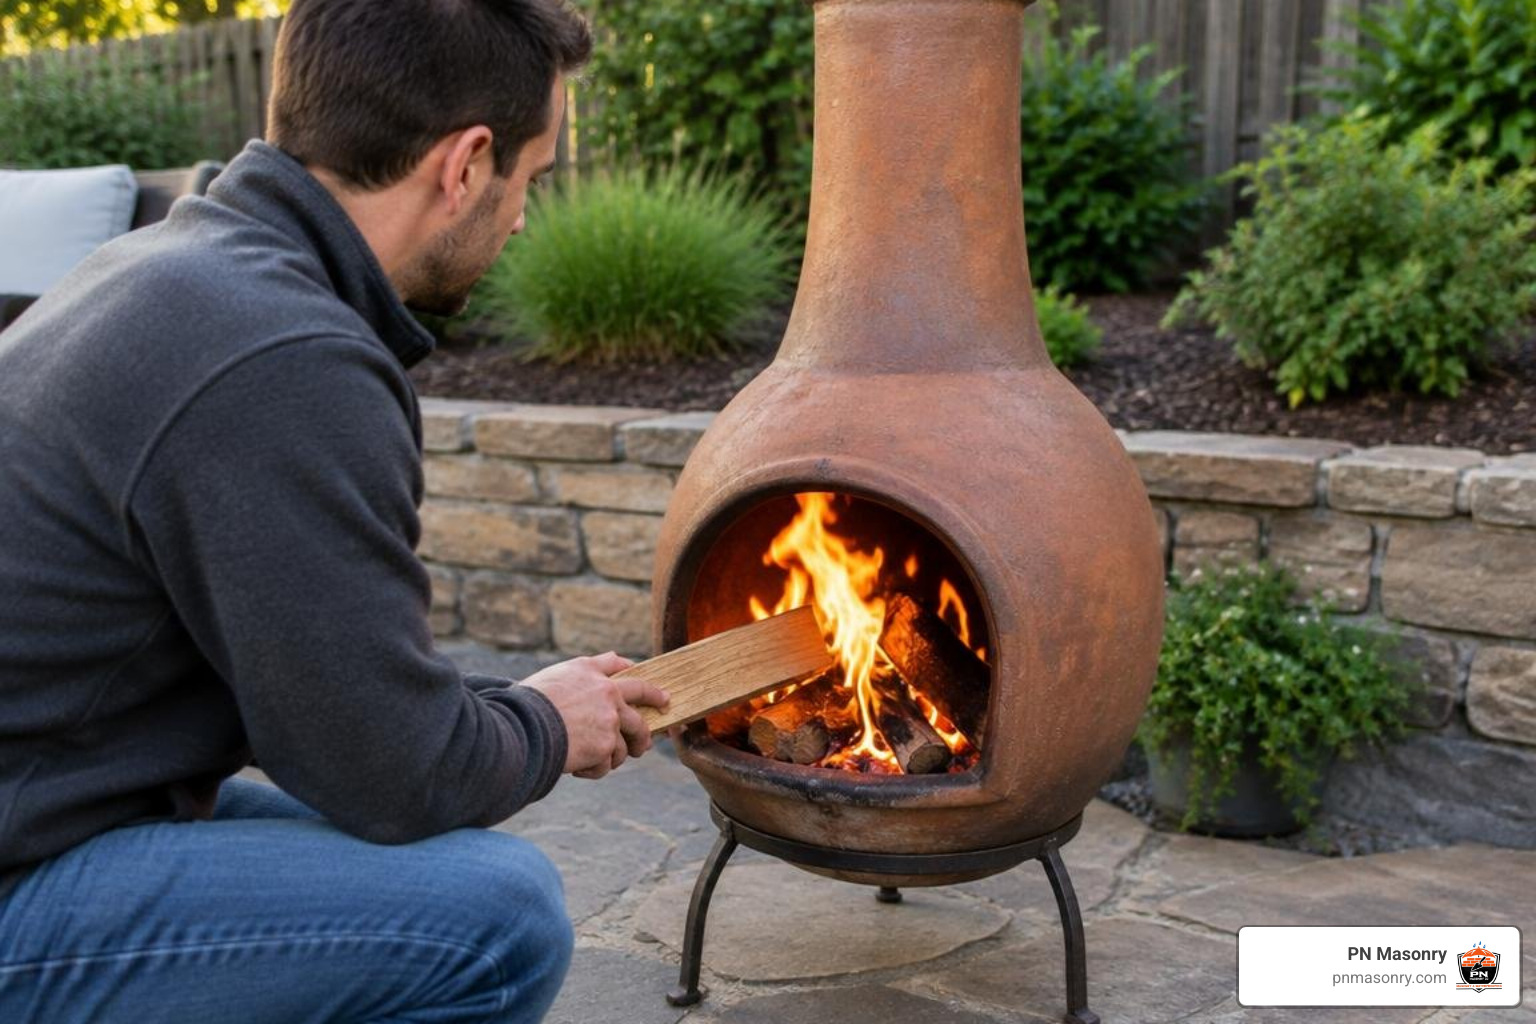
Rushing straight to a roaring bonfire after patching will boil residual moisture trapped within the repair, causing steam expansion that can blow the patch right off the clay. The tempering fire (curing) process requires several days of gradually increasing heat to reach full structural strength:
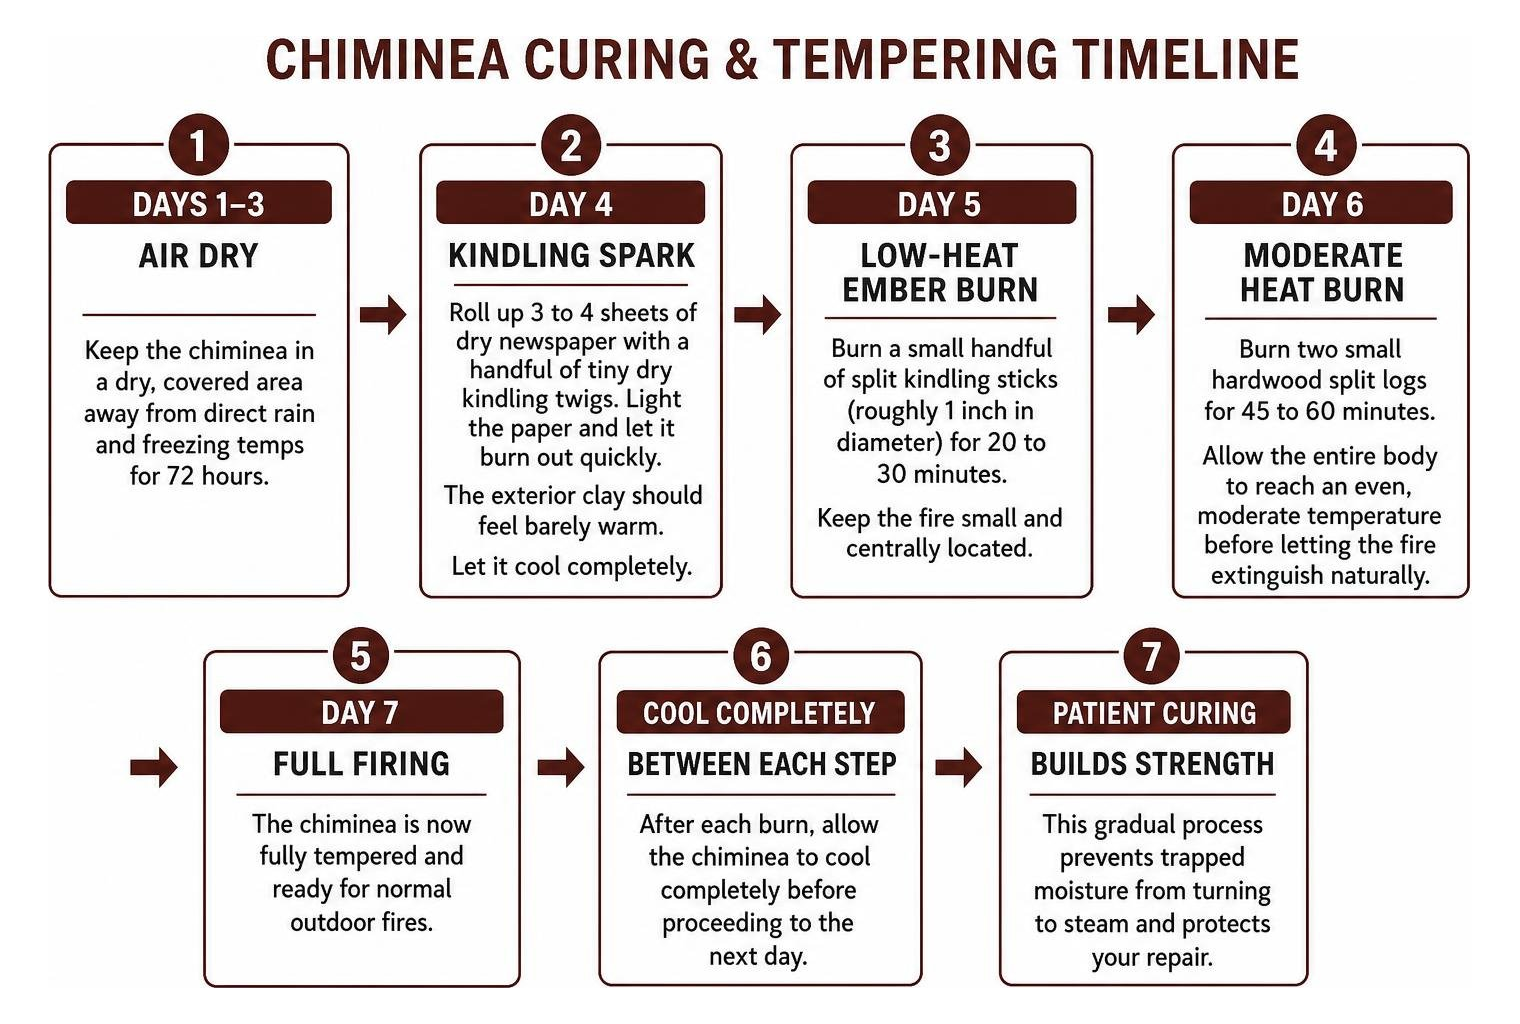
- Days 1 to 3 (Air Dry): Keep the chiminea in a dry, covered area away from direct rain and freezing temperatures for 72 hours. This lets moisture evaporate naturally without artificial heat.
- Day 4 (Kindling Spark): Roll up 3 to 4 sheets of dry newspaper with a handful of tiny dry kindling twigs. Light the paper and let it burn out quickly. The exterior clay should feel barely warm to the touch. Let it cool completely.
- Day 5 (Low-Heat Ember Burn): Burn a small handful of split kindling sticks (roughly 1 inch in diameter) for 20 to 30 minutes. Keep the fire small and centrally located.
- Day 6 (Moderate Heat Burn): Burn two small hardwood split logs for 45 to 60 minutes. Allow the entire body to reach an even, moderate temperature before letting the fire extinguish naturally.
- Day 7 (Full Firing): The chiminea is now fully tempered and ready for normal outdoor fires.
Safe Operation, Cooking Restrictions, and Longevity
A properly repaired clay chiminea will reliably provide 2 to 5 years of additional service when cared for correctly.
To maximize the life of your repaired unit, keep these practical guidelines in mind:
- Maintain a Protective Sand Base: Always keep 2 to 3 inches of clean masonry sand or pea gravel in the bottom of the fire bowl. This insulates the base of the chiminea from direct coal heat and prevents bottom fractures.
- Never Use Water to Extinguish Fires: Quenching flames with a garden hose or bucket of water causes immediate thermal shock that will shatter both the patch and the surrounding clay. Always let fires burn down to ash naturally.
- Cover Your Chiminea: Use a breathable, waterproof canvas cover whenever the unit is not in use. Freezing rain absorbed into unsealed clay causes winter freeze-thaw cracking.
- Seasonal Maintenance: Inspect the patch every spring. Seal minor surface fissures with a thin refractory slurry, and consider applying a breathable exterior sealant to keep rainwater out of the clay pores.
For built-in outdoor features, proper flashing and structural masonry maintenance are equally essential. If you ever need help with complex residential chimney work, exploring our broader chimney services can help you keep your home’s permanent heating systems running safely year-round.
Frequently Asked Questions About Chiminea Repair
Can I still cook or grill on a chiminea repaired with refractory mortar?
We do not recommend direct food contact (such as grilling meat directly over the opening or setting food onto the patch) after completing a repair. While fully cured refractory cement is chemically stable at high heat, industrial adhesives and bonding putties can off-gas trace compounds or shed fine silica particulates during heavy burns. Cooking via enclosed cookware (such as a cast iron Dutch oven set carefully inside) is generally fine, but avoid cooking directly on open grills attached to a patched chimney.
Why did my chiminea crack again after lighting the first fire?
The two most common reasons a repaired crack splits open again are trapped moisture and thermal shock. If the refractory mortar did not have a full 72 hours to air-dry, or if the unit absorbed rain right before being lit, the water inside rapidly converts to steam, expands, and breaks the bond. Skipping the multi-day tempering fire schedule and lighting a large fire too quickly is another frequent cause of failure.
Is it worth repairing an inexpensive clay chiminea versus buying a new one?
If your chiminea holds sentimental value, features unique artisanal artistry, or simply has a clean hairline fracture, spending $15 to $25 on high-temperature refractory cement and an afternoon of repair is well worth the effort. However, if the base is crushed, the neck has sheared off completely, or the unit was an inexpensive mass-market model, replacing it is usually safer and more practical than attempting a major rebuild.
Conclusion
A cracked chiminea does not have to mean the end of cozy evenings on the patio. By accurately assessing the fracture, selecting high-temperature refractory materials rated for at least 2,000°F, and committing to a slow, disciplined heat-tempering schedule, you can safely extend the lifespan of your outdoor clay fireplace for seasons to come.
Take your time with surface prep, make sure the unit stays dry throughout the curing process, and handle the clay with care. If you find that your outdoor heating needs have outgrown portable clay pots and you are ready for a permanent, custom-crafted brick or stone fireplace built to last a lifetime, visit PN Masonry to explore our comprehensive outdoor living and masonry solutions.