
Repair Chipped Stone Benchtops with Epoxy Resin
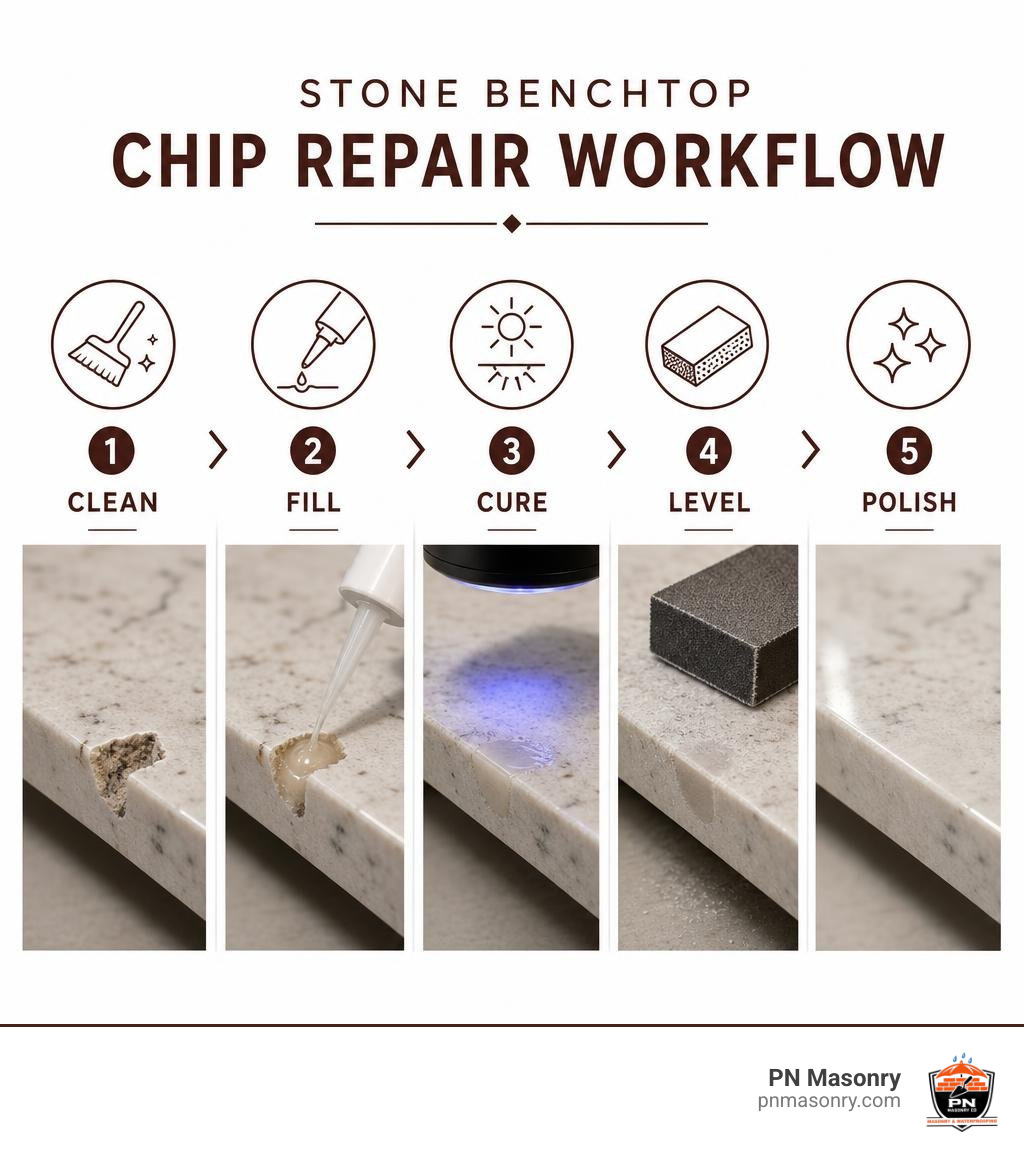
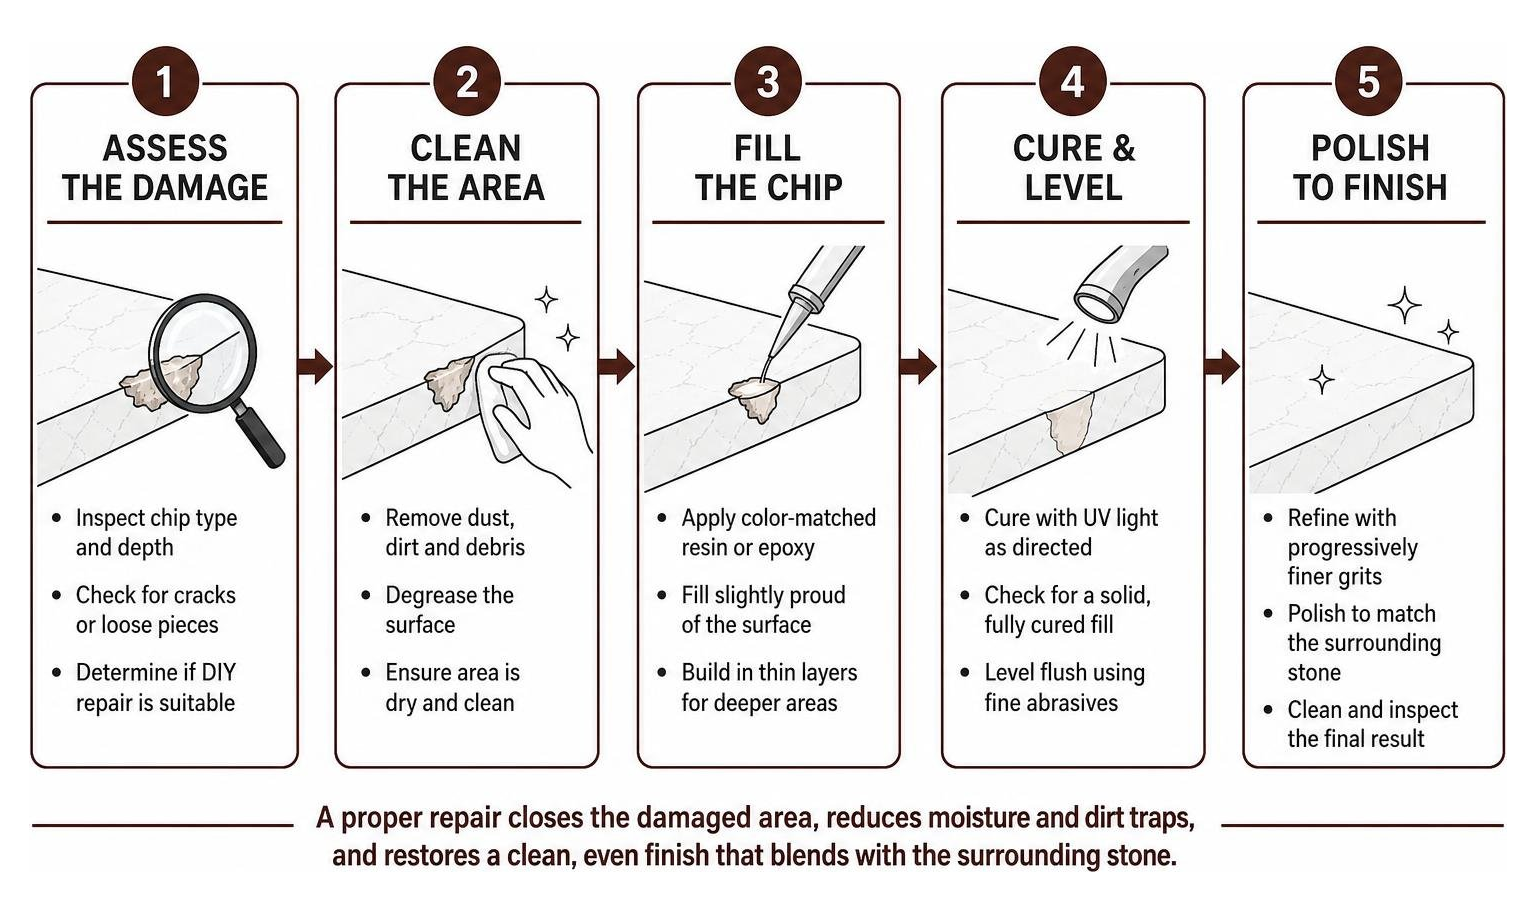
Most small chips, nicks, and shallow gouges in granite, marble, quartz, and quartzite benchtops can be repaired with a colour-matched epoxy or UV-curable resin. For a smooth result, clean and fully dry the damage, fill it in thin layers if it is deep, cure the resin as directed, then carefully level and polish the repair.
A good chip stone repair does more than hide an impact mark. It closes the damaged area so it is less likely to collect dirt or moisture, while restoring the clean, even look of the benchtop edge or surface.
DIY repair kits can work well for minor cosmetic damage. However, a crack that runs through the slab, a loose piece of stone, or a large missing section needs professional assessment before filling. The right material and careful colour matching make the biggest difference between a visible patch and a repair that blends into the surrounding stone.
Understanding Stone Benchtops and Damage Types
Whether you are prepping a meal in a residential kitchen or maintaining a commercial workspace, solid surfaces take a beating. Heavy cast-iron pans, dropped coffee mugs, and wayward wine bottles frequently strike the exposed edges of benchtops. Understanding what your surface is made of helps you determine the correct restoration approach.
Natural stones like granite, marble, and quartzite feature distinct mineral matrices. Granite is exceptionally hard, composed of quartz, feldspar, and mica, meaning impacts often result in sharp, clean edge chips. Marble, a softer metamorphic stone primarily made of calcite, is more prone to bruising, etching, and flaking along edges. Quartzite offers extreme durability, but its crystalline structure can cause small surface pits or spalling when struck sharply.
Engineered quartz surfaces combine roughly 90% crushed natural quartz aggregates with polymer resins and pigments. While engineered stone resists staining exceptionally well, sharp impacts can knock out small chunks, especially along flat-polished or beveled edge profiles.
| Stone Type | Composition | Common Chip Profiles | Repair Material Best Suited | Surface Sensitivity |
|---|---|---|---|---|
| Granite | Natural igneous rock (quartz, feldspar) | Sharp edge chips, surface divots | Clear or tinted UV resin, 2-part epoxy | Moderate; resists acids, porous if unsealed |
| Marble | Metamorphic calcite / dolomite | Bruised edges, flaking, fissures | Color-matched epoxy, low-viscosity acrylic | High; easily etched by acids and harsh cleaners |
| Quartz (Engineered) | Crushed quartz crystals & polymer resins | Clamshell edge fractures, voids | Color-pigmented UV-curable resin | Heat-sensitive; chemically resilient |
| Quartzite | Metamorphic quartz sandstone | Granular spalls, crystalline fractures | Water-clear UV resin, fluid epoxy | Low chemical sensitivity, dense crystalline matrix |
Surface Assessment and Chip Depth Evaluation
Before reaching for an adhesive, take a close look at the damage. A cosmetic nick is typically shallow—under 1/16 of an inch (1.5 mm)—and affects only the surface layer. These are the easiest repairs to tackle with a light-curing resin.
Deeper gouges measuring between 1/16 and 1/8 of an inch, or voids that wrap around a rounded bullnose profile, require incremental layering so the filler bonds fully without trapping air.
However, you must differentiate between surface chip damage and structural fissures. If an impact mark leads to a fracture line extending several inches across the slab, or if flexing occurs when you press down on either side, this indicates structural failure rather than a minor surface nick. If you notice structural issues extending to surrounding wall veneers or masonry features, you may need a broader stone veneer installation and replacement service to ensure the substrate remains sound and moisture-sealed.
Essential Tools and Materials for Chip Stone Repair
To execute a clean restoration, assemble your workspace with professional-grade supplies. Using household glues or general-purpose silicone leads to yellowing, gummy edges, and eventual failure.
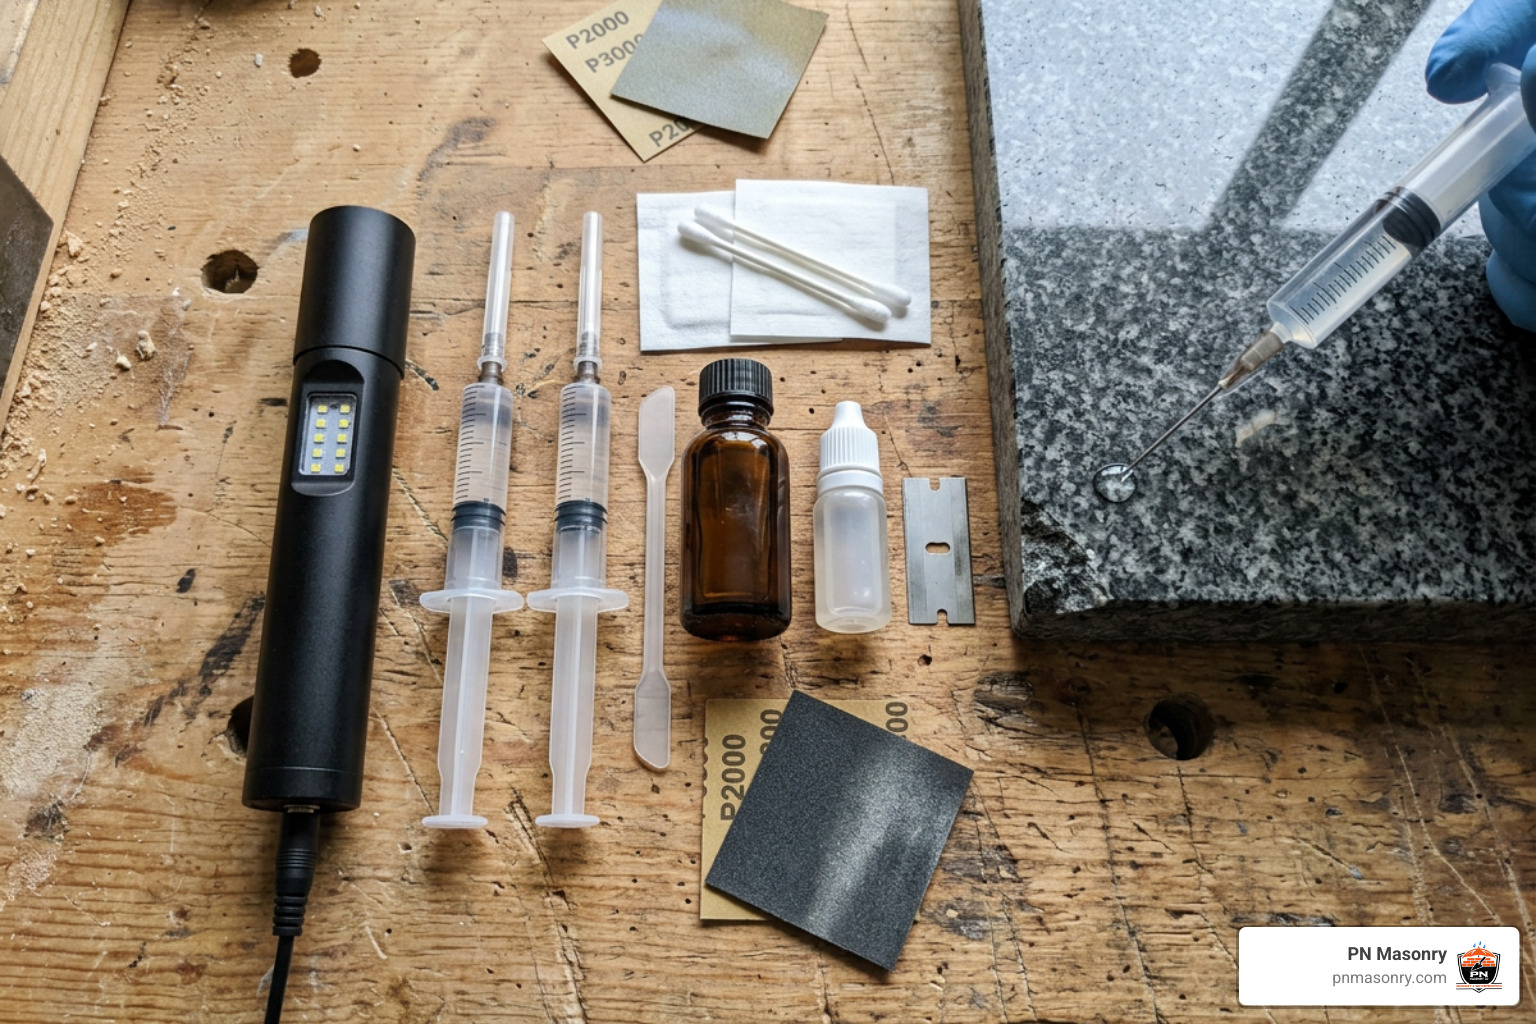
A dedicated Chip Repair Kit for Granite, Quartz, Marble & More provides the essential components tailored for masonry and stone restoration:
- UV-Curable Resin or Two-Part Epoxy: Light-curing flowing resins harden on demand, making them ideal for vertical edges and shallow divots. Two-part liquid epoxies work well for deeper structural fills.
- Precision Syringes and Needle Tips: Allow pinpoint application directly into small voids without messy overrun.
- Ultraviolet (UV) Curing Light: A 365–395 nm light cures specialized acrylic resins in as little as 60 seconds.
- Clear Plastic Release Sheets: Non-stick plastic tabs compress the uncured resin flat against the surface, block oxygen for a complete cure, and hold shapes along vertical corners.
- Single-Edge Razor Blades: Used at a 90-degree angle to plane the cured filler completely level with the surrounding slab.
- Polishing Pastes and Microfiber Cloths: Ultra-fine stone polishing compounds blend the filled resin’s sheen to match high-gloss or satin stone finishes.
- Isopropyl Alcohol (90%+) or pH-Neutral Stone Cleaner: Completely removes grease, cooking oils, and cutting board residues before bonding.
Selecting Resins and Matching Colors
Matching the optical properties of stone requires balancing transparency and pigment. Natural stones are rarely a single, uniform color—they feature depth, crystalline sparkle, and translucent layers.
For many granite and quartzite surfaces, a water-clear resin is the best choice. Clear resin functions like a liquid optic; it allows the natural mineral grains at the base and sides of the void to show through, creating an invisible repair.
When repairing opaque engineered quartz, solid marble, or deep black granite, you will achieve the best results by using dedicated kits like FillaChip – Chip Repair Kits & Colors – Apollo Stone Art, which supply individual color syringes. You can mix basic pigments (white, black, gray, brown, and ochre) on a clean plastic palette to match the background field stone. For speckled stones, apply a tiny dab of background base color, cure it, and cap it with a clear, translucent top layer to replicate the stone’s natural depth.
Step-by-Step Guide to Restoring Chipped Benchtops
A steady hand and proper technique make all the difference. Follow this proven step-by-step workflow to restore your benchtop.
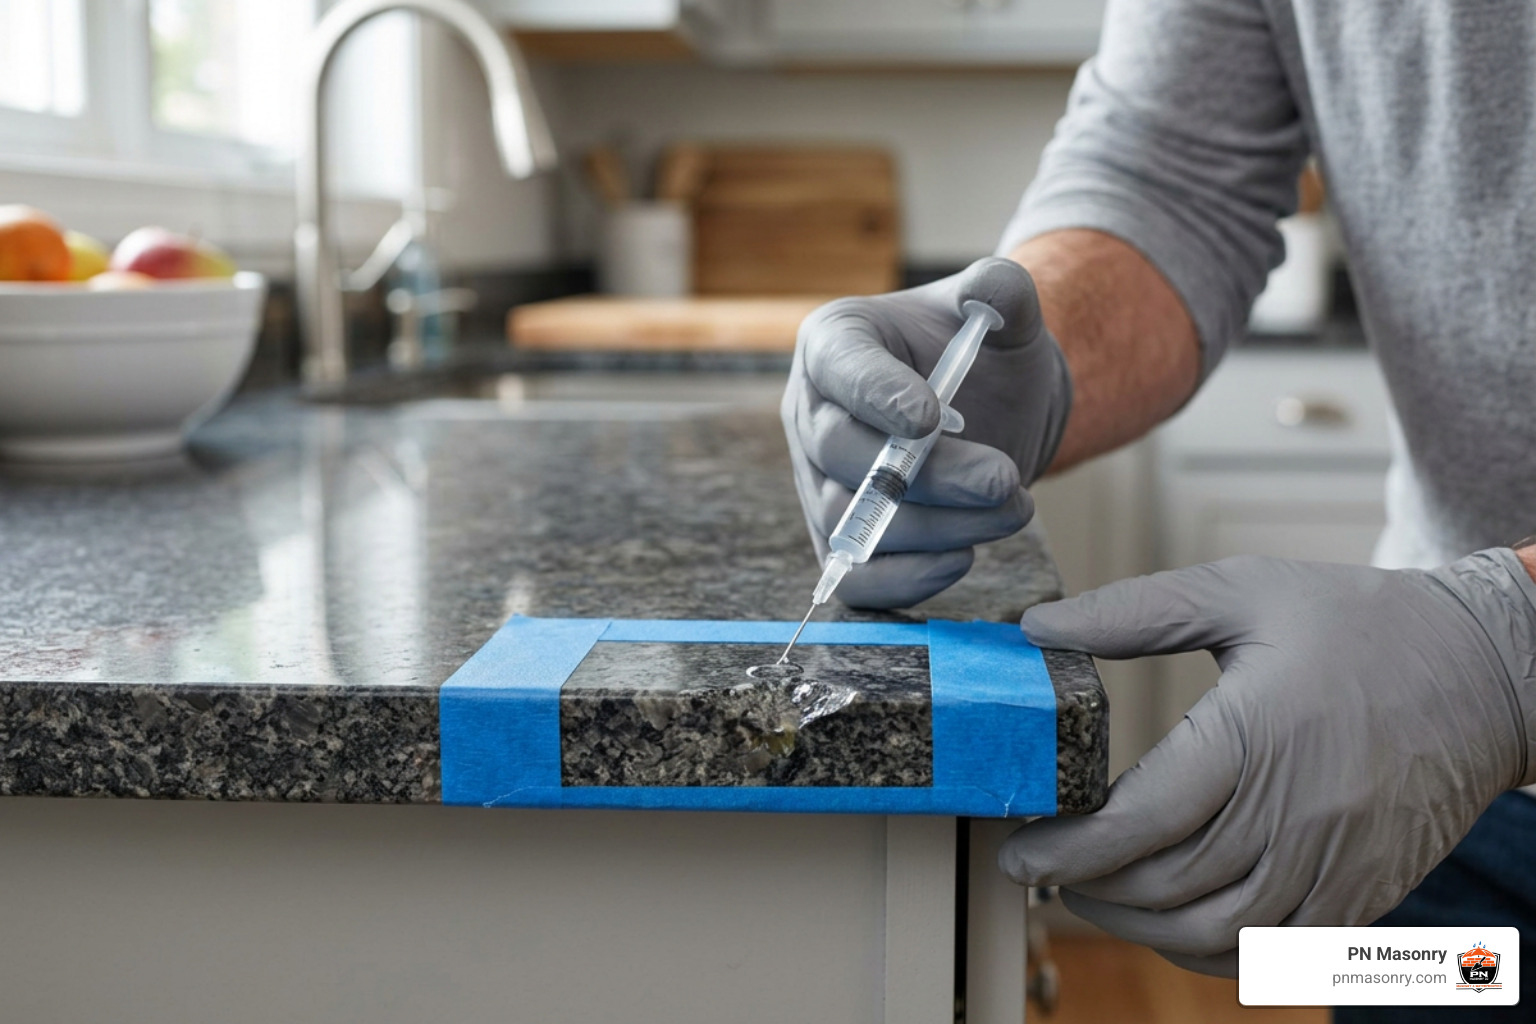
- Degrease and Clean the Void: Clean the chipped area thoroughly with high-purity isopropyl alcohol. Scrub gently with a clean brush or lint-free microfiber cloth to remove built-up oils, dish soap residues, and dust.
- Dry the Cavity Completely: Moisture trapped beneath the resin creates cloudy white patches and prevents proper adhesion. Allow the stone to air-dry for at least 30 minutes, or speed up the process with a hair dryer on a low, gentle heat setting.
- Mask the Perimeter: Place low-tack painter’s tape 1/16 of an inch away from the edges of the chip. This protects the surrounding polished stone from accidental scraping during later steps.
Applying and Curing Resin in Chip Stone Repair
Once prep is complete, fill the void carefully to avoid trapping air bubbles:
- Layering for Depth: If the chip is deeper than 1/8 of an inch, apply the resin in successive 1/16-inch layers. Cure each layer individually.
- Overfilling the Void: Apply a slight overfill—mounding the resin approximately 1 mm higher than the countertop plane. Resins shrink slightly as they polymerize; a slight dome prevents a concave hollow once cured.
- Placing the Release Sheet: Gently lay a clear plastic release sheet over the uncured mound. Lightly press with your finger to push out trapped micro-bubbles toward the edges. The plastic film blocks atmospheric oxygen, which otherwise leaves an uncured, tacky surface film on certain UV acrylics.
- UV Exposure: Position the UV light directly against the clear release sheet. Keep the light focused on the spot for a minimum of 60 seconds. If the chip is wide or pigmented, extend curing to 90–120 seconds to ensure the photochemical bonding reaction reaches the bottom of the void.
Leveling and Polishing for an Invisible Finish
After curing, remove the plastic sheet. The resin will now be hard as acrylic rock, standing slightly above the surface.
- Shave the Excess Flush: Hold a fresh, single-edge razor blade perpendicular (at a strict 90-degree angle) to the benchtop surface. Using short, gentle, back-and-forth scraping strokes, plane down the resin dome until it is flush with the stone. Never hold the blade at a low angle like a chisel, as this can catch the edge of the stone and create a new chip.
- Smooth the Transition: Run your dry fingertip across the patch. You should not feel any bump, ridge, or depression. If the patch feels low, clean with alcohol, add a tiny drop of clear resin, re-apply the film, and re-cure.
- Polish to Sheen: Apply a pea-sized drop of fine stone polishing compound to the patch. Buff the area in tight circular motions using a clean microfiber cloth or a low-speed rotary felt pad until the resin’s luster matches the surrounding polished slab.
Best Practices and Maintenance for Stone Surfaces
Repaired stone benchtops require sensible care to stay in top shape. While UV-cured polymers and epoxies provide exceptional tensile and shear strength, cured resins have different thermal expansion rates than natural rock. Always use trivets or hot pads under cookware straight from the stovetop or oven to prevent localized thermal shock.
Clean your benchtops using pH-neutral stone soaps and cleaners. Avoid bleach, ammonia, acidic citrus cleansers, and abrasive scouring powders, which etch natural marble and dull cured resin surfaces.
If your natural granite or marble has not been sealed recently, apply an impregnating sealer across the entire slab. Just as commercial masonry benefits from regular brick and block sealing and waterproofing to prevent moisture damage and salt spalling, residential benchtops rely on penetrating sealers to block oil and stain absorption.
Troubleshooting Pitfalls in Chip Stone Repair
- The Patch Remains Sticky or Tacky: This occurs if the resin was exposed to oxygen during curing or if the UV exposure was too brief. Always use a clear release sheet, check that your UV light has fresh batteries, and cure for at least 60 to 90 seconds.
- The Filler Looks Cloudy White: Trapped moisture or residual alcohol inside the chip before application causes cloudiness. Ensure the stone is bone-dry before dispensing the resin.
- A Visible Dark Halo Appears Around the Perimeter: If fine stone dust or grease was left inside the chip, the resin seals the dirt against the light-colored stone matrix. Clean thoroughly with alcohol before filling.
- Scratches Appear on the Adjacent Stone: Using a dull, nicked razor blade or tilting the blade at an angle will scratch surrounding polished surfaces. Always use a brand-new single-edge blade and keep it flat at 90 degrees.
Distinguishing Masonry Stone Repair from Glass and Automotive Fixes
It is tempting to think all chip repairs are the same, but the materials differ significantly across industries:
- Windshield Repair: Windshield repair kits utilize ultra-low-viscosity, water-thin resins designed to travel through narrow micro-fractures under mechanical pressure. They lack the body and structural fillers needed to reconstruct an exposed 3D corner on a kitchen island.
- Automotive Paint Fixes: Automotive touch-up systems rely on solvent-based acrylic enamels that require days to dry, shrink substantially, and offer no structural load resistance.
- Masonry and Benchtop Restorations: Solid stone demands thick, high-build resins with strong adhesive qualities capable of resisting cutlery impacts, moisture, and daily cleaning.
For exterior stone structures, historic facades, or load-bearing limestone sills experiencing deep spalling or environmental damage, simple countertop resins are insufficient. These architectural issues call for specialized lime mortars and comprehensive building restoration services in Franklin Park, IL to maintain structural integrity.
Frequently Asked Questions About Stone Benchtop Repair
How long does a typical stone chip repair take from start to finish?
Using a modern UV-curable resin kit, a standard cosmetic repair takes roughly 15 to 30 minutes from initial alcohol cleaning to final buffing. The photochemical curing step takes just 60 to 120 seconds under a UV light. If you use traditional two-part epoxies instead of UV resins, allow 24 hours of curing time before scraping and polishing.
Can clear epoxy resin work on multi-colored granite and quartz?
Yes. Clear resin is often the top choice for multi-colored granite and crystalline quartzite. Because it is optically transparent, light passes through the repair and reflects the underlying colors and mineral grains of the surrounding stone, effectively camouflaging the repair without complicated color mixing.
What is the difference between DIY chip kits and professional masonry restoration?
DIY chip kits are designed for small, localized surface chips and shallow nicks up to 1/8 inch deep. Professional restoration involves diamond honing, mechanical resin injection under pressure, color matching with industrial stone tints, and seamless repolishing across entire slab faces using variable-speed planetary wet polishers. You can see examples of extensive stone and brick restoration across residential and commercial properties in our gallery of past projects.
Conclusion
A chipped stone benchtop does not mean you need an expensive slab replacement. With a clear understanding of your stone’s composition, proper surface preparation, and the right UV-curable resin or epoxy system, you can eliminate unsightly chips and protect your investment in under an hour.
For large-scale stone damage, deep structural fractures, or comprehensive commercial masonry maintenance throughout Cook County, trust the experienced team at PN Masonry to restore your architectural brick, block, and stone surfaces to peak condition.