
How to Fix a Marble Chip Without Replacing the Surface
To fix a marble chip, clean and dry the damaged spot, mask the surrounding stone, fill the chip with a color-matched two-part epoxy or stone repair compound, and let it fully cure. Then carefully level the repair, wet-sand it smooth, and polish it to match the surrounding finish.
Small, shallow chips on a countertop, tile, vanity, or fireplace surround are often good DIY repairs. The best results come from using very little pigment, slightly overfilling the chip to allow for shrinkage, and waiting for the product’s full cure time before sanding.
Marble is softer and more porous than many other countertop stones, so edge impacts from dishes, pots, tools, and bathroom items can leave a noticeable divot. A proper repair can make the damage far less visible, stop it from catching dirt or moisture, and help protect the edge from further breakage.
For deep cracks, large missing sections, chips near sink cutouts, or damage that crosses prominent veining, professional stone restoration is usually the safer choice.
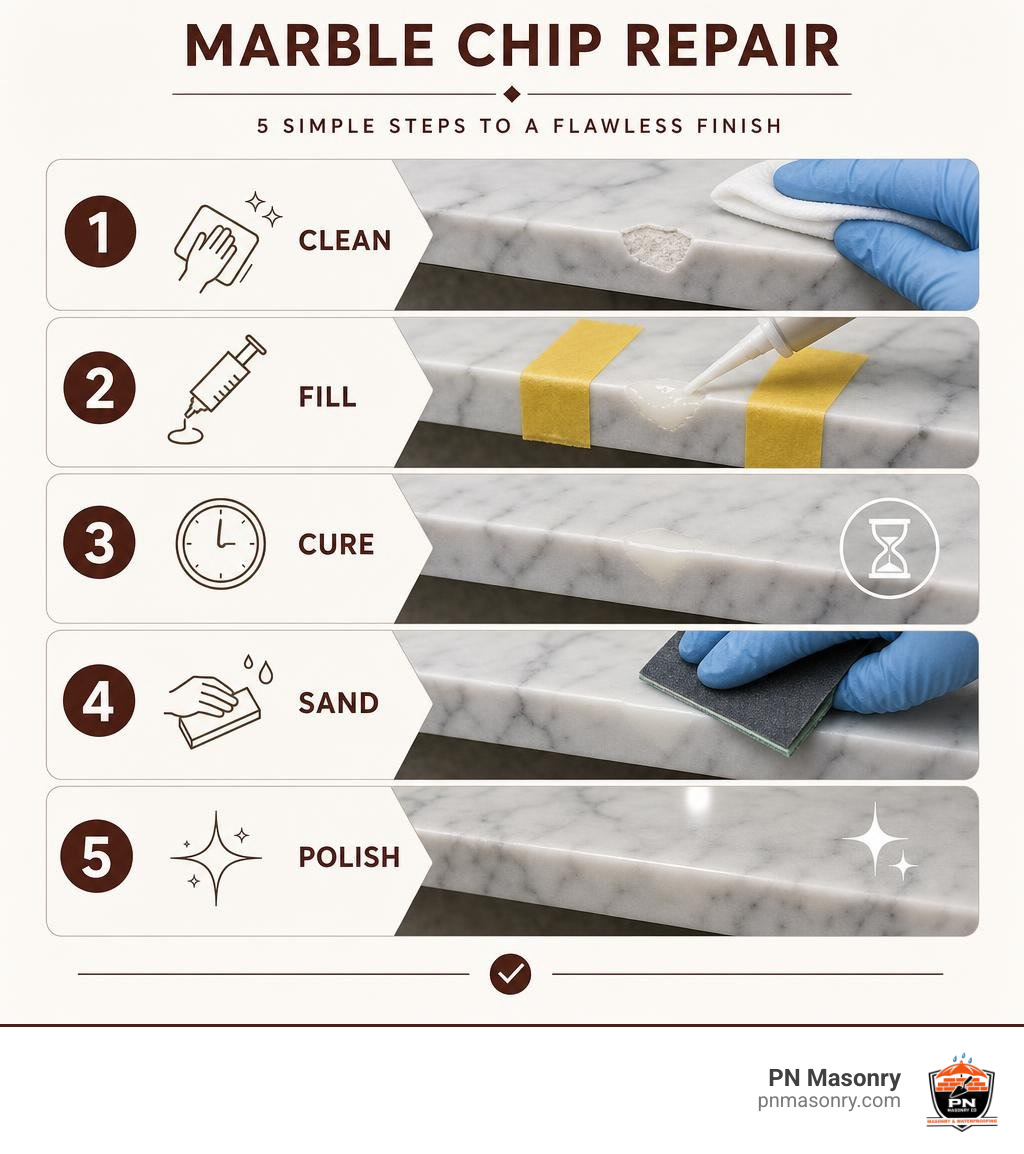
Assessing Marble Damage: Surface Scratches, Cracks, and Chips
Before grabbing a toolkit, you need to understand the exact nature of the damage. Marble is a metamorphic rock composed primarily of recrystallized calcite minerals, rating roughly a 3 to 4 on the Mohs hardness scale. Because it is softer and more brittle than granite, it responds differently to impact, tension, and chemical exposure.
A simple tactile evaluation helps determine what you are dealing with:
- The Fingernail Test: Run your fingernail gently across the damaged spot. If your nail glides smoothly over a dull white mark without catching, you are likely dealing with an acid etch mark or superficial scratch rather than a physical void. If your nail drops into a distinct pocket or catches on an edge, it is a chip or fracture.
- Etch Marks vs. True Chips: Acidic liquids like lemon juice, vinegar, or harsh cleaners react chemically with calcium carbonate, stripping the polished finish and leaving a chalky, dull spot. Etch marks require mechanical honing and polishing paste rather than resin fillers.
- Natural Fissures vs. Stress Cracks: Marble naturally contains geological fissures—subtle, stable lines that developed under subterranean heat and pressure millions of years ago. A structural crack, by contrast, creates an uneven separation across the slab, often radiating from high-stress areas like under-mount sink cutouts or cooktop corners.
When structural fractures compromise the substrate or when exterior architectural elements start failing, basic surface fillers are insufficient. In those situations, structural work like stone veneer installation and replacement or structural masonry stabilization is needed to preserve the integrity of the property.
| Damage Type | Visual & Tactile Characteristics | Root Cause | Best Repair Method |
|---|---|---|---|
| Micro-Pits & Flea Bites (<2 mm) | Tiny surface voids, shallow depth | Minor utensil impacts, crystalline pull-out | Cyanoacrylate (CA) gel or light-cure acrylic |
| Standard Edge Chips (2–15 mm) | Jagged divot, distinct depth, catches sponges | Heavy cookware or dropped bottle impact | Tinted two-part epoxy resin using mound technique |
| Acid Etch Marks | Dull, hazy white patch, surface remains level | Chemical reaction to acidic foods or cleaners | Tin oxide polishing powder or diamond honing |
| Structural Stress Fractures | Linear split passing through slab thickness | Cabinet settling, improper overhang support | Structural epoxy pressure injection |
Selecting the Right Repair Compound to Fix Marble Chip Divots
Selecting the proper chemical binder is the difference between an invisible mend and an obvious patch. In our masonry and stone experience, three main compounds dominate the DIY market:
- Two-Part Epoxy Resin (AB Paste): The gold standard for marble. Formulated with a resin base (Part A) and a hardener (Part B), epoxy cures through an exothermic chemical reaction rather than evaporation. This eliminates shrinkage, provides exceptional tensile bond strength, and dries with a water-clear transparency that mimics natural stone crystals. High-grade systems like liqua-glass epoxy kits maintain their structural hold without yellowing over time. For more complex edge profiles, consulting a pro guide to marble countertop repairs can help you dial in the right resin consistency.
- Light-Cure Acrylic (LCA): LCA compounds cure in seconds when exposed to a specific wavelength of LED or UV light. They work well for vertical edges or bathroom vanities where runny liquid resins might sag. However, LCA requires transparent curing strips to shape the material and exclude oxygen while hardening.
- Cyanoacrylate Gel (CA / Stone-Grade Super Glue): Suitable only for micro-pits smaller than 2 mm. While fast-setting, standard hardware-store cyanoacrylates lack long-term UV stability and can become brittle when exposed to moisture.
- Polyester Resins: Frequently found in generic department store kits, polyester resins shrink significantly as their styrene solvents evaporate. This leaves a visible depression the morning after application and is prone to yellowing on white marbles like Carrara or Calacatta.

Essential Tools and Materials to Fix Marble Chip Imperfections
Achieving professional-grade results requires having all materials staged before mixing your resins:
- 100% Pure Technical Acetone or Denatured Alcohol: Essential for stripping oils, waxes, and cooking grease from the stone pores.
- Single-Edge Razor Blades: Brand-new, unmarred steel blades for mechanical leveling.
- Wooden Mixing Sticks and Non-Waxed Mixing Cups: Waxed paper cups will contaminate your epoxy, clouding the final finish.
- Low-Tack Blue Painter’s Tape: Used to isolate the repair zone and protect adjacent factory finishes.
- Progressive Wet/Dry Silicon Carbide Sandpaper: 400, 800, 1500, and 2000-grit sheets.
- Polishing Compounds: High-grade tin oxide or aluminum oxide stone polishing paste.
- Nitrile Safety Gloves and Eye Protection: To prevent chemical contact and protect against dust.
Step-by-Step Process to Fix Marble Chip Damage at Home
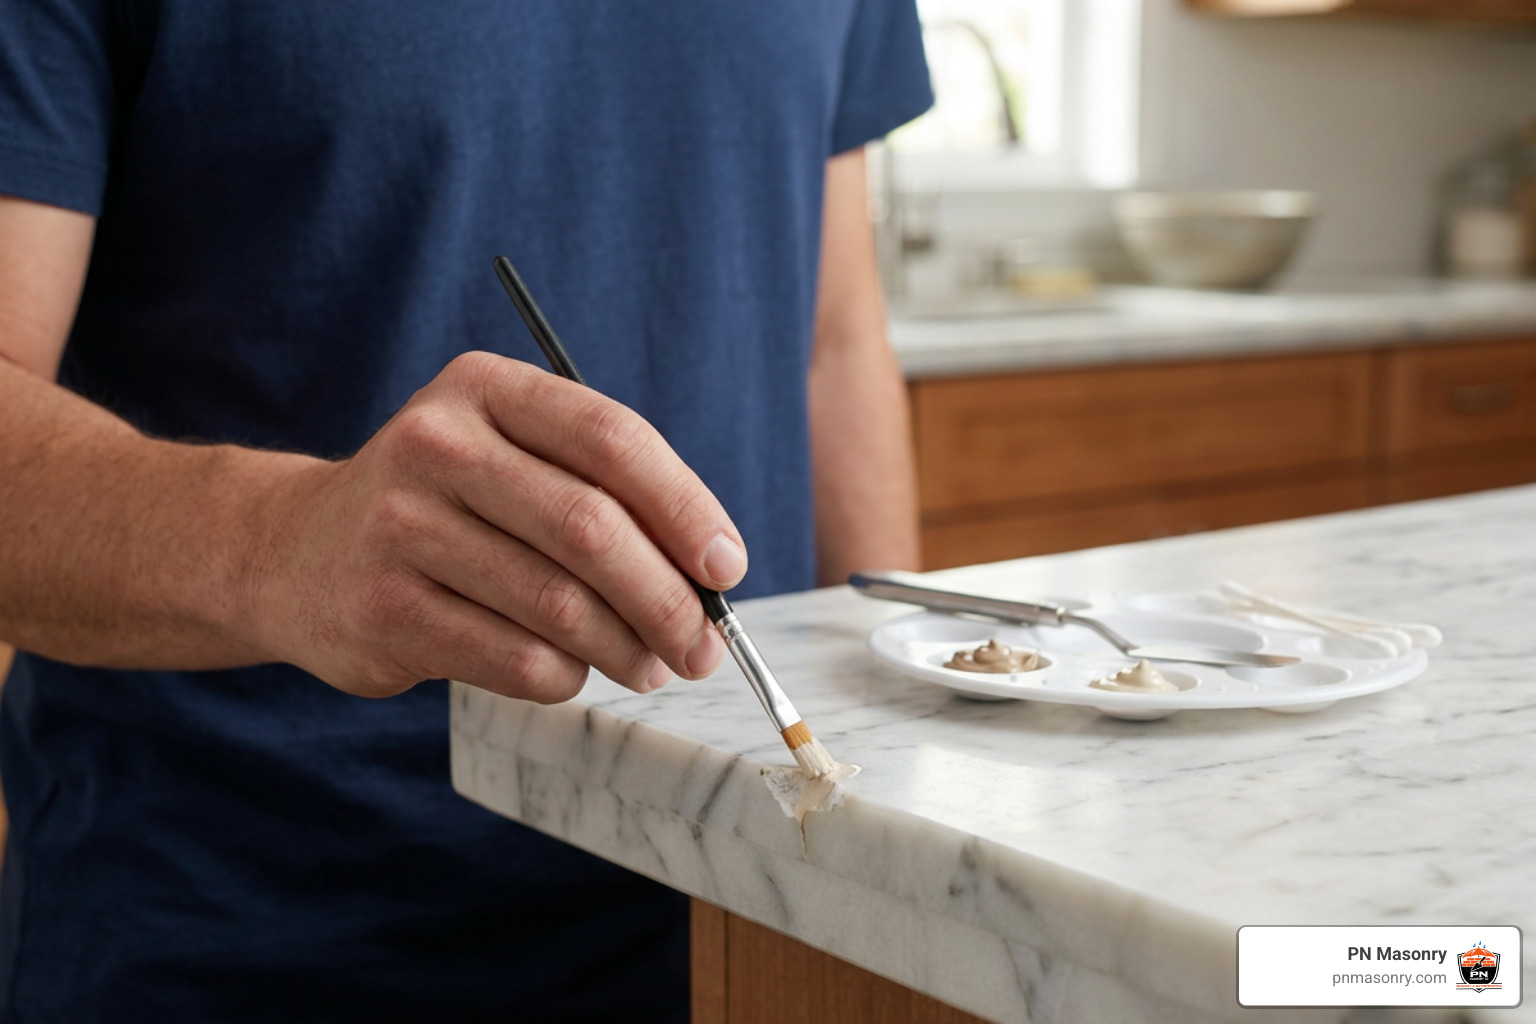
Tackling a chip on a kitchen island, bathroom vanity, or tiled floor follows a structured chemical and mechanical process. If you are dealing with flooring surfaces, mastering DIY marble tile repair techniques ensures the repair can handle regular foot traffic without popping loose.
Step 1: Deep Cleaning and Surface Preparation
Adhesion fails when microscopic dust, grease, or moisture sits between the epoxy and the stone’s crystalline structure.
- Decontaminate: Saturate a lint-free microfiber cloth with 100% pure acetone and thoroughly scrub the void. For deep chips, use a clean toothbrush to scrub out embedded dirt.
- Extract Loose Stone: Gently pick out loose calcite crystals using the point of a craft knife or dental pick. If a fragment is loose, remove it; bonding epoxy to an unstable stone shard will cause premature failure.
- Dry Thoroughly: Allow the acetone to flash off completely for 15 minutes. The stone must be bone-dry before adhesive application.
- Mask the Perimeter: Apply low-tack painter’s tape around the perimeter of the chip, leaving a 1 mm gap around the damaged edge. This prevents excess resin from spreading across undamaged stone.
Step 2: Tinting, Pigment Loading, and Color Matching
The most common DIY mistake is using too much color pigment. Marble is naturally translucent—light penetrates the surface and bounces off internal crystal planes. Adding too much solid pigment turns the repair into a flat, plastic-looking patch.
- The Translucency Rule: Start with a water-clear two-part epoxy. If your marble is classic white Carrara, you often need no base color at all—clear resin naturally adopts the surrounding stone’s refraction.
- Minimal Pigment Loading: If tinting is required, add pigment in micro-amounts using the tip of a toothpick. Keep pigment loading under 2% to 3% of total resin volume.
- Replicating Veining: For chips crossing a distinct grey or gold vein, mix two separate small batches: one translucent base and one tinted vein tone. Deposit the base filler first, then use a fine needle or toothpick to feather the darker vein color through the wet resin.
- Test on Scrap Material: Always smear a tiny droplet of mixed resin onto a piece of clear plastic packaging and hold it against the marble to evaluate the color match under natural lighting before applying it to the stone.
Step 3: Application and the Mound Overfill Technique
Epoxy and acrylic compounds undergo polymer contraction as cross-linking occurs during cure. If you trowel the patch perfectly flush while wet, it will cure into a shallow concave depression.
- Dispense and Mix: Dispense equal parts of Part A resin and Part B hardener onto a non-porous mixing pad. Blend thoroughly for 60 seconds with a wooden craft stick, avoiding rapid whipping that introduces air bubbles.
- Apply the Mound: Using a spatula or craft stick, transfer the mixed epoxy into the center of the void. Press firmly to ensure the resin penetrates all micro-crevices.
- Overfill by 1 mm: Build the resin upward so it forms a slight convex mound standing roughly 1 millimeter above the surrounding surface plane.
- Extract Air Micro-Bubbles: Pass a heat gun on low heat 6 inches above the wet resin for 2 seconds, or prick any rising bubbles with a clean sewing needle.
- Allow Full Cure: Let the epoxy rest undisturbed. Maintain room temperatures between 70°F and 75°F. While initial set occurs within 15 to 30 minutes, allow a full 24 hours for complete chemical polymerization before leveling.
Step 4: Mechanical Scraping, Wet Sanding, and Buffing
Once the resin has cured to glass-like hardness, level the mound flush with the surrounding marble surface.
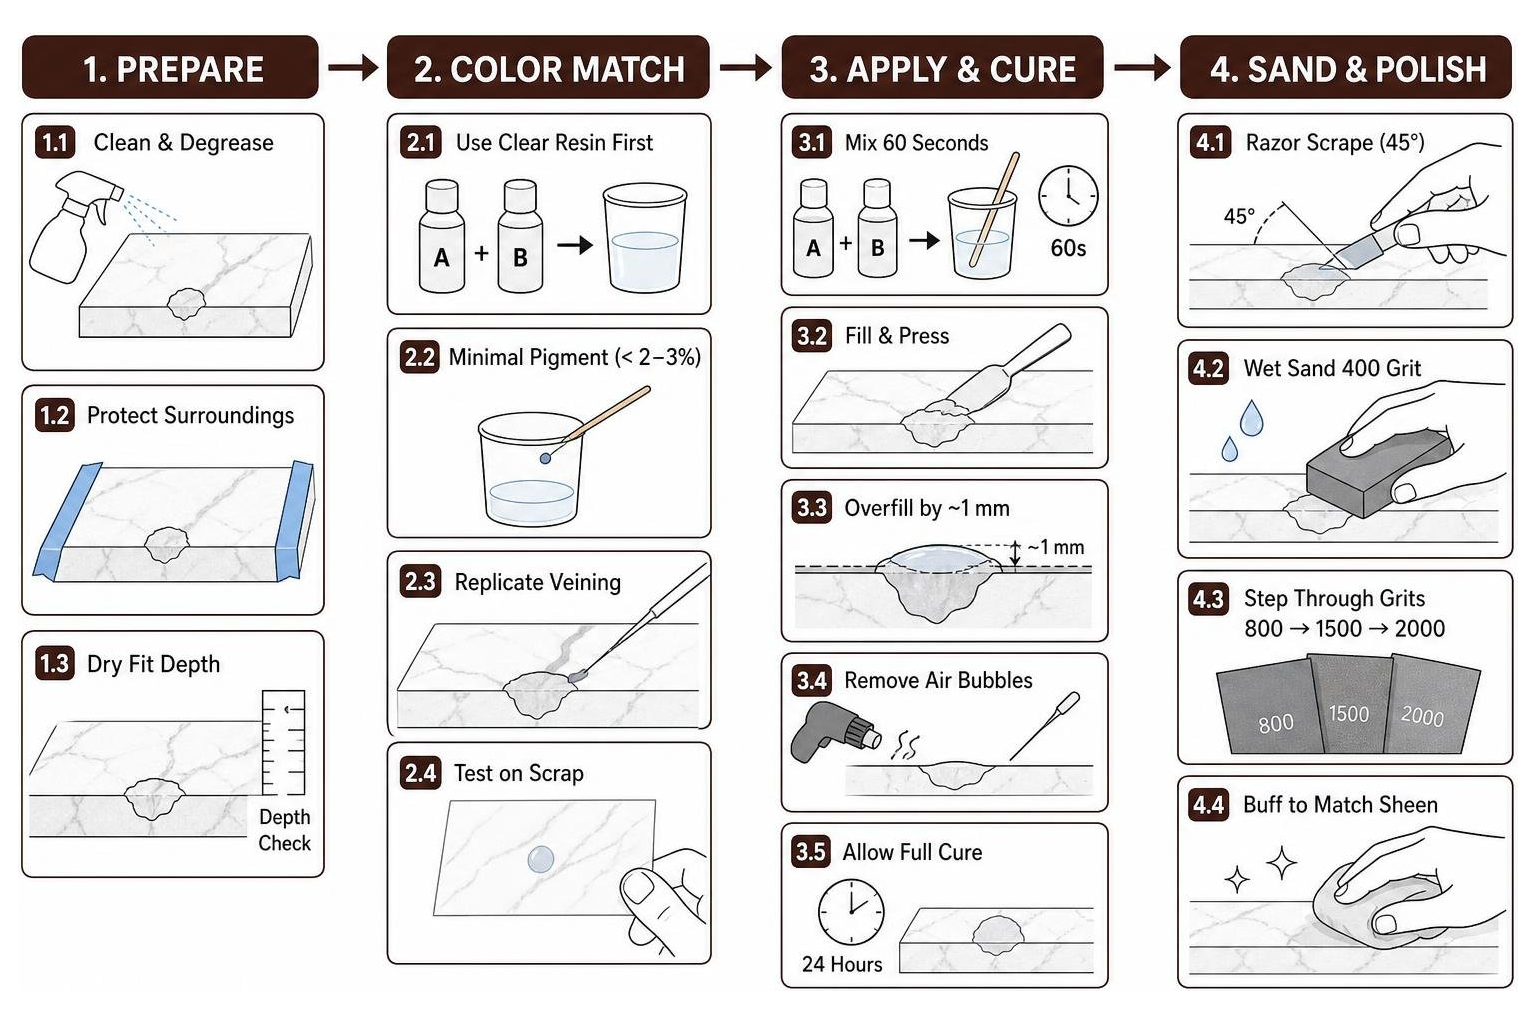
- Mechanical Razor Scraping: Hold a brand-new single-edge razor blade at a 45-degree angle to the surface. Using light, controlled strokes, draw the blade across the epoxy mound to shave it down layer by layer until it is nearly flush with the stone. Keep the blade flat to avoid scratching adjacent marble.
- Progressive Wet Sanding: Wrap a piece of 400-grit wet/dry sandpaper around a small, rigid rubber sanding block. Lubricate the area with water misted from a spray bottle. Sand with light, circular motions directly over the repair.
- Step Through the Grits: Progress through 800-grit, then 1500-grit, and finish with 2000-grit wet sandpaper. Wipe the slurry away between each grit transition. Feather your sanding slightly (no more than 1/4 inch) into the surrounding stone to blend the repair edges seamlessly.
- Mechanical Buffing: Apply a dime-sized amount of aluminum oxide or tin oxide marble polishing paste to the area. Buff briskly using a clean microfiber cloth or a variable-speed polisher fitted with a felt pad on low RPM until the restored area matches the original factory sheen.
Surface Care and Post-Repair Stone Maintenance

Once your repair is smooth and polished, protecting the surrounding calcium matrix ensures the stone retains its renewed finish. Routine maintenance is the best defense against future damage:
- Adopt pH-Neutral Cleaning Agents: Never use acidic sprays, bleach, ammonia, or vinegar on marble. Clean daily surfaces using warm water and a dedicated pH-neutral stone cleaner.
- Manage Thermal and Physical Shocks: Avoid dropping heavy items onto thin edges. Place silicone bumpers inside cabinet doors above stone counters to prevent accidental impacts from falling bottles or mugs.
- Apply Penetrating Impregnating Sealers: Natural stone is porous and absorbs moisture readily. Applying a breathable, penetrating sealer every 6 to 12 months creates a hydrophobic barrier in the pores, repelling liquid spills before they cause internal staining.
For broader masonry features like exterior stone steps, fireplace facades, or exterior walls, professional brick and block sealing and waterproofing is essential to prevent moisture infiltration and freeze-thaw spalling.
DIY Marble Repair vs. Professional Stone Restoration
While small surface divots are well suited for DIY kits, certain types of stone damage require specialized equipment and structural expertise.
DIY kits work best on small, shallow divots located on flat horizontal planes. However, larger repairs present significant technical challenges:
- Rebuilding Complex Edge Profiles: Reconstructing intricate edge details like ogee, bullnose, or beveled profiles on corners requires specialized stone-shaping jigs and progressive diamond resin pads.
- Structural Substrate Injections: When a crack runs all the way through a slab or results from a rusted steel rodding bar expanding inside the stone beneath a sink, topical epoxy will fail. These situations require structural stabilization.
- Silica Dust and Grinding Safety: Dry-grinding natural stone releases airborne respirable crystalline silica dust, which presents serious health risks including silicosis. Professional stone restoration contractors utilize wet-grinding diamond machinery integrated with industrial HEPA vacuum extraction to capture dust at the source.
If your home features architectural stone work, deteriorating masonry joints, or structural brickwork that requires care beyond a countertop patch, specialized tuckpointing and concrete block repair services will restore the safety and structural stability of your property.
Frequently Asked Questions About Marble Chip Repair
Can I use super glue as a permanent fix for a marble chip?
Standard cyanoacrylate (super glue) is not recommended as a permanent repair for natural marble. While it works for temporary fixes on dark stone micro-pits, standard super glues lack long-term UV stability. Over time, sunlight and ambient moisture cause cyanoacrylate polymers to degrade, turn yellow, and become brittle. A two-part water-clear epoxy resin or light-cure acrylic provides far better chemical stability and tensile strength.
How long does marble chip repair epoxy take to cure completely?
While many two-part stone epoxies achieve an initial set within 15 to 20 minutes, a full chemical cure requires 24 hours at standard room temperature (70°F to 75°F). Sanding, scraping, or polishing the patch before the 24-hour window has passed can tear the gummy resin out of the stone matrix and ruin your finish.
Will a DIY repaired marble chip be completely invisible?
A properly executed DIY repair will be virtually undetectable under casual observation from a standing distance. However, because natural marble possesses natural optical translucency, mineral chatoyancy, and unique crystalline veining, an exact microscopic match is challenging with a single resin layer. Keeping pigment additions minimal and matching the stone’s natural sheen through progressive wet sanding will give you the most seamless result.
Restoring Natural Stone Beauty
A chipped marble surface can be frustrating, but it does not mean your countertop, vanity, or hearth is ruined. By properly decontaminating the stone, using a non-shrinking two-part epoxy, applying the overfill mound technique, and wet-sanding through progressive grits, you can restore your marble’s smooth finish right at home.
When damage extends beyond surface chips to include structural cracks, loose architectural masonry, or widespread exterior stone deterioration, professional care is the best way to safeguard your investment. At PN Masonry, we provide comprehensive residential and commercial masonry restoration, stone veneer repair, tuckpointing, and weatherproofing services across Cook County, Illinois. Explore our expert residential and commercial stone services to see how our team keeps your natural stone and masonry structures strong, sound, and looking their best.